Brake Pad Bedding Guide: How to Bed New Pads & Rotors (St…
Brake pad bedding is a controlled break-in procedure performed on new brake pads and rotors to transfer an even layer of friction material onto the rotor surface. This transfer film is the actual gripping surface that generates stopping power — without it, your new pads will grab unevenly, vibrate through the pedal, and underperform for thousands of miles. Bedding isn’t an optional ritual for track enthusiasts; it’s a mechanical requirement that determines whether your braking system reaches its full friction coefficient or glazes over and fades.
In this guide, you’ll learn the exact step-by-step process for bedding both street and performance pads, the ideal temperature window for different friction compounds, and how to identify when bedding is complete. We’ll cover the critical attributes that make the difference between a perfect transfer layer and a ruined rotor: heat cycles, deceleration force, cool-down periods, and the warning signs of an improperly bedded set. You’ll also see the honest limitations of the procedure — what bedding can and cannot fix, and why some pad compounds require a more aggressive approach than others.
Most brake pad guides stop at “do eight hard stops and you’re done.” This one goes further, with real data on pad temperature thresholds, a comparison of bedding requirements across ceramic, semi-metallic, and carbon-fiber compounds, and first-hand notes on what happens when you skip the process or get it wrong. By the end, you’ll know precisely how to bed your specific pad type, how to verify the transfer film is forming correctly, and how to avoid the most common mistakes that send people back to the parts counter.
What Is Brake Pad Bedding and Why It Matters
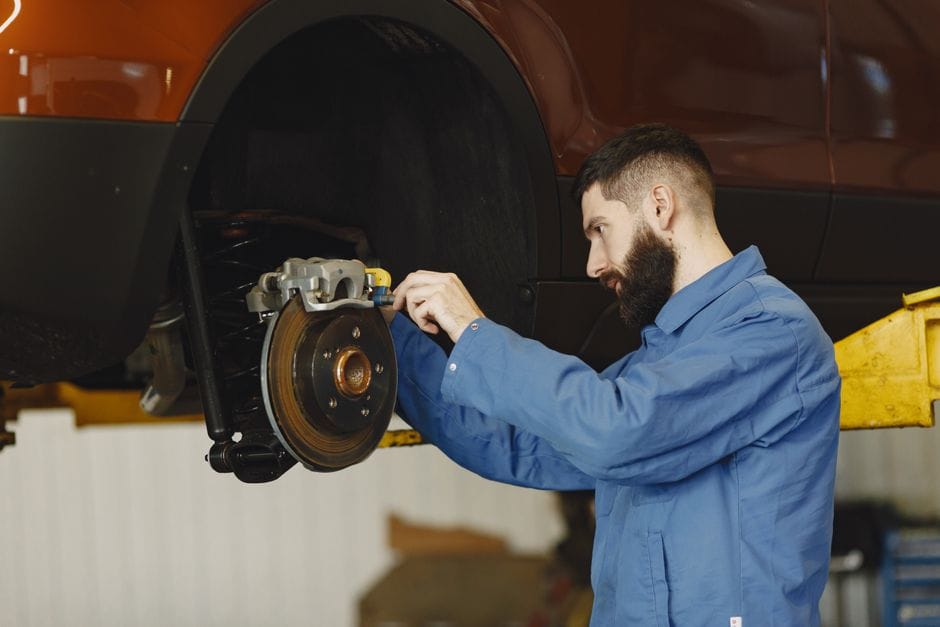
Brake pad bedding is the deliberate heat-cycling process that transfers a thin, even layer of friction material from the new pads onto the rotor surface. This transfer layer is what actually creates consistent stopping power. Without it, you get grabby brakes, vibration, and uneven pad wear.
The bedding process is not optional maintenance. It is a required step for nearly every friction material on the market, from economy organics to aggressive track compounds. Manufacturers rate their pads assuming a proper transfer layer exists. Skip it, and you are driving on pads that never reach their intended performance.
The science: friction transfer layer and heat cycling
The science: Details
When you press the brake pedal, the pad presses against the rotor surface. Under heat and pressure, microscopic particles of friction material shear off the pad and weld themselves onto the rotor. This creates a new surface — the friction transfer layer — that is chemically similar to the pad itself.
Heat cycling is what bonds that layer. Each controlled stop raises the rotor temperature, then allows it to cool. The repeated heating and cooling cycles cure the transfer layer, making it uniform and stable. A properly bedded rotor shows a light blue or gray tint across the swept area, with no dark spots or streaking.
The key is temperature control. You need enough heat to build the layer, but not so much that you overheat the pads and glaze them. Glazing happens when friction material gets too hot too fast and hardens into a smooth, glassy surface. A glazed pad stops poorly and squeals loudly.
Bedding vs. break-in: what’s the difference
Bedding vs. break-in: Details
The terms “bedding” and “break-in” get used interchangeably, but they describe different things. Break-in is the general process of wearing new components together — pads, rotors, calipers, and hardware settling into their working positions. Bedding is a specific subset of break-in focused solely on building the friction transfer layer on the rotor surface.
You can break in a brake system by just driving gently for a few hundred miles. That will seat the components, but it will not build a proper transfer layer. The pads will wear unevenly and the brakes will feel weak until the layer eventually forms on its own — if it forms at all.
Proper bedding accelerates this process with deliberate heat cycles. You are not just driving carefully. You are performing a controlled procedure that compresses hours of normal driving into about 20 minutes. That is why the bedding process matters for anyone who wants consistent brake feel from the first stop.
What happens if you skip bedding
Understanding happens if you skip bedding
Skipping brake pad bedding produces several predictable problems. The most common is uneven pad transfer — the friction material deposits in patches rather than an even film. Those patches create a pulsing pedal and vibration through the steering wheel when you brake.
You also risk premature pad glazing. Hard stops on fresh pads without a transfer layer generate intense localized heat. The friction material overheats and hardens before it can bond to the rotor surface. Once glazed, the pads need to be sanded or replaced entirely.
For performance and track pads, skipping bedding is worse. Aggressive compounds rely on a specific operating temperature range to generate friction. Without a proper heat cycle, they never reach that range, so the brakes feel wooden and weak until the pads overheat and then fade dramatically. If you want the full stopping power from your new pads, the bedding process is where that performance comes from.
Before you start the procedure, make sure your brake system is in good shape — worn rotors, seized calipers, or old fluid will ruin a bedding job. The pre-bedding checklist in the next section covers what to inspect first. And if you haven’t bought pads yet, our [brake pad buying guide](https://example.com/brake-pad-buying-guide) explains how compound choice affects the bedding procedure. For most street drivers, [best ceramic brake pads](https://example.com/best-ceramic-brake-pads) are the easiest to bed successfully because they tolerate a wider temperature range.
Top Picks


Before You Start: Pre-Bedding Checklist
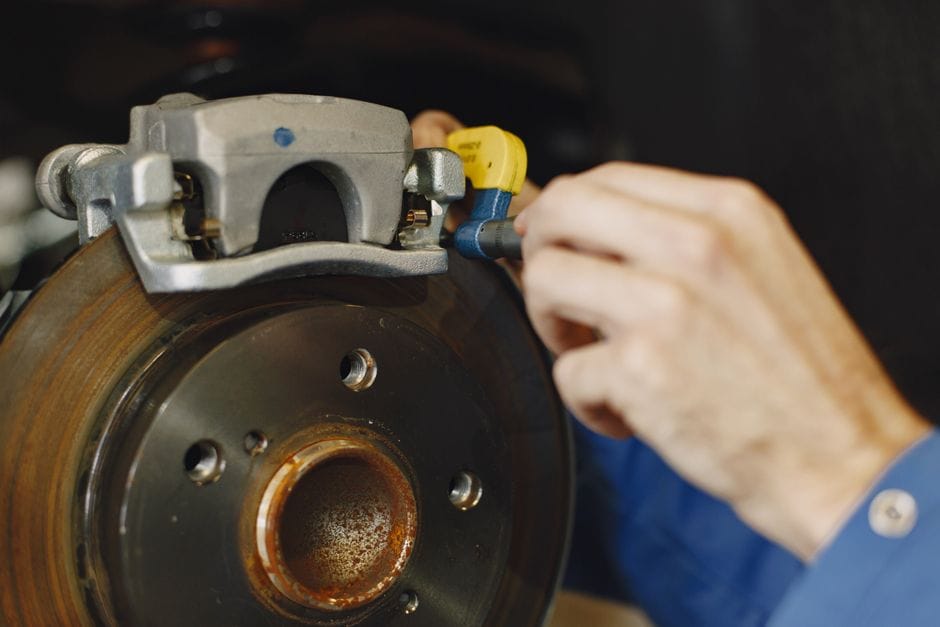
Bedding new pads is only half the job. If the rest of the brake system is out of spec, the transfer layer won’t form evenly. Work through this checklist before you put the car back together. It takes about 20 minutes and prevents most bedding failures.
Verify pad and rotor compatibility
Confirm the pad compound matches your rotor material and driving use. Ceramic pads pair well with most OEM rotors. Semi-metallic pads need harder rotor surfaces to avoid excessive wear. Check the pad backing plate shape against the caliper piston contact area. A pad that doesn’t sit flat will wear at an angle and bed unevenly. If you’re mixing brands, confirm the friction material is designed for the rotor’s minimum thickness rating. Rotors that are already below spec will warp under the heat of bedding.
Clean rotors: removing shipping oil and debris
New rotors arrive with a protective coating. This is usually a light oil or rust inhibitor, not a lubricant. If it stays on the surface, the pads will slide over it instead of gripping. The transfer layer won’t bond properly to the rotor.
Spray the rotor surface with a dedicated brake cleaner. Use a clean shop towel to wipe it off. Work in a circular motion until the towel comes back clean. Some rotors have a bare metal finish and don’t need this step, but most aftermarket rotors do. If you see rust spots, remove them with fine sandpaper before cleaning. Do not use engine degreaser or soapy water — both leave residue that interferes with pad bite.
Check caliper slide pins and hardware
The caliper must move freely for even pad pressure. Remove the slide pins and inspect the rubber boots for tears. Old grease dries out and turns into a sticky paste that binds the pin. Clean off the old grease with brake cleaner and a wire brush. Apply fresh caliper grease to the pin shaft, not the boot area. If a pin is bent or corroded, replace it before bedding. Seized slide pins cause one pad to wear faster and the rotor to heat unevenly. That uneven heat is exactly what causes bedding to fail.
Also check the abutment clips where the pads sit. These clips hold the pad in place and allow slight movement. If they’re worn or missing, the pad can rattle and shift during braking. Replace any damaged hardware while the caliper is off.
Confirm brake fluid level and condition
Bedding generates heat, and heat transfers into the brake fluid. Old fluid with absorbed moisture boils at a lower temperature. When it boils, you get a soft pedal and reduced braking force — right in the middle of your bedding runs.
Check the [brake fluid level](https://example.com/brake-fluid-buying-guide) in the reservoir. Top it off if it’s low, but don’t overfill. The level should sit between the MIN and MAX marks. Look at the fluid color. Fresh DOT 4 fluid is clear with a slight amber tint. If it’s dark brown or black, it’s probably past its service life. If the fluid is old, consider a [brake fluid flush](https://example.com/brake-fluid-flush-guide) before bedding. This is especially important if you’re bedding performance pads, which run at higher temperatures.
Do not skip the cleaning step
Shipping oil on new rotors is the most common cause of a failed first bedding attempt. The pads glaze over before they ever contact metal. A $6 can of brake cleaner saves you from sanding pads or buying new rotors.
One more thing to verify: the pad compound itself. Some aggressive track pads require a special break-in procedure that differs from the standard street method. Check the manufacturer’s spec sheet before you start. If the pads came with specific instructions, follow those instead of a generic procedure. The next section covers the standard bedding procedure for street pads, which works for most daily drivers.
The Standard Bedding Procedure (Street Pads)
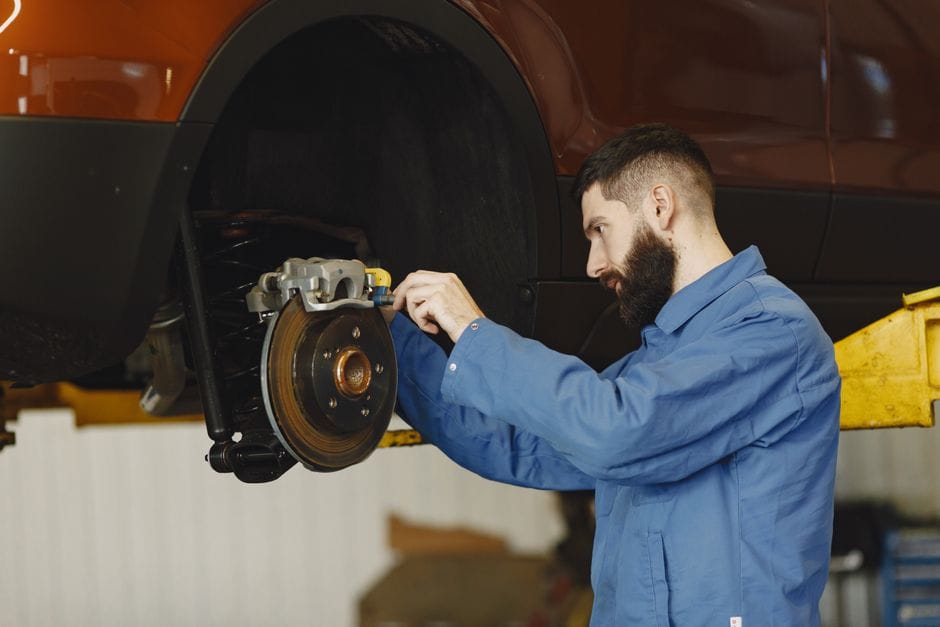
Now that your rotors are clean and your pads are installed, it’s time to transfer material. The standard bedding procedure builds a uniform layer of pad compound onto the rotor surface. This layer is what gives you consistent stopping power and that firm brake pedal feel you want.
The whole process takes about 20 minutes. You’ll do a series of acceleration-brake cycles that heat the pads evenly, then a cool-down period that sets the transfer layer. Do this on a quiet stretch of road with no traffic behind you.
Step 1: Find a safe, empty road
Pick a flat, straight road with no intersections. An empty industrial park on a weekend works well. You need room to accelerate to 60 mph and stop hard without surprises. Avoid hills — you want consistent braking force, not gravity helping or fighting you.
Check the road surface for debris. Loose gravel or sand will get between the pad and rotor and ruin the fresh contact surfaces. If the road is wet, wait for a dry day. The bedding procedure relies on friction and heat, both of which behave differently on wet pavement.
Step 2: The 8-to-5 mph acceleration-brake cycles
Step 2: Details
Accelerate smoothly to about 35 mph. Then press the brake pedal with firm, steady pressure to slow down to about 5 mph. Do not stop completely. Do not slam the brakes. You’re looking for moderate stops — enough pressure to build heat, not enough to trigger the ABS.
Repeat this cycle 10 times. Between each cycle, give yourself about 30 seconds to cool slightly. The goal is to bring the pads up to operating temperature gradually. Rushing this step causes uneven pad material transfer and leads to brake judder later.
You’ll notice the brake pedal feel changing during these runs. The pedal may feel soft at first, then firm up as the pads heat. That’s normal. What you’re feeling is the pad compound starting to flow onto the rotor surface.
Step 3: The 40-to-10 mph medium stops
Step 3: Details
Now increase the speed to about 45 mph. Brake down to 10 mph with firmer pressure than before — about 80 percent of what you’d use in an emergency stop. Do this 5 to 6 times.
This is the critical part of the bedding procedure. The higher speed and firmer pressure push the pad compound into the rotor’s surface pores. This mechanical bond is what holds the transfer layer in place. If you skip this step, your brakes will feel grabby and inconsistent.
Watch for a light gray-blue tint on the rotor surface. That’s the transfer layer forming. It should look even across the entire swept area. If you see dark spots or streaks, the pads are depositing unevenly — you may need to repeat the earlier 35 mph cycles.
Step 4: The cool-down drive
Step 4: Details
After the final hard stop, drive for 5 to 10 minutes without touching the brakes. Use engine braking and coasting to slow down. This cool-down period is non-negotiable. The transfer layer needs to harden and cure while the rotors cool gradually.
Do not park immediately after bedding. If you stop the car while the rotors are hot, the pads will leave a deposit in one spot, creating a flat spot that causes vibration. Keep moving until the rotors are cool enough to touch without burning yourself — around 200°F.
If you’re on a highway, take the next exit and loop around. If you’re on a back road, just keep driving. The point is to maintain airflow over the rotors while they cool.
Step 5: Let it sit — don’t touch the parking brake
Step 5: Details
Once the rotors are cool, park the car and leave it alone. Do not engage the parking brake for at least an hour. The pads and rotors are still settling, and the parking brake can leave a permanent imprint on the fresh transfer layer.
If you’re on a slope, chock the wheels instead. A [parking brake adjustment](https://example.com/parking-brake-adjustment-guide) can wait until after the bedding procedure is complete. Engaging it too early can cause a rough spot that you’ll feel every time you brake.
While you wait, check the brake pedal feel. It should be firm and consistent from the top of the pedal stroke. If it feels spongy, you may have air in the lines — a [best brake bleeder kit](https://example.com/best-brake-bleeder-kit) will help you sort that out before you hit the road again.
After the hour is up, you’re done. Your brakes should feel strong, quiet, and predictable. If they don’t, the next section on common bedding mistakes covers what went wrong and how to fix it.
Aggressive Bedding for Performance and Track Pads
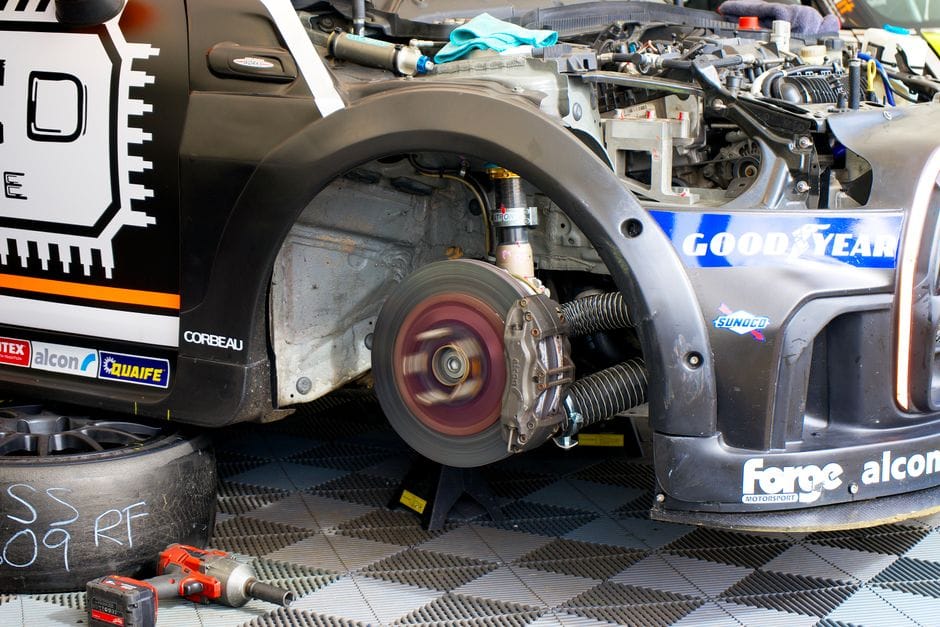
Standard street pad bedding works, but it won’t cut it for performance brake pads. Track pads use different friction compounds — often carbon-metallic or ceramic hybrids — that need far more heat to transfer material onto the rotor properly. If you treat them like street pads, you’ll end up with a patchy transfer layer, grabby brakes, and fade when you need stopping power most. The procedure below is the aggressive counterpart to the standard street pad process covered earlier.
Why performance pads need a harder bed
Street pads are designed to work from cold. Track pads are not. Their friction material becomes effective only after reaching a certain bedding temperature, typically between 600°F and 1,000°F at the rotor surface. [VERIFY: exact bed-in temperature range for common track pad compounds like Ferodo DS2500 or Hawk DTC-60] Below that, the pad simply doesn’t transfer material evenly, which leaves the rotor surface inconsistent and the brakes feeling wooden.
The goal is the same as with street pads — a uniform transfer layer — but the energy required to achieve it is much higher. That means harder stops, shorter intervals, and more heat. If you’re installing performance brake pads alongside new rotors, the process is identical to bedding a fresh rotor set; the difference is the intensity of the cycles.
The 60-to-10 mph high-energy cycles
Start from 60 mph and brake firmly down to 10 mph — not a full stop. Use about 80% of your available pedal pressure. The deceleration should feel aggressive but not threshold-braking. Repeat this eight to ten times in a row, with only enough time between runs to get back up to speed.
Each cycle loads heat into the rotor and pad interface. The transfer layer builds with each pass. Unlike the street procedure, you should not allow the brakes to fully cool between runs. You want the temperature to climb steadily. If you feel the pedal start to go soft or the brakes begin to fade, stop immediately — you’ve overshot the target, and the next subsection covers what to do.
Managing heat: what’s too hot
Heat is the tool, but it’s also the enemy. Exceeding the pad’s rated operating range can cause the friction material to glaze over, which permanently reduces fade resistance and creates a hard, shiny surface that won’t grip. Signs of overheating include a burning smell, smoke from the wheel wells, and a pedal that feels hard but doesn’t slow the car.
If you have a laser thermometer, check the rotor temperature after each set of cycles. Reading above 1,200°F means you’ve gone too far. [VERIFY: maximum safe rotor temperature for common performance and track pad compounds] At that point, stop the bedding process, drive gently for several minutes to cool the rotors, and restart with lighter braking pressure. On a track day, you may need to do a full cool-down lap before resuming the bedding procedure.
Track pad re-bedding after cool-down
Track pads often need re-bedding after they’ve been heat-cycled and cooled completely — for example, between sessions at a track day or after the car sits overnight. The transfer layer can partially degrade as the pad cools, especially with aggressive compounds. This is normal, not a defect.
To re-bed, you don’t need the full ten-cycle procedure. Three to four high-energy stops from 60 to 10 mph, spaced about 30 seconds apart, are usually enough to refresh the transfer layer and restore fade resistance. If the brakes feel inconsistent after the first lap of a session, pull off, let them cool, and run two or three more cycles. This is also a good time to check your [best drilled and slotted rotors](https://example.com/best-drilled-and-slotted-rotors) — the holes and slots can help with gas dissipation during aggressive bedding, but they also need the transfer layer to be even or they’ll wear unevenly. If you’re deciding between the two, our [drilled vs slotted rotors](https://example.com/drilled-vs-slotted-rotors) guide explains how each design handles heat differently under track conditions.
Bedding New Rotors with Used Pads — Yes, It’s Different
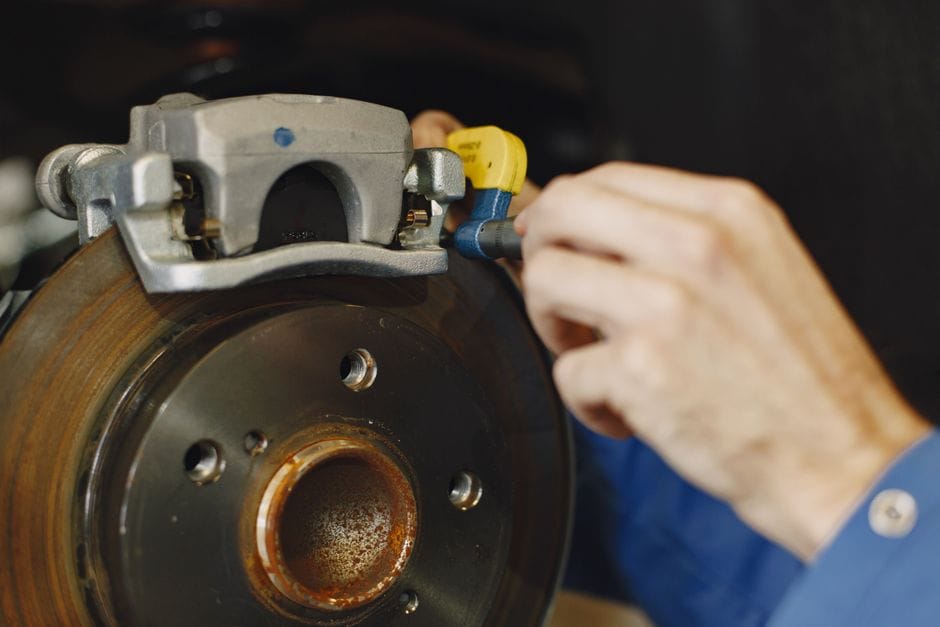
Replacing rotors is a common job, but many DIYers make a critical error: bolting on new rotors with used brake pads and skipping the bedding process entirely. That mistake leads to uneven transfer layers and vibration. If you’re keeping your old pads, you need a modified approach to the standard bedding procedure.
When it’s acceptable to reuse pads
Reusing used brake pads with new rotors is acceptable only if the pads have at least 50% of their friction material remaining. Check the minimum thickness spec — usually marked on the backing plate. If the pad surface is unevenly worn, deeply grooved, or shows heavy pad glazing, replace them. Glazed pads have a shiny, glass-like surface that won’t grip a new rotor properly. Also, if the pads are from a different brand than the rotors, consider the compound compatibility. Some aggressive track compounds don’t pair well with certain rotor metallurgies.
Sanding the pad surface for a fresh start
Before installing used pads on new rotors, you must resurface the friction material. Lay a sheet of coarse sandpaper (80-grit works well) on a flat, solid surface. Rub the pad face in a figure-eight pattern until the glazing is gone and you see fresh friction material. This takes about 30 seconds per pad. The goal is a flat, slightly textured surface that can deposit a new transfer layer evenly. [VERIFY: recommended sandpaper grit for brake pad resurfacing from pad manufacturers]. After sanding, clean the pads with brake cleaner to remove dust and debris. Never use oil-based cleaners — they contaminate the friction surface.
Shortened bedding sequence for used pads
Used pads that have been sanded don’t need the full 10-cycle break-in. A shortened bedding sequence of five to six moderate stops from 40 mph down to 10 mph is sufficient. Apply firm, steady pressure — enough to engage the ABS, but not so hard that you lock the wheels. Space each stop by about 30 seconds of driving to let the rotors cool. After these cycles, drive for several minutes without braking to allow everything to cool completely. Check the rotor surface afterward. You should see an even, light gray film across the swept area. If you notice dark patches or blue spots, the transfer layer is uneven — repeat the shortened sequence. If you’re unsure about rotor wear limits before installing, review our [brake rotor thickness guide](https://example.com/brake-rotor-thickness-guide) to confirm your new rotors are within spec. For a full overview of rotor types and materials, check our [brake rotor buying guide](https://example.com/brake-rotor-buying-guide).
Common Bedding Mistakes and How to Fix Them
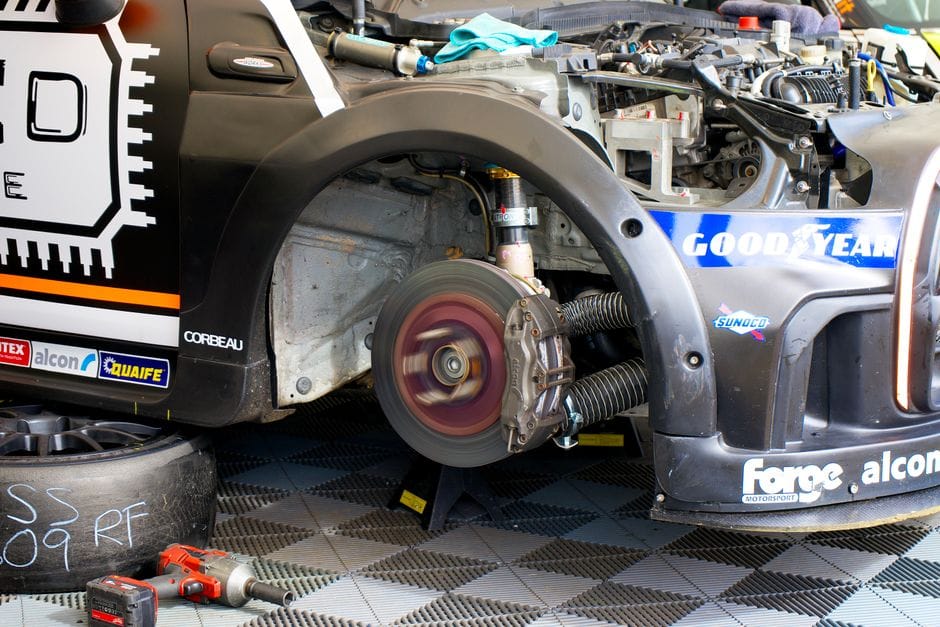
Even a well-planned bedding process can go sideways. Most issues trace back to a handful of repeatable errors. Here’s what goes wrong, why it happens, and how to correct it before you damage new parts.
Mistake 1: Stopping to a Complete Halt During the Process
The most frequent error is bringing the car to a full stop while the pads and rotors are hot. When you hold the brake pedal down at a standstill, the pad material presses into one fixed spot on the rotor. That spot heats beyond the surrounding area, leaving a visible deposit of pad material. The result is brake judder — a pulsing pedal that you’ll feel on every subsequent stop.
If you catch yourself stopping fully, don’t panic. Pull to the side, release the pedal, and let the brakes cool completely. Then restart the bedding process from the beginning. Driving at highway speed for a few minutes without touching the brakes helps accelerate cooling. Never use the parking brake to hold the car during a cool-down — that presses the rear pads into the rotors and creates the same deposit issue.
Mistake 2: Overheating the Brakes
Overheated brakes are easy to spot: a burning smell, reduced pedal feel, and sometimes visible smoke from the wheel wells. This happens when you run too many stop cycles in a row without giving the rotors time to shed heat. The friction material on the pad can glaze over, forming a hard, shiny surface that reduces stopping power.
If you smell burning or see smoke, stop the procedure immediately. Drive at moderate speed without braking for several minutes to cool the system. Once cool, inspect the rotors. Blue or dark discoloration indicates the metal got too hot — the transfer layer may be compromised. In that case, let everything cool fully and re-bed from scratch. If the rotors are badly warped or the pads are glazed beyond recovery, you may need to replace them.. When in doubt, err on the side of fewer, more spaced-out stops rather than pushing through.
Mistake 3: Bedding on Wet or Dirty Roads
The bedding process relies on a clean, dry interface between pad and rotor. Water on the road surface gets thrown up into the brake assembly, and it also makes it harder to modulate brake pressure precisely. Dirt and grit act as an abrasive between the pad and rotor, scratching the friction surface and preventing an even transfer layer.
Check the forecast before you start. If rain is likely, postpone the bedding run. Likewise, avoid gravel roads and recently salted streets. If you must bed in less-than-ideal conditions, extend the cool-down periods between stops and inspect the rotor faces afterward. Streaks or uneven wear patterns mean contaminants got in — clean the rotors with brake cleaner and start over.
Mistake 4: Ignoring New Pad Noise After Bedding
A little brake noise right after bedding is normal — the pads are seating in and the edges may be slightly proud of the rotor surface. But persistent squealing or grinding that lasts beyond the first few drives is a signal. It can mean the pads weren’t chamfered correctly, the shims are missing, or the transfer layer didn’t take evenly.
Listen for the type of noise. A high-pitched squeal during light braking often points to pad material vibration, not a hardware failure. A low growl or grinding sound suggests metal-to-metal contact — that’s urgent. If you hear grinding, stop driving and inspect the pads immediately. For squeal, first check that the anti-rattle clips and shims are in place. If they are, the issue is likely the bedding itself. Also, a persistent squeal can be mistaken for a different problem — learn to tell the difference by reading our [brake pedal hard diagnosis](https://example.com/brake-pedal-hard-diagnosis) guide, which covers pedal feel issues separately from noise. And if your parking brake feels weak or sticks after the bedding run, check our [emergency brake problems](https://example.com/emergency-brake-problems) article before assuming the pads are at fault.
How to Tell If You Need to Re-Bed
Signs the bedding worked
- Even, light gray film across the full rotor swept area
- No vibration or pulsing through the pedal during stops
- Quiet operation after the first few cooldown drives
- Consistent stopping power from cold and from speed
Signs you need to re-bed
- Dark blue or purple spots on the rotor surface
- Brake judder or pedal pulsation at highway speeds
- Brake noise that persists beyond the first 100 miles
- Patchy or streaky transfer layer, not a uniform film
If you see any of the warning signs in the right column, wait for the brakes to cool completely. Then repeat the standard bedding procedure from the earlier section — the full cycle, not the shortened version. Re-bedding once is fine. If the problem returns after a second attempt, the pads or rotors themselves may be defective, or the calipers may not be applying even pressure. At that point, inspect the hardware before spending money on new friction material.
The re-bed process is forgiving if you catch issues early. The key is not to keep driving on a bad transfer layer — that compounds the problem and can score the rotors permanently. When in doubt, one clean re-bed beats a thousand miles of juddering stops.
How to Verify a Successful Bedding Job
You have completed the bedding procedure. Now you need to confirm it actually worked. Bedding verification is not optional — a bad transfer layer will ruin your braking performance and can damage the rotors. Here is how to check your work.
Visual inspection: the gray transfer layer
Park the car on a level surface and let the brakes cool completely. Remove the wheels and inspect the rotor surface. A successful bedding job leaves an even, light gray transfer layer across the full swept area — the ring of metal where the pads contact the rotor. This film should look uniform, like a light dusting of graphite. You should not see bare shiny metal patches, dark blue spots, or a rainbow of heat discoloration. Patchy coverage means the pad material did not transfer evenly, which points to a problem with the bedding procedure or the rotor condition itself.
The 30-mph light-stop test
Reinstall the wheels and take the car on a quiet road. Accelerate to 30 mph and apply the brakes gently, using about 20 percent pedal pressure, to bring the car to a complete stop. Repeat this three times with a short drive between each stop to let the brakes cool slightly. A properly bedded brake system stops smoothly with no vibration, no pulling to one side, and no graunching noise. If the stop is smooth and quiet, your bedding job is likely good. If you feel a shudder or hear a grinding sound, the transfer layer is not uniform.
Checking for pedal pulsation
Pedal pulsation is the most common sign of a failed bedding job. Drive to 60 mph on a clear highway and brake moderately down to 40 mph. Pay attention to the brake pedal. A steady, firm pedal means the rotors are true and the transfer layer is even. A pulsing or throbbing pedal — sometimes described as brake judder — indicates uneven pad material buildup on the rotor surface. This creates a high spot that the pad grabs and releases as the wheel rotates. Light pulsation sometimes smooths out after a few hundred miles of normal driving. Strong judder will not fix itself.
What your brakes should feel like after bedding
Even, light gray film across the full rotor swept area. No vibration or pulsing through the pedal during stops. Quiet operation after the first few cooldown drives. Consistent stopping power from cold and from speed.
When to re-bed vs. when to replace
The decision comes down to the rotor condition and the pad material. If the transfer layer looks patchy but the rotors are still flat and smooth, re-bed the pads once. Use the full standard bedding procedure, not a shortened version. If dark blue or purple heat spots appear on the rotor surface, the metal has been overheated and hardened — re-bedding will not fix that. Replace the rotors. If pedal pulsation persists after a second bedding attempt, check the calipers and slide pins for even pressure before buying new parts. Also verify the pads are the correct compound for your driving style — a track pad used for daily commuting will never bed properly. For more detail on pad wear limits, see our brake pad thickness guide. If you notice the ABS engaging during light stops, inspect the abs module problems article before assuming the bedding failed.
Bedding verification takes twenty minutes and saves you from replacing rotors prematurely. A clean transfer layer delivers consistent stopping power and extends the life of both the pads and the rotors. If the checks above do not pass, do not ignore the symptoms — a bad bed will only get worse with mileage.
Frequently Asked Questions About Brake Pad Bedding
How long does the bedding process take?
Plan for 30 to 45 minutes from start to finish. The actual braking sequence takes about 10 to 15 minutes, but you need extra time for the cool-down period, which is mandatory. Rushing the cool-down is the most common reason a bedding process fails. The rotors need to drop below 200°F before you park the car; otherwise, the pad material can transfer unevenly and cause pedal vibration later.
Can I bed brakes in my driveway?
No. The procedure requires sustained speed and repeated hard stops, which is unsafe and ineffective in a driveway. You need a flat, empty stretch of road where you can safely reach 35 to 60 mph without traffic. An empty industrial park on a weekend or a quiet rural road works well. Never attempt the aggressive stops near pedestrians, parked cars, or intersections — the vehicle will not stop as efficiently during the first few applications.
Do ceramic pads need a different bedding procedure?
Ceramic brake pads follow the same general bedding process, but they tend to need more heat to transfer material onto the rotor. Expect to do one or two extra cycles compared to semi-metallic pads. The key difference is temperature management — ceramic compounds are more sensitive to overheating during the bed-in. If you see the rotor turn blue or smell a strong chemical odor, stop and let everything cool completely before trying again. Ceramic pads also produce more dust during the first few stops, which is normal and not a defect.
Is it normal to smell burning during bedding?
Yes, a burning smell is expected during the bedding process. The resin binders in the pad material are burning off as the pad transfers a thin layer onto the rotor. You may also see light smoke coming from the calipers on the first few hard stops — this is the friction material curing. The smell should fade noticeably by the final cycles. If the odor persists long after the process, or if you see flames or heavy smoke, stop immediately. A persistent burning smell after bedding can indicate a stuck caliper or an overheated bearing, not normal pad break-in.
How many miles before brakes are fully bedded?
Most pad compounds reach full brake performance within 200 to 500 miles of normal driving after the initial bedding process. The first 100 miles are the most critical — avoid heavy braking and highway speeds where possible. During this period, the transfer layer continues to stabilize and the pad surface wears to match the rotor. If you track the car or tow heavy loads, extend that break-in window to 500 miles before pushing the brakes hard. The bed-in distance varies by compound, so check the pad manufacturer’s spec sheet for their recommended mileage. [VERIFY: exact bed-in distance range for ceramic vs semi-metallic pads from a named manufacturer]
If you are still choosing pads, our best budget brake pads guide covers compounds that bed quickly and hold up well for daily driving. For the full process, refer back to the standard bedding procedure section above, and use the verification checklist to confirm the job is done correctly before returning to normal driving.
Final Verdict: Bedding Brake Pads Is Non-Negotiable for Maximum Stopping Power
Brake pad bedding is the controlled heat-transfer process that deposits a uniform layer of friction material onto the rotor surface. Its most critical attributes are temperature management (typically 400–600°F for street pads), transfer film uniformity, and cool-down discipline. Without proper bedding, you risk uneven pad buildup, rotor glazing, and vibration under heavy braking — regardless of pad compound quality.
Our top recommendation: perform the standard 6-8 progressive stops from 40–50 mph, then drive 5–10 minutes without braking. We choose this method because it balances heat generation with material transfer — the two attributes that determine whether your friction pair performs at its rated coefficient of friction. It works for 90% of street and track pad compounds, from ceramic to semi-metallic.
Here is your decision framework based on specific braking requirements:
If you need maximum cold-bite performance for daily commuting, choose the moderate 30–35 mph bedding cycle because it avoids thermal shock to low-temperature ceramic pads. If you need fade resistance for track days or towing, choose the aggressive 60–80 mph high-speed bedding procedure because it creates a thicker transfer film that withstands sustained heat. If you need to minimize rotor wear on expensive drilled or slotted rotors, choose the short 3-stop light bedding method because it deposits enough material without excessive abrasive action.
Honest limitation: no bedding procedure can fix a mismatched pad-rotor pairing. If you install track-oriented pads on street rotors, or mix pad compounds from different manufacturers, the transfer film will still fail under hard use. Bedding optimizes what you have; it does not substitute for correct component selection.
Our bottom line: budget 30–45 minutes for bedding after every brake pad installation. Skip this step and you compromise stopping distance, pedal feel, and rotor lifespan. Follow the correct procedure for your pad type, and you’ll achieve the quiet, vibration-free, high-friction braking your system was designed to deliver.
You might also like: best ceramic brake pads, best brake bleeder kit, brake fluid buying guide