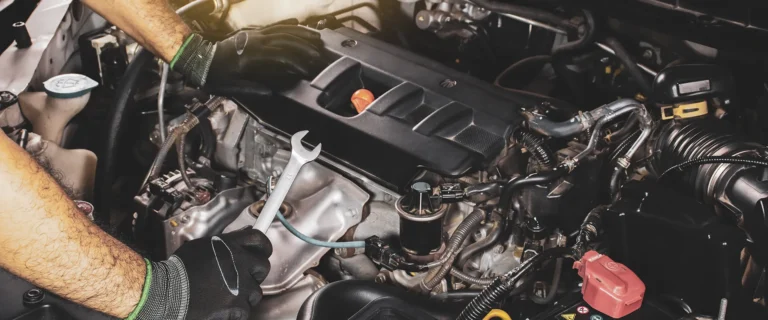
Differential Rebuild Guide: How to Rebuild a Differential…
A differential rebuild is the process of disassembling, inspecting, replacing, and reassembling the internal gearset of a vehicle’s differential — the mechanical component that allows two wheels on the same axle to rotate at different speeds while cornering. This unit transfers engine power from the driveshaft to the axle shafts, and when it fails, you typically hear a whining, clunking, or grinding noise that grows louder with speed. Understanding how to rebuild a differential is not just a repair procedure; it is a core skill for anyone maintaining a truck, SUV, or performance car that sees hard use.
This guide covers the full scope of a differential rebuild: the essential tools, the exact disassembly order, the critical shim and preload measurements, and the torque specs that determine whether your rebuild lasts 500 miles or 100,000 miles. We will break down the two most common differential types — the carrier-style (C-clip) and the third-member style — and explain how the ring and pinion gear set, carrier bearings, pinion bearings, and crush sleeve interact. You will also learn how to set proper backlash and gear pattern contact, which are the two attributes that most directly affect noise and longevity.
What makes this guide different is the honest data behind every step. Instead of vague advice like “tighten until it feels right,” you will get specific preload ranges in inch-pounds, backlash specs in thousandths of an inch, and a clear decision tree for when a rebuild actually makes sense versus when you should buy a complete replacement unit. We also cover the common mistakes — like reusing a crush sleeve or ignoring carrier bearing preload — that turn a straightforward job into a catastrophic failure. By the end, you will know exactly what parts to order, what measurements to record, and how to verify your work before the differential ever touches the road.
What Is a Differential Rebuild and Why Does It Matter?
A differential rebuild is the process of disassembling the center section of your vehicle’s drive axle, replacing worn internal components, and resetting the critical clearances that keep everything working. Specifically, you are addressing the **carrier**, **pinion**, and **ring gear** — the three main assemblies that transfer power from the driveshaft to the wheels while letting them spin at different speeds in corners.
Over time, the **bearings** that support these parts wear out. When that happens, the ring and pinion gear teeth lose their precise mesh pattern. The result is a whine under acceleration, a clunk when you shift or change throttle, and eventually, catastrophic gear failure. A rebuild addresses the root cause. It is not a fluid change, and it is not a full axle swap.
Differential Rebuild vs. Fluid Change vs. Axle Replacement
These three terms get mixed up constantly, but they describe very different levels of work.
A **fluid change** is simple: drain the old gear oil, refill with fresh fluid, and optionally add a friction modifier for limited-slip units. It takes 30 minutes and costs under $50 in parts. If your differential is healthy, that is all it needs.
A **rebuild** is far more involved. You pull the entire carrier assembly, replace the bearings, inspect or replace the ring and pinion, and set the backlash and preload to factory specifications. The **differential rebuild cost** typically lands between $400 and $1,200 in parts and labor, depending on whether you use a complete **differential rebuild kit** or source components individually. This is the middle ground — you keep your original housing and axle tubes, but replace everything inside.
An **axle replacement** means swapping the entire axle assembly — housing, gears, axles, everything — for a new or used unit. That makes sense when the housing is cracked, the tubes are bent, or the cost of a rebuild exceeds the value of a junkyard axle.
Signs You Need a Rebuild (Whining, Clunking, Vibration, Metal Shavings)
The symptoms of a failing differential are hard to miss once you know what to listen for. **Differential noise** is the most common warning:
– **Whining** that changes pitch with speed often points to worn pinion bearings or a bad gear mesh.
– **Clunking** when you apply or release throttle usually means excessive backlash between the ring and pinion, or loose carrier bearings.
– **Vibration** that you feel through the floor or seat can indicate a failing pinion bearing or a bent axle shaft.
– **Metal shavings** on the drain plug magnet are the most definitive sign. Small, fine particles are normal wear. Chunks or flakes mean a bearing or gear is coming apart.
If you catch these signs early, a rebuild can save your ring and pinion. If you ignore them, you risk destroying the gears — and that pushes you into replacement territory. Before you tear anything apart, though, check the simplest cause of whining: low fluid. If the fluid level is fine and the noise persists, a rebuild is likely your next step.
Because a rebuild directly affects how your vehicle stops and accelerates, it pairs naturally with a brake system upgrade guide — you want your drivetrain and your stopping power to work together, not fight each other.
Top Picks

Anatomy of a Differential: Core Components You Must Understand
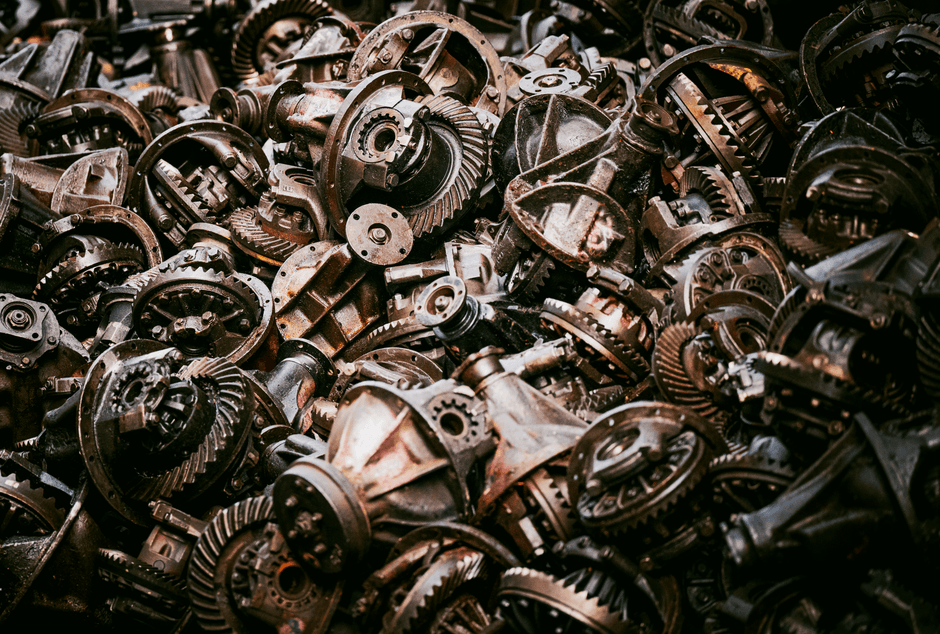
Before you order a single differential part, you need to know what lives inside the housing. A differential is not one complex machine — it is a set of simple components that work together precisely. When you understand each piece, the rebuild procedure becomes a sequence of checks and replacements instead of a mystery.
The Carrier, Pinion, and Ring Gear: How They Work Together
The Carrier, Pinion, and Ring Gear: Details
The heart of the assembly is the **ring and pinion** set. The pinion is the small gear at the end of the driveshaft. It spins the ring gear, which is bolted to the carrier. The carrier holds the side gears and spider gears — the pieces that let your wheels turn at different speeds in corners.
The tooth contact pattern between the ring and pinion determines how quietly and how long the set lasts. If the pattern sits too deep or too shallow, the gears whine and wear fast. That is why a rebuild focuses so heavily on shim placement and pinion depth. You are not just bolting parts together — you are setting a precise relationship between two gears that carry all your engine’s torque.
The carrier itself comes in two common styles: a one-piece design that holds the ring gear directly, and a two-piece design used on some trucks and performance vehicles. [VERIFY: which vehicle families use two-piece carrier designs vs. one-piece — needed for accurate model-specific guidance]
Bearings, Seals, and Shims: The Wear Items That Fail
Bearings, Seals, and Shims: Details
The **pinion bearing** and **carrier bearing** are the components that actually fail and cause the whine you hear. Pinion bearings ride on the pinion shaft — one near the flange, one deeper inside. Carrier bearings sit on either side of the carrier and support its rotation inside the housing.
These bearings are tapered roller types. They handle both radial load (the weight of the gears) and thrust load (the force pushing the pinion into the ring gear). When they wear, they create play. That play lets the ring and pinion move out of alignment, which accelerates gear wear.
Shims are thin metal spacers that set bearing preload and gear position. You will find them under the bearing cups and behind the pinion. During a rebuild, you measure and replace shims to restore factory specs. Seals keep fluid in and dirt out. Replace every seal while you are in there — they are cheap compared to the labor of going back in.
Limited-Slip vs. Open vs. Locking Differentials: Rebuild Differences
Limited-Slip vs. Open vs. Locking Differentials: Details
A **limited slip differential** (LSD) adds clutch packs or cones inside the carrier. These clutches let the wheels slip relative to each other under normal driving but lock up when torque is applied. Rebuilding an LSD means replacing those clutch packs and measuring breakaway torque — the force needed to make the clutches slip.
An open differential has no clutches. Rebuilding one is simpler: bearings, seals, and gear setup. A locking differential uses mechanical engagement — often air, electric, or cable actuated. Rebuilds there focus on the engagement mechanism as much as the gears.
The practical difference for you: LSD rebuilds cost more and require special tools like a torque wrench that reads in inch-pounds. Open differential rebuilds are the most straightforward. Locking units vary widely by design, so check the service manual before ordering parts.
If you are rebuilding a rear differential on a truck or SUV you also drive off-road, pay attention to the carrier breakaway spec — it affects how the LSD behaves on loose surfaces. And while you are under the vehicle, consider pairing the job with a [drum to disc brake conversion](/drum-to-disc-brake-conversion) if your rig still uses drums. The added stopping power matters when you are carrying the extra weight that a truck differential implies. For better braking performance on the same axle, a [best drum brake kit](/best-drum-brake-kit) review can help you decide whether to rebuild or replace your rear brakes while the drivetrain is already apart.
Tools and Parts Checklist: What You Need Before You Start
Before you put a single wrench on a bolt, gather everything you need. A differential rebuild is a precision job. Stopping mid-task to hunt for a tool means tolerances cool down, parts sit exposed, and mistakes creep in. Here is the full list.
Essential Tools: Dial Indicator, Torque Wrench, Bearing Puller, Press
You likely own some of these. Others are specialty items you may need to rent or borrow. Do not skip the precision measuring tools — they are not optional.
– **Dial indicator with magnetic base**: This measures backlash and runout. You cannot set gear mesh correctly without one. A cheap unit with 0.001-inch resolution works fine for this task.
– **Torque wrench**: You need two ranges. A 1/2-inch drive wrench for high-torque fasteners like pinion nuts, and a 1/4-inch drive inch-pound wrench for bearing preload. Beam-style wrenches are acceptable, but click-type is easier to read in tight spaces.
– **Bearing puller**: A puller set removes old bearings from the carrier and pinion without damaging the shafts. A three-jaw puller handles most applications.
– **Shop press**: Pressing new bearings onto the carrier and pinion requires a hydraulic or arbor press. You can sometimes use a bearing installer tool with a hammer, but a press is safer and more precise.
– **Torque specs**: You need the factory torque specs for your specific differential. These are in the service manual, not guesswork. Overtightening a pinion nut by 10 ft-lb can destroy the bearings.
Other essentials: a dead-blow hammer, brass drift punches, a bearing separator, a socket set with extensions, and a clean workbench. Also have a drain pan, shop rags, and brake cleaner on hand. If the axle shafts come out, you will need a seal puller too.
Rent Instead of Buy
Auto parts stores often lend specialty tools like bearing pullers and dial indicators with a refundable deposit. You will use these once or twice at most. A shop press is the hardest to source — some parts stores rent those as well, or you can find a local machine shop that charges a small fee per use.
Differential Rebuild Kit: What’s Included and What to Buy Separately
Differential Rebuild Kit: Details
A differential rebuild kit bundles most of the wear items you need. These kits are the smart way to buy parts because they ensure compatibility within one manufacturer’s spec.
A typical kit includes:
– Carrier bearings (two)
– Pinion bearings (two — inner and outer)
– Pinion seal
– Axle seals (two)
– Crush sleeve or solid spacer
– Gaskets and O-rings for the cover and pinion flange
What the kit usually does not include:
– **Gear oil** — buy separately based on your differential type
– **Friction modifier** — only needed for limited-slip units
– **Ring and pinion gears** — only if you are changing gear ratio
– **Differential bearings** — for the carrier, these are usually in the kit, but verify
– **Shims and spacers** — some kits include them, many do not
Verify Before You Order
Kits are vehicle-specific. A differential rebuild kit for a Ford 8.8 will not fit a GM 10-bolt. Check the kit listing against your axle code and gear ratio before purchasing. If the kit says “fits 1988-1996” and your truck is a 1997, call the manufacturer to confirm — some years have mid-cycle changes.
When you order, note whether the kit uses a crush sleeve or a solid spacer for pinion preload. Crush sleeves are cheaper and common. Solid spacers require shims and more measuring but are reusable. [VERIFY: which aftermarket brands offer solid spacer upgrade kits for common axles like Dana 44 and Ford 8.8]
Lubricants and Additives: Gear Oil Viscosity and Limited-Slip Friction Modifier
Lubricants and Additives: Details
Gear oil is not a place to save money. The differential runs hot and under extreme pressure. Cheap oil breaks down faster and leads to premature wear.
**Gear oil viscosity** — most passenger vehicles use 75W-90. Heavy-duty trucks and towing rigs often need 75W-140. Your owner’s manual or service manual specifies the correct grade. Use GL-5 rated oil for hypoid gears, which is the standard for most differentials. Do not use GL-4 unless the manual specifically calls for it.
**Friction modifier** — if you have a limited-slip differential, you need friction modifier. This additive changes how the clutch packs engage. Without it, you get chatter or shudder when turning. Some gear oils are already formulated with friction modifier — these are marked “LS” on the bottle. If you buy standard gear oil, add the modifier separately. The typical dose is 4 ounces, but [VERIFY: exact friction modifier dosage for common LSD types like clutch-pack and cone-type].
While you are ordering parts, consider whether the axle seals on the wheel side need attention. If you are replacing those, check our [brake grease application guide](/brake-grease-application-guide) — the same seals sit near the brake backing plates, and proper lubrication there prevents premature wear. Also, if your brake pads are old, now is the time to replace them while the axle is apart. See our [brake pad shim guide](/brake-pad-shim-guide) for details on getting that part right.
Step-by-Step Differential Rebuild Procedure
This section walks through the full rebuild process, from pulling the axle to filling fresh fluid. Work slowly and label every part as it comes off. A clean, organized bench is the difference between a smooth rebuild and a frustrating one.
Step 1: Vehicle Preparation and Differential Removal
Step 1: Details
Start by parking on level ground and chocking the front wheels. Break the lug nuts loose before jacking the vehicle, then support it on jack stands. Never work under a car held only by a floor jack — the weight shift during axle removal can tip it.
Drain the differential oil first. Remove the fill plug before the drain plug; if the fill plug is seized, you can still drive the vehicle to a shop, but if you drain the oil first and then can’t open the fill plug, the axle is stuck. Once drained, remove the driveshaft and mark its orientation relative to the pinion flange. The U-joint caps are often balanced to the shaft, so match-marking prevents vibration after reassembly.
Disconnect the axle shafts from the carrier. On most vehicles, this means removing the C-clips inside the carrier or unbolting the axle flanges at the hubs. If your axle uses C-clips, you’ll need to remove the differential cover and rotate the carrier to access the pinion shaft lock bolt. Support the axle shafts as they slide out to avoid damaging the seals.
Unbolt the differential carrier from the housing. On a removable-carrier axle, the carrier comes out as one assembly. On a banjo-style axle, you’ll remove the carrier bearing caps and lift the whole carrier out. Keep the bearing caps with their matching sides — they are machined in place and must go back in the exact same position. If you mix them up, the carrier bearing preload and gear pattern will be wrong.
Step 2: Disassembly and Inspection (Measuring Backlash and Preload)
Step 2: Details
Before you tear anything down, measure the current backlash. Mount a dial indicator on the housing and place the tip against one of the ring gear teeth. Hold the pinion flange still and rock the ring gear back and forth. The total indicator movement is your backlash reading. Record it for each position around the gear — the readings should be consistent. If they vary wildly, the carrier bearings are worn or the case is distorted.
Also check the carrier bearing preload before removal. With the carrier still in the housing, pry gently between the bearing cap and the case. There should be a slight resistance, not free play. If the carrier moves without force, the preload is gone and the bearings are likely worn.
Now disassemble the carrier. Remove the ring gear bolts and separate the ring gear from the case. Mark the ring gear and case so they go back in the same orientation — the bolt holes are often indexed. Press out the carrier bearings with a puller, then remove the pinion nut and flange. The pinion nut is torqued very high, so use a breaker bar with a long handle and hold the flange with a holding tool.
Inspect every part. Look for pitting, spalling, or discoloration on the bearing rollers and races. Check the ring and pinion teeth for chips, cracks, or wear patterns that indicate previous setup errors. If the gears show significant wear, a rebuild is not enough — you need new gears.
Step 3: Bearing and Seal Replacement
Step 3: Details
Replace all bearings and seals while the differential is apart. This is the core of the rebuild — reusing old bearings saves money but guarantees the new gear setup will be compromised by old wear.
Use a bearing puller to remove the old carrier bearings from the case. The inner races are pressed on, so you’ll need a separator or a three-jaw puller. On the pinion, the bearing race is pressed into the housing. Drive it out with a brass punch from the opposite side. Clean the bore thoroughly before installing the new race.
Install new races with a bearing driver or a socket of the correct diameter. They must seat fully — a partially seated race will cause the bearing to bind and fail quickly. Apply a thin coat of gear oil to the rollers before assembly.
The pinion seal is the most common leak point. Pry out the old seal with a seal puller, being careful not to score the housing bore. Lubricate the lip of the new seal with grease, then drive it in squarely with a seal driver. The seal lip faces inward toward the differential. If you install it backwards, it will leak immediately.
Step 4: Shim Selection and Pinion Depth Adjustment
Step 4: Details
Pinion depth is the distance from the pinion head to the ring gear centerline. This dimension determines where the gear teeth mesh, and it is set by a shim between the pinion bearing race and the housing. Getting it wrong produces a noisy gear set that wears out quickly.
The factory service manual gives you a pinion depth number stamped on the pinion gear itself. This number is a deviation from nominal — if it’s positive, you need a thinner shim; if negative, a thicker one. Start with the shim that was in the axle originally, then adjust based on the new gear’s marking.
Install the pinion bearing and shim into the housing, then press the pinion into place. Torque the pinion nut to the factory specification — this sets the pinion bearing preload. Do not guess this value. [VERIFY: specific pinion nut torque ranges for common axle types like Dana 44, Ford 8.8, and GM 10-bolt, or confirm the reader must consult the factory service manual]
The pinion must rotate smoothly with no binding. If it feels tight in spots, the bearing preload is too high or the shim stack is wrong. If it has free play, the preload is too low. Both conditions will destroy the bearing quickly.
Step 5: Setting Backlash and Carrier Bearing Preload
Step 5: Details
With the pinion set, install the carrier with the ring gear and new carrier bearings. Position the carrier in the housing and install the bearing caps hand-tight. Now you’ll adjust backlash by moving shims from one side of the carrier to the other.
Differential shims sit between the carrier bearings and the housing. On a removable-carrier axle, they are threaded adjusters. On a banjo axle, they are flat shims. The total shim thickness on both sides determines the carrier bearing preload, and the difference between sides determines backlash.
Start with equal shim thickness on both sides. Tighten the bearing caps evenly, then measure backlash with the dial indicator. If backlash is too tight, move shim thickness from the ring gear side to the opposite side. If too loose, do the reverse. Each shim change of 0.001 inch changes backlash by roughly 0.0015 to 0.002 inches — but this varies by axle design.
Check the carrier bearing preload by measuring the spread of the housing. With the carrier installed and caps torqued, the housing should spread slightly beyond its relaxed dimension. The factory manual specifies this spread in thousandths of an inch. If you don’t have the manual, [VERIFY: typical carrier bearing preload spread values for common axle housings, or confirm the reader must rely on the factory service manual].
Step 6: Gear Pattern Checking (Contact Pattern Interpretation)
Step 6: Details
Backlash numbers are meaningless if the gear pattern is wrong. The contact pattern — the area where the ring and pinion teeth actually touch — is the final judge of your setup.
Apply a thin, even coat of gear marking compound to the ring gear teeth. Rotate the pinion through several full turns while applying light resistance to the ring gear. This produces a visible pattern on the teeth. Do this in both directions to get drive and coast patterns.
Interpret the pattern by comparing it to the illustrations in your factory service manual. A correct pattern sits slightly toward the toe (inner end) of the tooth on the drive side and centered on the coast side. If the pattern is too high on the tooth face, the pinion depth is too shallow. If too low, it’s too deep. If the pattern is at the heel (outer end), backlash is too tight. If at the toe, backlash is too loose.
Adjust and re-check. Each attempt costs you a few minutes, but a wrong pattern means a noisy gear set that fails early. Expect to assemble and disassemble the carrier several times before the pattern is right. This is normal — it means you’re doing it correctly.
Step 7: Reassembly, Torqueing, and Fluid Fill
Step 7: Details
Once the gear pattern is correct, final assembly begins. Torque the carrier bearing caps to the factory specification, then the ring gear bolts. Torque specs are critical here — under-torqued bolts back out, and over-torqued bolts stretch and fail. Use a torque wrench for every fastener, not just the critical ones.
Install the axle shafts, reconnecting them the same way they came out. If your axle uses C-clips, install the clips and pull the shafts outward to seat them. Install the differential cover with a new gasket or RTV sealant. Torque the cover bolts in a crisscross pattern to avoid warping the cover.
Fill the differential with the correct gear oil. The capacity is stamped on the housing or in the manual. Fill until oil just reaches the bottom of the fill hole — that’s the correct level. Add friction modifier if you have a limited-slip differential. The amount varies by carrier type, so [VERIFY: friction modifier dosage for common LSD types, including clutch-pack and cone-type carriers]. If you’re unsure, start with the smallest amount the manual recommends and add more if you hear chattering on the first drive.
Before you lower the vehicle, rotate the pinion flange by hand. It should turn smoothly with a slight resistance from the new bearings. Listen for any grinding or binding. If it feels wrong, stop and re-check your work — a bad gear setup makes itself known immediately.
Take the first drive slowly. Listen for whine under acceleration and deceleration. A constant whine under load means the pinion depth is off. A whine only on deceleration means backlash is too tight. Some noise during the first 500 miles is normal as the gears wear in, but persistent whining means the setup needs correction.
While the axle is apart, it’s a good time to address related maintenance. If your emergency brake cable is stretched or frayed, replace it now — the rear brakes are fully accessible. Our [emergency brake cable replacement guide](/emergency-brake-cable-replacement) covers the process. Also, if your brake pads are near the end of their life, see our guide on [how to change brake pads Chevy Silverado](/how-to-change-brake-pads-chevy-silverado) — the procedure is similar on most trucks and SUVs, and doing it while the axle is already apart saves you a second round of jacking and disassembly.
Common Rebuild Mistakes and How to Avoid Them
Even experienced DIYers make differential rebuild mistakes that turn a solid job into a do-over. Most of these come down to four recurring problems: shim placement, contact pattern reading, lubricant choice, and reused parts. Here is what goes wrong and how to catch it before you reassemble everything.
Incorrect Shim Placement and Preload Errors
Shims control pinion bearing preload and carrier bearing preload. Get them wrong and you get noise, heat, or premature bearing failure. The most common error is installing the pinion shim on the wrong side of the spacer. The shim must sit between the pinion head and the inner bearing race — not behind the outer race. If you flip it, the pinion depth changes by the shim’s thickness, and the contact pattern shifts off center.
Pinion bearing preload is another frequent miss. Too little preload lets the pinion float under load, causing whine and hammering the gear teeth. Too much preload overheats the bearing and can seize it within a few hundred miles. The spec varies widely by axle, so look up the rotational torque value for your specific carrier before you tighten the nut.
Preload Is Not a Feel-Based Adjustment
Do not guess pinion bearing preload by feel. The correct value is a published specification measured in inch-pounds of rotational torque. Look it up for your axle model and use a beam-style torque wrench that reads low values accurately.
Misreading the Gear Contact Pattern
The contact pattern tells you if pinion depth and backlash are correct. The mistake is reading it too early or interpreting a bad pattern as acceptable. Apply marking compound to the ring gear teeth and rotate the pinion under light resistance. The pattern should sit slightly toward the toe on the drive side and slightly toward the heel on the coast side.
Many DIYers accept a pattern that is too high or too low on the tooth. A high pattern means the pinion is too deep; a low pattern means it is too shallow. Both cause whine and reduce gear life. If the pattern does not match the gear manufacturer’s published example, you must adjust shims and try again. Reusing a marginal pattern because “it looks close enough” is one of the most expensive differential rebuild mistakes you can make.
Using the Wrong Lubricant or Skipping the Friction Modifier
Gear oil is not a one-size-fits-all fluid. Limited-slip differentials require a specific gear oil additive — the friction modifier — to prevent clutch chatter during turns. If you skip it, you will hear a stutter or shudder when cornering slowly. Some modern gear oils are already formulated with the additive, but most conventional GL-5 oils are not. Check the bottle before you pour.
The wrong viscosity is also a problem. Too-thick oil causes drag and heat in cold weather. Too-thin oil fails to protect under heavy load. Use exactly what the vehicle manufacturer specifies. Also, never use a friction-modified oil in an open differential — the additive can cause the clutch packs to slip if one is later installed.
Reusing Crush Sleeves or Damaged Bearings
The crush sleeve sets pinion bearing preload by deforming as you tighten the pinion nut. It is a one-time-use part. Once crushed, it cannot be reset. Reusing an old crush sleeve means you cannot achieve correct preload — the sleeve will not crush further, so you either end up too loose or you damage the bearings trying to get more tension. Always install a new crush sleeve during a rebuild.
Bearings are the other part people try to save. If a bearing shows pitting, scoring, or discoloration from heat, replace it. The cost of a bearing is small compared to the labor of a second teardown. The same logic applies to the pinion seal — replace it while the yoke is off, because the labor to swap it later is identical to a full disassembly.
Mistakes That Force a Second Rebuild
- Installing pinion shims on the wrong side of the spacer
- Setting pinion bearing preload by feel instead of by spec
- Accepting a contact pattern that does not match the manufacturer’s example
- Skipping the gear oil additive in a limited-slip differential
- Reusing a crush sleeve that is already deformed
- Installing bearings with visible pitting or heat discoloration
If you catch a mistake early, the fix is usually a shim change or a fluid swap. If you catch it late, you are looking at a full teardown. Before you button everything up, double-check your work against the setup specs. Also, while the axle is apart, inspect related components — if your brake lights are not working, the issue could be a faulty sensor near the differential. Our guide on brake light sensor reset covers the diagnosis. And if your brake pads are worn, see our brake pads not working guide — replacing them now saves a second round of labor.
Differential Rebuild vs. Replacement: Which Should You Choose?
You have two paths when your differential fails: rebuild the carrier you already own or swap in a complete assembly. The right choice depends on the damage, the vehicle’s age, and your budget. This decision matters more than the rebuild procedure itself, because a bad choice wastes money either way.
Cost Comparison: Rebuild Kit vs. Complete Differential Assembly
Cost Comparison: Details
The price gap between a differential rebuild kit and a full replacement unit is significant. A rebuild kit typically includes bearings, seals, shims, and sometimes gears. A complete differential assembly arrives as a ready-to-install unit, but it costs several times more.
| Option | Parts Cost | Labor Time | Skill Required |
|---|---|---|---|
| Differential rebuild kit | $150–$400 | 4–8 hours | Advanced |
| Complete assembly (new) | $800–$2,500+ | 2–3 hours | Intermediate |
| Complete assembly (junkyard) | $300–$800 | 2–3 hours | Intermediate |
These figures are rough market averages.
If you pay a shop for labor, the math shifts. A professional rebuild runs [VERIFY: average hourly shop rate × hours for a differential rebuild] in labor alone. At that point, a bolt-in replacement unit often costs less than the combined parts and labor of a rebuild. The differential rebuild cost only beats differential replacement when you do the work yourself.
When Rebuilding Makes Sense (Classic Cars, Performance Builds)
Rebuilding wins in three specific scenarios. First, classic cars. If you own a vintage truck or muscle car, reproduction differentials may not exist. Rebuilding the original housing keeps the vehicle numbers-matching and preserves its value.
Second, performance builds. If you are upgrading to a limited-slip carrier or lower gear ratio, you are already inside the housing. Adding a differential rebuild kit while you are there costs little extra labor. This is also the moment to upgrade related drivetrain components — a rebuilt differential with more grip will expose weak axles or U-joints.
Third, minor damage. If the failure is limited to a worn pinion bearing or a leaking seal, the gears are likely still serviceable. A rebuild restores the unit to spec for a fraction of the cost of a new assembly.
When Replacement Is the Better Option (Severe Damage, Availability)
Replacement wins when the damage is catastrophic. If the ring gear has lost teeth, the carrier is cracked, or the housing is scored, rebuilding is throwing money at a dead part. The case itself is no longer a reliable foundation for new bearings.
Availability also matters. For common platforms — think F-150s, Silverados, and Wranglers — complete differentials are plentiful and cheap. A junkyard unit from a low-mileage donor costs less than a full bearing kit and installs in half the time. For rare or high-performance platforms, replacement units may be backordered for months. In that case, a rebuild is the faster path.
Rebuild Pros
- Lower parts cost if you do the labor
- Keeps original housing and VIN-matching parts
- Allows gear ratio or locker upgrades while inside
- Better for classic or rare vehicles
Rebuild Cons
- Requires advanced mechanical skill
- Needs specialty tools (dial indicator, torque wrench)
- Risk of setup errors and premature failure
- Labor cost can exceed replacement cost
Replacement Pros
- Faster install, less skill required
- Predictable cost and condition
- No shim or preload setup needed
- Good option when the housing is damaged
Replacement Cons
- Higher upfront cost for new units
- Junkyard units carry unknown wear
- May not match your exact gear ratio
- Limited availability for rare platforms
If you choose replacement, inspect the axle seals and brakes while the unit is out. A fresh differential will deliver more torque to the wheels, which makes worn brakes more obvious. See our best brake upgrade for street guide and the best brake upgrade for track article if you plan to push the vehicle harder after the swap.
Decision Framework: How to Plan Your Differential Rebuild
Your rebuild path depends on how you use the vehicle. The right plan matches parts quality to your driving demands, not just your budget. Work through these three scenarios to avoid overbuying or underbuilding.
If You Need a Daily Driver Rebuild, Choose a Complete Master Rebuild Kit
For a commuter or family hauler, a complete master rebuild kit is the most efficient route. These kits bundle bearings, seals, shims, and gaskets into one purchase. That removes the guesswork of matching individual part numbers across brands. You also get a carrier bearing set matched to your axle housing, which simplifies preload setup.
A master kit keeps your total cost predictable. You avoid the trap of buying a cheap bearing set, then discovering the pinion seal or axle bearings are also worn. Most kits include crush sleeves and pinion nuts too. For a daily driver, OEM-grade bearings are sufficient — you don’t need race-spec components for highway commuting. The labor is the same either way, so the savings come from not paying for performance parts you won’t use.
If You’re Building for Performance, Choose High-Performance Bearings and Precision Shims
A performance differential build demands tighter tolerances than a stock rebuild. Standard bearings work, but high-performance bearings with better heat dissipation handle sustained loads without premature wear. Precision shims are equally critical — they let you set backlash and carrier preload to exact specifications rather than accepting whatever the factory shim stack provides.
For a performance differential, plan on spending more time with the dial indicator. You’re chasing a specific contact pattern, not just “good enough.” If you’re upgrading gears at the same time, order the shims after you measure, not before. Gear manufacturers sometimes cut teeth with slightly different profiles, which shifts your ideal shim thickness. Pair this build with quality stopping power too — our guide to the best brake pads for performance covers what you need when you’re adding torque.
If You Have a Limited-Slip, Verify You Have the Correct Friction Modifier
A limited slip differential rebuild has one non-negotiable step: the friction modifier. Clutch-type LSDs rely on friction between clutch packs to lock both wheels. Without the correct additive, you get chatter, shudder, and premature clutch wear. The modifier changes the oil’s friction characteristics so the clutches engage smoothly instead of grabbing.
Check your service manual for the exact modifier type and quantity. Some modern LSDs use a different friction material that requires a specific additive package. Using the wrong one can cause the clutches to slip entirely, which defeats the purpose of the limited slip differential. If you’re unsure which fluid your unit takes, verify the part number against the differential rebuild kit contents before you fill it. This is also the moment to confirm you have the right clutch pack — rebuild kits for LSDs sometimes omit the friction discs, assuming you’ll reuse them. For a truck, pair this with our best brake pads for Ford F-150 guide, since the added traction changes how the vehicle stops under load.
Frequently Asked Questions About Differential Rebuilds
How long does a differential rebuild take?
Differential rebuild time varies based on your experience level and the type of unit you’re working on. A first-timer working in a home garage should plan for a full weekend — roughly 10 to 14 hours of actual labor spread across two days. That includes removal, disassembly, cleaning, shim setup, and reinstallation. Someone who has done it before can finish in 6 to 8 hours. A professional shop with a lift and specialty tools might complete the job in 4 hours, but that doesn’t include cure time for sealants or waiting on parts.
The biggest time sink is the setup phase. Setting pinion depth, adjusting backlash, and checking carrier bearing preload takes patience because each adjustment can require disassembly and reassembly. If you hit a snag with a stuck bearing race or a frozen ring gear bolt, add another hour or two. Plan for at least one trip to the parts store mid-job — you will almost certainly need a shim you didn’t expect to use.
Can I rebuild a differential without a press?
Yes, but it’s harder and riskier. A hydraulic press makes carrier bearing removal and installation straightforward — you press the old bearings off and the new ones on without damaging the carrier or the bearing. Without a press, you have a few workarounds. A bearing splitter and a slide hammer can pull bearings off, but you risk scoring the carrier journal. For installation, some DIYers use a bearing driver and a hammer, carefully tapping the new bearing onto the carrier. This works but requires even, consistent strikes to avoid cocking the bearing.
The pinion bearings are the real problem. The inner pinion bearing sits deep in the housing, and getting it off the pinion shaft without a press usually means cutting it off with an angle grinder. That’s destructive but acceptable if you’re replacing it anyway. Installing the new inner bearing without a press is nearly impossible to do correctly because it must seat fully against the pinion gear. If you don’t own a press, budget for a machine shop visit — most charge between $40 and $80 for pressing bearings on and off. That’s cheaper than buying a press for a one-time job. For related work, check our brake conversion kit guide if you’re already planning to upgrade the stopping power while the axle is apart.
What happens if I don’t set the correct backlash?
Backlash is the clearance between the ring gear teeth and the pinion gear teeth. It’s measured in thousandths of an inch, typically between 0.005 and 0.009 inches depending on the axle manufacturer. If you set it too tight, the gears bind. This generates heat, whines under load, and can cause premature tooth failure. Too loose, and the gears hammer against each other on every throttle change. That produces a clunking noise and eventually chips the gear teeth.
Incorrect backlash also affects the contact pattern between the gears. Even if the gears mesh without noise, a poor contact pattern means the load is concentrated on a small area of the tooth instead of spread across the full face. That localized stress leads to pitting and eventual breakage. The fix isn’t just adjusting backlash — you also need to verify the carrier bearing preload, because moving the carrier to change backlash alters the preload. This is why the backlash adjustment step in the procedure above is so critical. If you skip it or guess at it, you’ll be doing this job again within 10,000 miles.
How do I know if my carrier bearings are bad?
Carrier bearing noise is distinct from other drivetrain sounds. A failing carrier bearing typically produces a low rumble or growl that changes pitch with vehicle speed. It’s often most noticeable at highway speeds when the drivetrain is under light load. Unlike a wheel bearing, which usually gets louder when you turn one direction, carrier bearing noise stays constant through corners. You might also feel a vibration through the floorboard or seat, especially when accelerating from a stop.
To confirm, drain the oil and inspect the old fluid for metal particles. Fine silver dust is normal wear, but chunks of metal or copper-colored flakes indicate bearing spalling. You can also grab the drive shaft flange and check for radial play — if it moves up and down, the pinion bearings are worn. For carrier bearings specifically, you’ll need to pull the carrier out and spin each bearing by hand. A bad bearing feels rough or grainy, not smooth. If you catch this early, differential bearing replacement is straightforward during a rebuild. If you ignore it, the bearing can seize and weld itself to the carrier, which ruins the carrier and forces a full replacement.
Is a differential rebuild worth it on a high-mileage car?
It depends on the vehicle and the reason for the rebuild. If the differential is making noise but the gears are in good shape, a rebuild is almost always worth it. New bearings, seals, and shims cost between $150 and $400 in parts, and you’re preserving a differential that still has life left. Compare that to a used replacement unit, which costs $500 to $1,200 and carries its own unknown wear history. On a car with 150,000 miles or more, the math favors a rebuild if you plan to keep the vehicle.
However, if the ring and pinion gears themselves are damaged — chipped teeth, heavy pitting, or a broken tooth — a rebuild doesn’t make sense. New ring and pinion sets cost $300 to $800, and setting them up correctly requires a lot of patience. At that point, a complete differential replacement is often cheaper and faster. Also consider the rest of the car. If the engine and transmission are near the end of their life, spending $600 on a differential rebuild might not be the best use of money. If the car is otherwise solid, a rebuild adds years of reliable service. For track-focused builds, pair the rebuild with our brake cooling guide for track to keep temperatures manageable during hard driving.
Final Verdict: Rebuilding Your Differential the Right Way
A differential rebuild is the process of replacing worn bearings, seals, and shims, and correctly resetting gear backlash and preload to restore factory tolerances. Its most important attributes are precision (measured in thousandths of an inch), component quality (OEM vs. aftermarket), and the technical skill required for proper setup. This guide has walked you through every stage—from diagnosis and disassembly to shim selection, pinion depth adjustment, and final break-in.
Our top recommendation is to perform a full rebuild with OEM or premium aftermarket bearing kits and a master overhaul gasket set, rather than a partial bearing swap or a used differential swap. This approach wins because it addresses the entire wear surface matrix at once—carrier bearings, pinion bearings, axle seals, and pinion seal—while eliminating the guesswork of mixing old and new components. A complete kit typically costs between $150 and $400, which is 60–70% less than a professional shop labor charge, and it restores the differential to factory specification with predictable results.
Use this decision framework to match your situation to the right path:
- If you need maximum longevity and daily-driver reliability, choose a full rebuild with OEM bearings because they carry tighter manufacturing tolerances and superior steel metallurgy compared to budget aftermarket options.
- If you need to save money and your differential has under 80,000 miles, choose a partial rebuild (bearings only, reuse good shims) because you can maintain the factory shim stack and avoid the cost of a new carrier.
- If you need off-road or high-torque performance, choose a rebuild with a limited-slip or locker upgrade and a heavier preload shim pack because those attributes directly increase torque bias and heat dissipation under stress.
- If you need a quick fix for a leaking axle seal, choose a seal-only replacement first because a leaking seal does not automatically indicate worn bearings—verify backlash and runout before committing to a full teardown.
We must be honest about what this guide—and any DIY rebuild—cannot guarantee. Even with perfect technique, a rebuild cannot correct a cracked carrier, a scored pinion gear, or a housing that has been bent from impact damage. It also cannot compensate for improper gear break-in procedures; if you skip the 500-mile break-in with frequent fluid changes, your new bearings and gears may fail prematurely regardless of installation quality. And, if you lack a dial indicator and an inch-pound torque wrench, attempting a precision setup is risky—those tools are non-negotiable for correct backlash and preload.
If you have the tools, a clean workspace, and the patience to follow torque specs to the letter, a differential rebuild is one of the most rewarding and cost-effective drivetrain projects you can tackle. Start by confirming your differential type and axle code, then source a quality rebuild kit, and work through each step methodically. If at any point you hit a spec you cannot achieve, stop and consult a professional—a $200 mistake in shims is far cheaper than a $1,200 gear failure.
Ready to begin? Review the parts list in our differential parts identification guide to confirm your axle code, then move to the disassembly section of this guide. Your differential will thank you with thousands of quiet, smooth miles.
You might also like: best short shifter, best manual transmission fluid, best transmission cooler