Brake System Upgrade Guide: How to Choose and Install the…
Your vehicle’s brake system is its most critical safety entity. It is an electro-mechanical assembly of rotors, calipers, pads, fluid, and lines. This system converts kinetic energy into heat and brings your car to a controlled stop. Most drivers treat brakes as a wear-and-tear afterthought. Enthusiasts and safety-conscious owners treat them as a performance system worth upgrading. A brake system upgrade is not just about stopping harder. It is about managing heat, reducing fade, and improving pedal feel under stress.
This guide covers the full attribute spectrum of brake components. We examine rotor diameter and material, such as cast iron versus carbon-ceramic. We also cover caliper piston count and configuration, pad friction coefficients, and price-to-performance tradeoffs at each tier. We will walk through the installation process, including torque specs, bedding procedures, and brake fluid bleeding. This way, you know exactly what you are getting into before you spend a dime. Whether you are tracking your car, towing heavy loads, or simply want more confidence on steep descents, the right component selection depends on your driving profile. It is not just about your budget.
What sets this guide apart is the data. We have compiled real-world comparison tables, honest limitations of each upgrade path, and decision frameworks that match components to use cases. This is not marketing hype. You will learn why a big brake kit can actually hurt daily-driver performance. You will see why stainless steel lines matter less than fluid choice. You will also learn when a simple pad upgrade delivers 80% of the benefit for 20% of the cost. By the end, you will have a clear upgrade roadmap tailored to your vehicle, your driving style, and your wallet.
What Is a Brake System Upgrade? (And How It Differs from Repair)
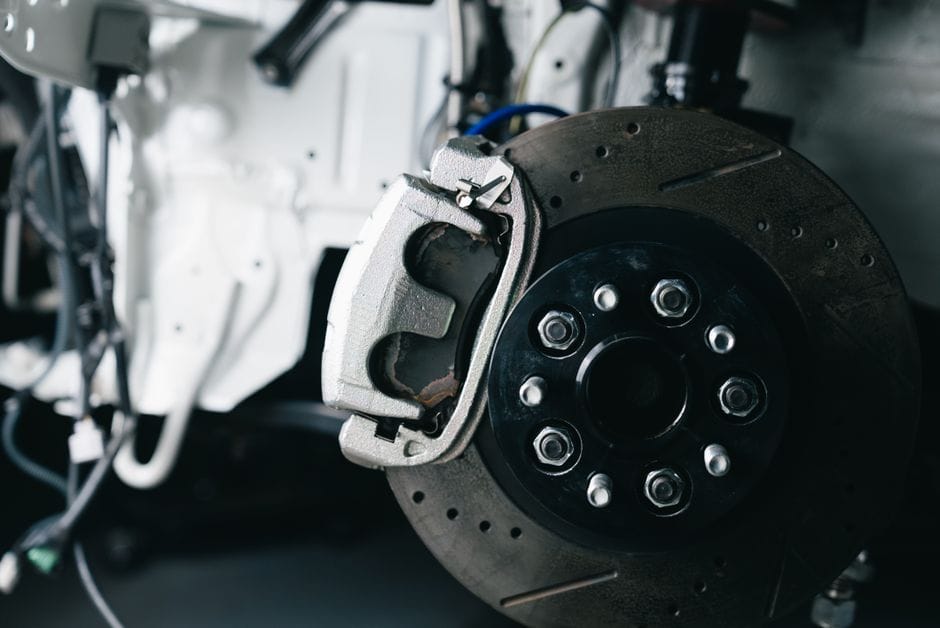
A brake system upgrade means replacing stock components with higher-performance parts to improve stopping power, heat management, or pedal feel. It is not the same as fixing a worn or failed part. When you repair brakes, you restore the system to its original factory performance. When you upgrade, you change how the system behaves beyond what the manufacturer shipped.
Think of it this way: if your brake pads are worn to the backing plate, replacing them with the same OEM-style pads is a repair. Swapping them for a high-friction ceramic compound that handles track heat better is an upgrade. Both involve new brake pads, but the intent and the result are different.
Defining the Upgrade: Beyond OEM Replacement
An upgrade targets one or more of the following performance attributes: increased friction coefficient for shorter stopping distances, larger thermal capacity to resist fade during repeated hard braking, improved pedal feel through stiffer lines or revised caliper designs, or reduced unsprung weight for better suspension response. Each component choice — pads, rotors, calipers, lines, fluid — contributes differently to these goals.
Upgrade vs. Repair vs. Maintenance: Where the Lines Are Drawn
Brake repair restores a failed or worn system to factory specifications. Brake maintenance is routine replacement of consumables like pads and rotors at scheduled intervals. A brake upgrade deliberately changes component specifications to achieve performance beyond OEM design intent. The distinction matters because it affects warranty coverage, insurance considerations, and installation complexity. A repair can be done by any competent shop; an upgrade often requires specialized knowledge of torque specs, bedding procedures, and system compatibility.
The Core Goal: Managing Heat and Friction
The Core Goal: Details
All braking is the conversion of kinetic energy into thermal energy. The brake system’s job is to manage that heat without losing friction. When pads overheat, they glaze and fade. When rotors overheat, they warp or crack. When fluid boils, the pedal goes soft. An upgrade improves the system’s thermal budget — either by adding mass (larger rotors), improving ventilation (drilled or slotted designs), or using materials with higher temperature thresholds (carbon-ceramic or high-temp fluid). Understanding this heat-friction relationship is the foundation of every upgrade decision you’ll make.
For a deeper look at one often-overlooked upgrade component, see our brake pad shim guide — shims can dramatically reduce noise and improve pad-to-rotor contact consistency.
Top Picks


The Starting Point: Assessing Your Current Brake System
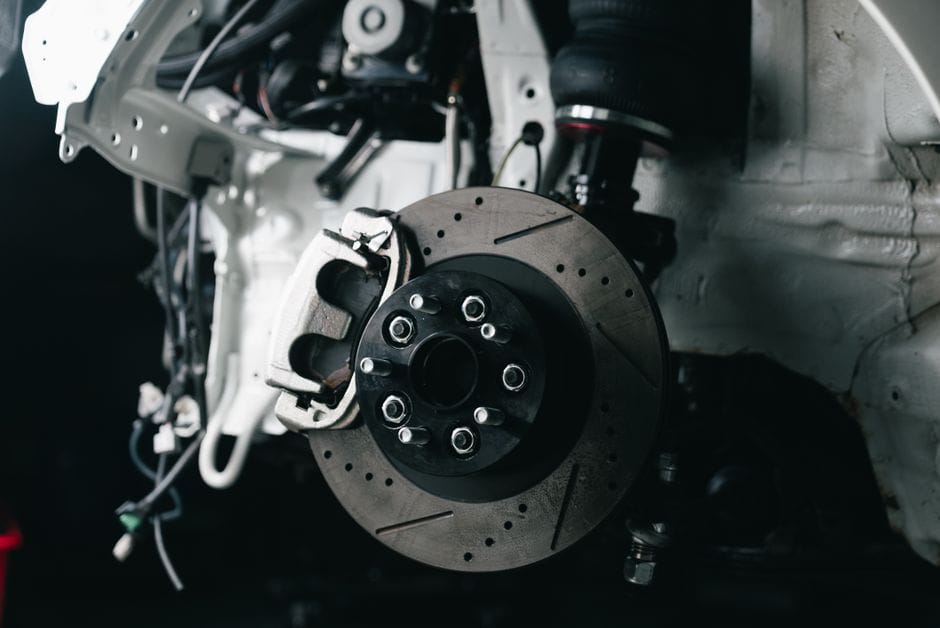
Before you buy anything, you need to know what you’re working with. This section covers how to evaluate your existing brake hardware, driving profile, and vehicle weight to determine which upgrades actually matter for your use case.
Evaluating Your Driving Profile and Vehicle Weight
Your driving habits dictate your brake needs. A daily commuter in flat terrain needs different components than a weekend track driver or someone who tows a trailer through mountain passes. Vehicle weight is equally critical — a 5,000-pound truck generates far more heat per stop than a 2,800-pound sports car. Calculate your vehicle’s gross weight and estimate your typical braking frequency and intensity. This assessment will guide every subsequent component choice.
Inspecting Rotors, Pads, and Fluid Condition
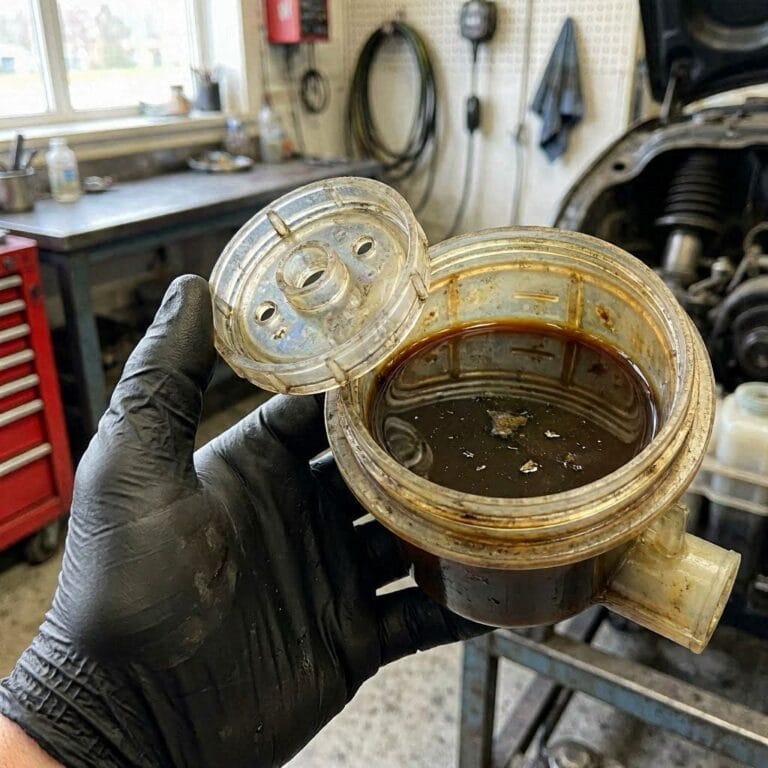
Start with a visual and tactile inspection. Measure rotor thickness with a micrometer and compare to minimum spec stamped on the hub. Check for scoring, cracks, or blue discoloration indicating heat damage. Examine pad thickness and look for uneven wear patterns. Test brake fluid with a moisture meter — if it’s dark or reads above 3% water content, it’s overdue for replacement. These baseline measurements tell you whether you’re upgrading from a healthy system or repairing damage first.
Identifying Weak Points: Fade, Noise, or Pedal Feel
What problem are you trying to solve? If you experience brake fade after several hard stops, your thermal capacity is insufficient. If the pedal feels spongy, you may have air in the lines or flexing rubber hoses. If brakes squeal or vibrate, you may have pad compound issues or rotor runout. Write down your specific complaints — they’ll point you to the right upgrade path. A pad upgrade won’t fix a boiling fluid problem, and stainless lines won’t solve rotor warping.
Brake Pads: The First and Most Impactful Upgrade
Brake pads are the friction interface between your foot and the road. They’re also the cheapest and easiest component to upgrade, making them the logical starting point for most drivers. This section breaks down pad compounds, temperature ranges, and how to match them to your driving style.
Pad Compounds: Organic, Semi-Metallic, Ceramic, and Track Compounds
Organic pads are quiet and gentle on rotors but fade quickly under heat. Semi-metallic pads offer higher friction and better heat transfer but wear rotors faster and can be noisy. Ceramic pads provide a balance of low dust, low noise, and decent heat capacity — ideal for street use. Track compounds (often carbon-metallic or racing-specific ceramics) deliver maximum friction at high temperatures but require warm-up and produce significant dust and noise. There’s no single “best” compound — only the best match for your use case.
Temperature Range and Friction Coefficient Explained
Every pad has an operating temperature window. Below the minimum, friction is poor and stopping distances increase. Above the maximum, the pad glazes and fades. Friction coefficient (μ) is the ratio of braking force to applied pressure — street pads typically range from 0.35 to 0.45 μ, while track pads can exceed 0.55 μ. But a high μ pad that operates at 200°F–1,200°F is useless for a cold morning commute. Match the pad’s temperature envelope to your actual driving conditions, not just the marketing claims.
Street vs. Track vs. Towing Pad Selection
For street driving, choose a ceramic or premium organic pad with low dust and noise. For track days, select a dedicated track compound that performs at 500°F–1,500°F. For towing, you need a semi-metallic or heavy-duty ceramic pad that maintains friction under sustained load and high heat. Many drivers run dual setups — street pads for daily use and track pads for events — but that requires swapping pads regularly. If you can only have one set, prioritize your most demanding use case.
Brake Rotors: Size, Material, and Design Choices
Calipers: Fixed vs. Floating, Piston Count, and Big Brake Kits
Calipers are the clamping mechanism that presses the pads against the rotors. Upgrading calipers can improve clamping force, reduce flex, and add piston area for better modulation. But caliper upgrades are the most complex and expensive part of a brake system upgrade.
Fixed vs. Floating Calipers: Pros and Cons
Floating calipers (single-piston or dual-piston) slide on pins to apply pressure from one side. They’re cheaper, lighter, and adequate for most street vehicles. Fixed calipers (four, six, or more pistons) are rigidly mounted and apply pressure from both sides simultaneously. They offer stiffer feel, more even pad wear, and better heat dissipation — but they require custom mounting brackets, larger wheels, and higher maintenance. For most daily drivers, a high-quality floating caliper with performance pads is sufficient.
Piston Count and Clamping Force
More pistons don’t automatically mean more stopping power — they mean more even pressure distribution across the pad. A four-piston fixed caliper spreads force more uniformly than a single-piston floating caliper, reducing pad taper and improving modulation. However, total clamping force is determined by hydraulic pressure and piston area, not just piston count. A properly sized single-piston caliper can generate as much force as a poorly matched six-piston unit. Match piston area to your master cylinder’s output for optimal pedal feel.
When a Big Brake Kit Makes Sense (and When It Doesn’t)
Big brake kits (BBKs) replace the entire caliper, rotor, and mounting hardware with larger components. They make sense for track cars, heavy tow vehicles, or vehicles with significant power upgrades. They don’t make sense for daily drivers — the added weight, cost, and maintenance requirements often hurt performance in normal driving. A BBK can also upset the brake bias if the front-to-rear clamping force ratio changes. Unless you’re consistently hitting brake temperatures that cause fade, a pad and rotor upgrade will deliver most of the benefit at a fraction of the cost.
Brake Lines and Fluid: The Often-Overlooked Upgrades
Brake lines and fluid are the hydraulic link between your foot and the calipers. They’re cheap, easy to install, and can dramatically improve pedal feel and reliability — yet they’re frequently ignored in upgrade plans.
Stainless Steel Braided Lines vs. Rubber Hoses
Factory rubber hoses expand under pressure, softening the pedal and delaying brake response. Stainless steel braided lines are reinforced with a metal mesh that prevents expansion, delivering a firmer, more immediate pedal. They also resist abrasion and last longer than rubber. The downside is a slightly harsher pedal feel and the need for careful routing to avoid chafing. For most drivers, this is the single best bang-for-buck upgrade available.
Brake Fluid: DOT 3, DOT 4, DOT 5.1, and Racing Fluids
Brake fluid’s boiling point is critical — if it boils, you get vapor lock and a pedal that goes to the floor. DOT 3 and DOT 4 are glycol-based with dry boiling points around 401°F and 446°F respectively. DOT 5.1 has a higher boiling point (around 500°F) but is still glycol-based. DOT 5 is silicone-based and should never be mixed with glycol fluids. Racing fluids like Motul RBF 600 or Castrol SRF offer dry boiling points above 590°F but absorb water faster, requiring more frequent changes. For street and light track use, DOT 4 is sufficient; for heavy track use, step up to a racing fluid.
Bleeding and Flushing: The Right Procedure
Upgrading fluid or lines requires proper bleeding to remove air from the system. Use a pressure bleeder or vacuum bleeder for best results — manual pumping works but risks introducing air. Always bleed in the correct order (typically farthest wheel from the master cylinder first). After installing new lines, do a full flush to remove old fluid and contaminants. Torque the banjo bolts to spec and check for leaks before driving. A proper bleed is essential for pedal feel and safety.
Installation Guide: Step-by-Step Upgrade Process
Installing brake upgrades requires mechanical skill, the right tools, and attention to detail. This section walks through the process from start to finish, including torque specs, bedding, and safety checks.
Tools and Safety Equipment Needed
You’ll need a jack and jack stands, lug wrench, brake caliper tool or C-clamp, torque wrench, flare nut wrench for brake lines, brake cleaner, anti-seize compound, and new crush washers. Safety gear includes gloves, safety glasses, and a respirator if working with brake dust. Never work under a vehicle supported only by a jack — always use jack stands. Brake fluid is corrosive, so protect painted surfaces and skin.
Step-by-Step: Pads, Rotors, and Calipers
1. Loosen lug nuts, jack up the vehicle, and secure on jack stands. Remove the wheel.
2. Remove the caliper mounting bolts and slide the caliper off the rotor. Support it with a wire hanger — never let it hang by the brake hose.
3. Remove the old pads and rotor. Clean the hub surface with a wire brush.
4. Install the new rotor, ensuring it sits flush. Apply anti-seize to the hub contact area (not the friction surface).
5. Compress the caliper piston using a C-clamp or caliper tool. For rear calipers with parking brakes, you may need a special tool to rotate the piston.
6. Install new pads with shims and anti-squeal compound. Reinstall the caliper and torque the bolts to spec.
7. Repeat for all wheels, then bleed the brakes as described above.
Torque Specs and Critical Checks
Torque specs vary by vehicle — always consult your service manual. Common ranges: caliper mounting bolts 25–35 ft-lbs, lug nuts 80–100 ft-lbs, banjo bolts 15–20 ft-lbs. After installation, pump the brake pedal until firm before starting the engine. Check for fluid leaks at all connections. Test drive at low speed, then perform several moderate stops to verify function.
Bedding-In Procedure for New Pads and Rotors
Bedding transfers pad material evenly onto the rotor surface, maximizing friction and preventing glazing. The standard procedure: perform 8–10 moderate stops from
60 mph down to 10 mph without coming to a complete stop, allowing brief cooling between each. Then perform 2–3 hard stops from 60 mph to near-zero to build heat. Finally, drive for 5–10 minutes without using the brakes to cool the system. Do not come to a complete stop during the bedding process, as this can leave uneven pad material on the rotor. After bedding, allow the brakes to cool completely before parking. This process is critical — skipping it can result in poor braking performance, noise, and premature rotor wear.
Cost vs. Performance: Budgeting Your Upgrade
Brake upgrades range from under $100 to over $10,000. Understanding where your money delivers the most performance is essential to avoiding wasted spend. This section provides a realistic cost-benefit breakdown.
Entry-Level Upgrades (Under $300)
A premium pad upgrade (ceramic or high-performance semi-metallic) typically costs $80–$200 per axle. Adding stainless steel braided lines runs $100–$150 per set. These two upgrades deliver the most noticeable improvement in pedal feel and stopping power for the least money. If you’re on a tight budget, start here — you’ll get 80% of the benefit for 20% of the cost of a full big brake kit.
Mid-Range Upgrades ($300–$1,000)
This tier includes performance rotors (slotted or drilled), higher-grade brake fluid (racing DOT 4 or DOT 5.1), and possibly a caliper upgrade to a larger floating unit. You can also add a master cylinder brace to reduce firewall flex. These upgrades are ideal for drivers who experience fade during spirited driving or towing. They require moderate mechanical skill to install but are still manageable for a DIY enthusiast.
High-End Upgrades ($1,000+)
Big brake kits with fixed multi-piston calipers, carbon-ceramic rotors, or full race-spec systems fall into this category. These are for track cars, high-horsepower builds, or vehicles used in competitive motorsport. Installation often requires custom fabrication, wheel upgrades, and professional alignment of brake bias. The cost-to-performance ratio is poor for street use, but for track work, the consistency and fade resistance are unmatched.
Hidden Costs: Wheels, Brackets, and Labor
Larger rotors and calipers often require bigger wheels to clear them. That means new wheels and tires — potentially $1,000–$3,000. Custom mounting brackets may be needed, adding $100–$300. If you’re not doing the installation yourself, labor costs for a brake upgrade can range from $200–$600 depending on complexity. Always factor these into your budget before committing to a specific upgrade path.
Maintenance and Longevity After Upgrading
Upgraded brakes require different maintenance than stock systems. Understanding these requirements will extend component life and ensure consistent performance.
Pad Wear and Rotor Life Expectations
Performance pads typically wear faster than OEM pads — especially track compounds. Expect 20,000–40,000 miles from street performance pads, but only 5,000–10,000 miles from track pads. Rotors also wear faster with aggressive pads. Check pad thickness at every oil change and measure rotor thickness annually. Replace pads before they reach the backing plate to avoid rotor damage.
Fluid Flush Intervals
Racing brake fluid absorbs water faster than standard DOT 3 or DOT 4. If you use racing fluid, flush it every 6–12 months. Standard DOT 4 should be flushed every 2 years. Moisture in the fluid lowers the boiling point, increasing the risk of fade. Use a moisture tester to monitor water content — if it exceeds 3%, flush immediately.
Noise, Dust, and Corrosion Management
Performance pads often produce more dust and noise than OEM pads. Ceramic pads minimize dust but may squeal under light braking. Track pads are notoriously noisy and dusty. Apply anti-squeal compound to pad backing plates and ensure shims are in place. Clean rotor surfaces regularly to prevent rust buildup, especially if the vehicle sits for extended periods. Use a brake cleaner and wire brush on the hub and caliper mounting points during each pad change.
Common Mistakes and How to Avoid Them
Even experienced mechanics make errors during brake upgrades. This section highlights the most frequent pitfalls and how to sidestep them.
Mismatched Components
Installing pads and rotors from different manufacturers without checking compatibility is a common mistake. Pad compounds are formulated for specific rotor materials and surface finishes. Mixing a track pad with a cheap cast iron rotor can cause rapid rotor wear or pad glazing. Always verify that the pad manufacturer recommends your rotor type, and vice versa.
Incorrect Torque and Fastener Issues
Over-tightening caliper bolts can strip threads or warp the caliper. Under-tightening can lead to catastrophic failure. Always use a torque wrench and follow the vehicle manufacturer’s specs. Replace crush washers on banjo fittings every time you disconnect a brake line — reusing them can cause leaks. Use thread locker on caliper mounting bolts if specified by the manufacturer.
Skipping the Bedding Process
Many DIYers install new pads and rotors and immediately drive aggressively. This glazes the pads and ruins the rotor surface. The bedding process is not optional — it’s essential for establishing an even transfer layer. If you skip it, you’ll likely experience poor braking, vibration, and premature wear. If you accidentally glaze the pads, you can sometimes recover them by re-bedding, but often they need replacement.
Ignoring Brake Bias and ABS Compatibility
Upgrading only the front brakes can upset the front-to-rear brake bias, causing the rear wheels to lock up prematurely or the ABS to behave erratically. Some vehicles require a proportioning valve adjustment or a recalibration of the ABS module after a significant upgrade. If you’re changing rotor diameter or caliper piston area, consult a brake specialist to ensure the system remains balanced.
Frequently Asked Questions
Will a brake upgrade void my warranty?
It can. Aftermarket brake components may void the warranty on the brake system itself, and in some cases, on related suspension or drivetrain components. Check your vehicle’s warranty terms and consult your dealer before making changes. Some manufacturers offer performance brake options that maintain warranty coverage.
Can I upgrade just the front brakes?
Yes, but it’s not recommended without also upgrading the rear brakes or adjusting the proportioning valve. Front brakes handle 60–80% of braking force, so upgrading only the front will improve stopping power but may cause rear lockup or ABS issues. For street use, a balanced upgrade of both axles is safer.
How do I know if my brake fluid needs upgrading?
If you experience brake fade after repeated hard stops, or if your fluid is more than 2 years old, consider upgrading to a higher boiling point fluid. Check the fluid’s color — dark or cloudy fluid indicates contamination. Use a moisture tester to measure water content; above 3% means it’s time to flush.
Are drilled rotors better than slotted rotors?
Drilled rotors are better for wet conditions and street use, as they shed water and gas. Slotted rotors are better for track use because they wipe the pad surface without the cracking risk of drilled holes. For most drivers, a high-quality slotted rotor is the safer choice — drilled rotors can crack under extreme heat.
What’s the difference between DOT 4 and DOT 5.1 brake fluid?
Understanding’s the difference between DOT 4 and DOT 5.1 brake fluid?
Both are glycol-based and compatible with each other. DOT 5.1 has a higher dry boiling point (around 500°F vs. 446°F for DOT 4) and is often used in performance applications. DOT 5 is silicone-based and should never be mixed with glycol fluids. Always check your vehicle’s requirements before switching.
Conclusion: Building Your Upgrade Roadmap
A brake system
upgrade is not a one-size-fits-all proposition. It’s a deliberate, step-by-step process that starts with understanding your driving needs, assessing your current hardware, and making informed component choices that work together as a system. The most successful upgrades are built on a foundation of proper maintenance — there’s no point adding performance pads to a system with worn rotors or contaminated fluid.
Start with the basics: upgrade your brake fluid to a high-quality DOT 4, install stainless steel braided lines, and choose a pad compound that matches your primary use case. These three changes will transform pedal feel and fade resistance for a modest investment. From there, evaluate whether larger rotors or a caliper upgrade are justified by your actual driving demands — not by what looks good at a car show.
Remember that every component interacts with the others. A big brake kit without proper fluid is a waste of money. Track pads on a daily driver will frustrate you with noise and dust. And skipping the bedding process can ruin an otherwise excellent setup. Take your time, follow the procedures, and verify your work with a thorough test drive.
Ultimately, the goal of a brake system upgrade is not just to stop harder — it’s to stop with confidence, consistency, and control in every situation you encounter. Whether you’re carving canyon roads, hauling a trailer, or chasing lap times, the right upgrade path is the one that matches your vehicle, your skill level, and your budget. Use the frameworks in this guide to make decisions based on data, not hype, and you’ll end up with a brake system that performs exactly as you need it to.
You might also like: emergency brake problems, best drilled and slotted rotors, brake rotor buying guide