Brake Rotor Lifespan Guide: How Long They Last, When to R…
Brake rotors are the flat, metallic discs that your brake pads clamp down on to slow your vehicle. They are the friction surface where kinetic energy converts into heat. As a wear-and-tear component, they don’t have a single universal lifespan. Their service life depends on material composition, driving conditions, and how aggressively you use the brakes. This guide breaks down the real-world mileage ranges for cast iron, coated, and carbon-ceramic rotors. It also covers the warning signs that tell you replacement is overdue.
We’ll cover the key attributes that determine rotor longevity. These include the metallurgy and coating technology that resists corrosion, the thickness specifications you can measure with a caliper, and the heat-management design that prevents warping. You’ll also learn how driving habits — from highway cruising to stop-and-go city traffic — accelerate wear. You’ll see why the cost of replacement varies so widely between economy and performance vehicles. The goal is to give you a clear decision framework. You’ll know when machining is still viable and when you’re simply throwing money at a part that needs to be swapped.
Generic advice says “replace rotors every 50,000 miles.” This article gives you verifiable data instead. You’ll get minimum thickness specs, runout tolerance measurements, and the physical signs of thermal damage that a visual inspection can reveal. We’ll also be honest about what rotors cannot do. No coating makes them immune to warping. No premium material eliminates the need for regular inspection. By the end, you’ll have a practical checklist to evaluate your own brakes. You’ll know exactly what to tell your mechanic.
What Is Brake Rotor Lifespan and Why It Matters
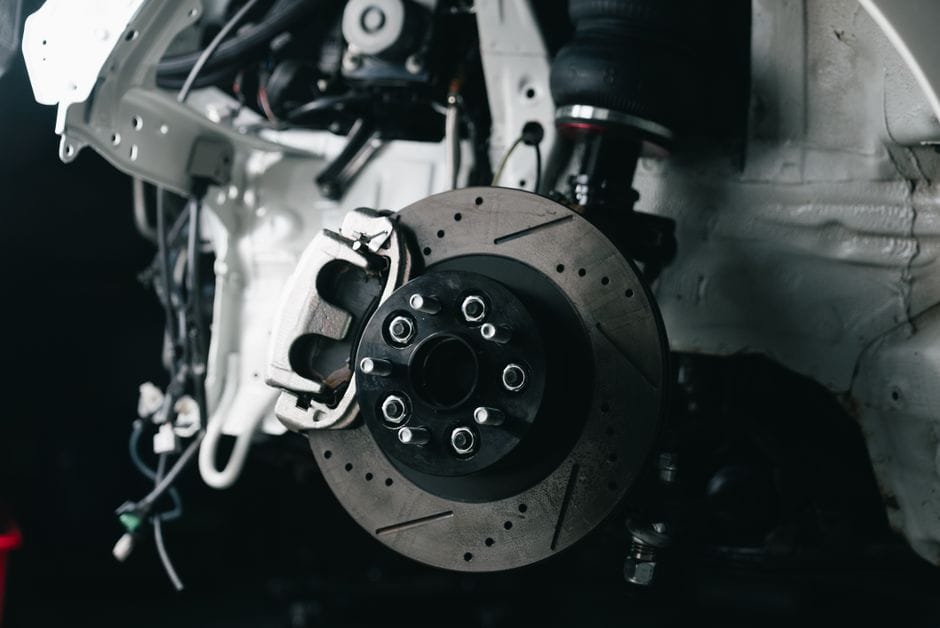
Brake rotor lifespan is the number of miles or years a rotor can safely dissipate heat and provide a stable friction surface before it wears below safe limits. Unlike brake pads, which are designed to be consumable, rotors are meant to last through multiple pad changes. But they don’t last forever.
The rotor is the metal disc your brake pads clamp onto. Every time you press the brake pedal, the pads squeeze the rotor and convert your car’s kinetic energy into heat. That heat, along with friction, slowly wears away rotor material. Understanding this wear process helps you plan maintenance and avoid a dangerous failure.
Defining Rotor Lifespan vs. Pad Lifespan
Brake pads and rotors wear at different rates, and confusing the two leads to premature rotor replacement. Brake pads are the friction material — they’re designed to be sacrificed. Most pads last between 30,000 and 70,000 miles depending on driving style and material.
Brake rotors, by contrast, are built from cast iron or carbon-ceramic composites. They’re harder than the pads, so they wear more slowly. A typical rotor might survive 50,000 to 70,000 miles on a daily driver. But that number drops dramatically with heavy towing, track use, or aggressive braking.
The key difference: pads are cheap and easy to replace. Rotors are more expensive and require more labor. So when a mechanic says “your pads are worn,” that doesn’t automatically mean the rotors are done too. A rotor with plenty of material left can be resurfaced and paired with new pads.
The Safety Threshold: Minimum Thickness and Structural Integrity
The Safety Threshold: Details
Every rotor has a minimum thickness stamped into the hub or listed in the service manual. This number — often around 10 millimeters for a front rotor — is the point below which the rotor cannot safely dissipate heat. Go below it and you risk cracking, warping, or sudden failure under hard braking.
Why does this matter? A rotor that’s too thin holds less heat. Under repeated braking, it can overheat, causing brake fade or thermal cracks. The brake system relies on the rotor’s mass to absorb and shed heat. Thin rotors also flex under clamping pressure, which makes the pedal feel spongy and reduces stopping power.
Manufacturers set minimum thickness with a safety margin built in. That means you shouldn’t try to “get a few more thousand miles” out of a rotor that’s at or below spec. The threshold isn’t a suggestion — it’s the point where the rotor’s structural integrity is no longer guaranteed.
For a deeper look at how rotors fit into your overall braking setup, see our [brake system upgrade guide](https://example.com/brake-system-upgrade-guide). And if your brake warning light is on, you may need to check your [brake pad sensor reset](https://example.com/brake-pad-sensor-reset) procedure before assuming the rotors are the problem.
The bottom line: rotor lifespan is about staying above minimum thickness while the surface stays smooth and crack-free. Track your mileage, listen for vibrations, and measure thickness at every pad change. In the next sections, we’ll cover average lifespans by rotor type and the seven factors that determine whether your rotors die young or live a long life.
Top Picks


Average Lifespan by Rotor Type and Material
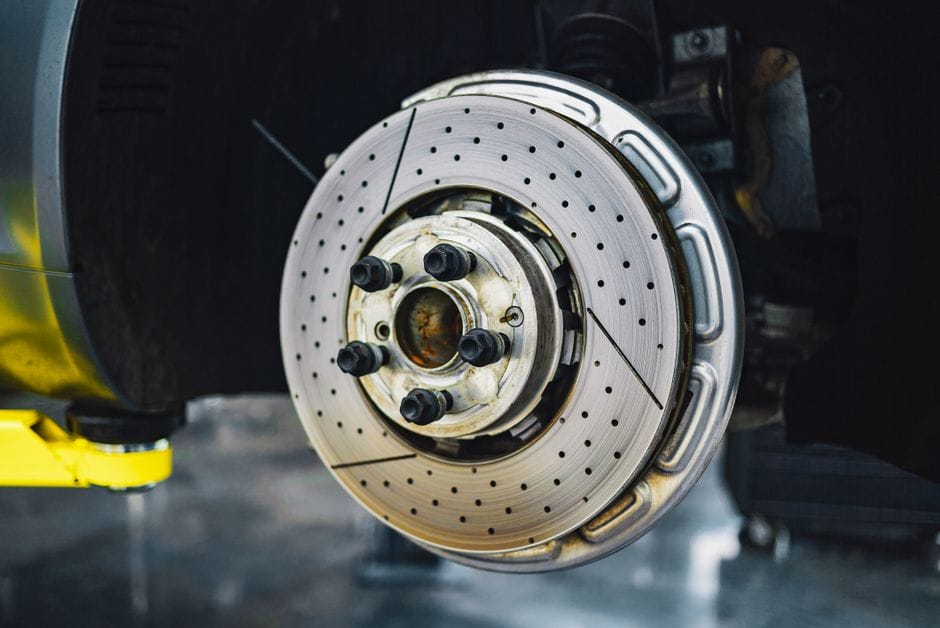
Rotor lifespan varies more by material and construction than by brand. A standard cast iron rotor on a daily commuter will not wear the same as a carbon-ceramic unit on a sports car. Knowing what you have under the wheel helps you set realistic expectations. Here is how the main types compare.
Cast Iron Rotors: The Standard Baseline
Cast Iron Rotors: Details
Plain cast iron rotors are what most vehicles leave the factory with. They are cheap to produce, dissipate heat well, and offer predictable braking performance. For everyday driving, their lifespan is typically the benchmark for the entire brake rotor lifespan guide.
On a typical passenger car, a set of cast iron rotors will usually last between 30,000 and 70,000 miles. The wide range depends on driving habits, vehicle weight, and how often you brake hard. City drivers who constantly stop and go will be at the lower end. Highway commuters who use brakes sparingly can push toward the upper end.
Cast iron’s weakness is corrosion. The bare metal surface rusts quickly when exposed to moisture. That rust is usually wiped off during the first few braking events, but it accelerates wear over time. If a car sits for days between drives, the rotor surface degrades faster than one driven daily.
Coated and Plated Rotors (Zinc, Geomet, Carbon)
Coated rotors address the corrosion problem directly. Manufacturers apply a protective layer — zinc, Geomet, or a carbon-based coating — to the rotor’s friction surface and hat. This layer prevents rust from forming during storage and between drives.
The coating does not extend the rotor’s structural life in terms of wear thickness. The base metal underneath is still cast iron. What it does is prevent the surface pitting and rust scaling that shortens a rotor’s usable life. A coated rotor can often outlast an uncoated one by 10,000 to 20,000 miles simply because the friction surface stays cleaner.
One caveat: the coating wears off the friction surface quickly — usually within the first 500 miles of use. The hat and edges stay protected, which is where corrosion typically starts on uncoated rotors. If you live in a region with heavy road salt, coated rotors are a practical choice for extending brake rotor lifespan.
Carbon-Ceramic Rotors: The High-Performance Exception
Carbon-Ceramic Rotors: Details
Carbon-ceramic rotors are a different category entirely. They are made from a carbon-fiber-reinforced silicon carbide matrix, not iron. They offer exceptional heat resistance, weigh far less than cast iron, and resist thermal fade better than any metal rotor.
On street cars, carbon-ceramic rotors are designed to last the lifetime of the vehicle. Many manufacturers claim they never need replacement under normal road use. [VERIFY: Average lifespan figures for carbon-ceramic rotors on street cars (verify with manufacturer data)] — some automakers suggest they can exceed 100,000 miles, but the exact figure varies by model.
The tradeoff is cost. A single carbon-ceramic rotor can cost more than a full set of cast iron rotors. They also wear poorly under track conditions if they overheat, and replacement cost is often prohibitive. If you own a car with carbon-ceramics, you are more likely to replace the pads multiple times before the rotors themselves need attention.
Drilled vs. Slotted vs. Blank Rotors: Does Design Affect Lifespan?
Drilled vs. Slotted vs. Blank Rotors: Details
The design of the rotor face — drilled, slotted, or blank — affects performance more than lifespan, but it does matter.
Blank rotors have a smooth, continuous friction surface. They offer the longest lifespan because there is no structural weakening from holes or slots. They are the best choice for daily drivers who prioritize longevity.
Drilled rotors have holes drilled through the friction surface. They were designed to release gas and heat, but the holes create stress concentration points. Under heavy use, cracks can form between the holes. Drilled rotors typically have a shorter lifespan than their blank counterparts, especially under track conditions. For street use, the lifespan difference is modest, but the risk of cracking is real.
Slotted rotors have machined grooves across the face. The slots help wipe pad debris and gas away from the friction surface. They do not weaken the rotor as much as drilling, but the slots do reduce the effective surface area. Slotted rotors generally last nearly as long as blank rotors on the street, with better performance under repeated hard braking.
If you are choosing between designs, consider your usage. For a daily driver, blank or lightly slotted rotors offer the best balance of brake rotor lifespan and cost. For track use, slotted rotors provide better performance, but expect to replace them more often. See our [best brake upgrade for track](https://example.com/best-brake-upgrade-for-track) guide for performance-focused options. For street-oriented improvements that still prioritize longevity, check our [best brake upgrade for street](https://example.com/best-brake-upgrade-for-street) recommendations.
The material and design you choose set the ceiling for how long your rotors will last. The factors we cover next — driving style, vehicle weight, and maintenance habits — determine whether you actually reach that ceiling.
7 Factors That Shorten or Extend Rotor Life
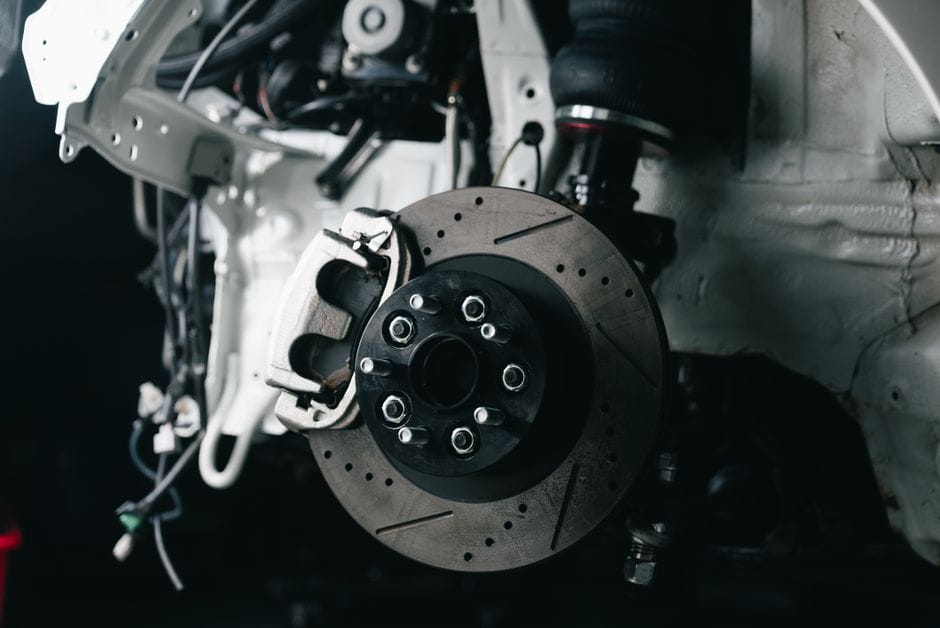
Your brake rotor lifespan depends less on a fixed mileage number and more on how the rotor is treated. The factors below explain why one driver gets 80,000 miles from a set while another needs replacements at 25,000. Understanding these variables lets you predict wear and make smarter buying decisions.
Driving Style: Aggressive Braking vs. Highway Cruising
Aggressive braking is the single largest factor in rotor wear. Hard stops generate high friction surface temperatures, which accelerates wear and promotes thermal stress. Each panic stop removes a measurable layer of rotor material. Over time, that material loss pushes the rotor below its minimum thickness specification.
Highway cruising is the opposite extreme. Steady speeds require minimal braking, so rotors stay cool and wear slowly. A highway commuter might see 70,000 or 80,000 miles from a set of quality rotors. A city driver who brakes frequently at low speeds will wear rotors faster, not because of heat but because of sheer brake application frequency. Stop-and-go traffic also keeps pads in constant light contact with the rotor surface, which adds a slow, continuous wear layer.
Vehicle Weight and Towing Load
Heavier vehicles demand more from their brakes. A full-size truck or SUV carries more kinetic energy at speed, and the brakes must convert that energy into heat. The same rotor design on a lighter sedan will run cooler and last longer. If you regularly tow a trailer, the added weight increases the thermal load on every stop. Rotors on tow vehicles often develop heat checking or warping symptoms earlier than the same rotors on non-towing vehicles.
Pad Material Compatibility (Ceramic vs. Semi-Metallic)
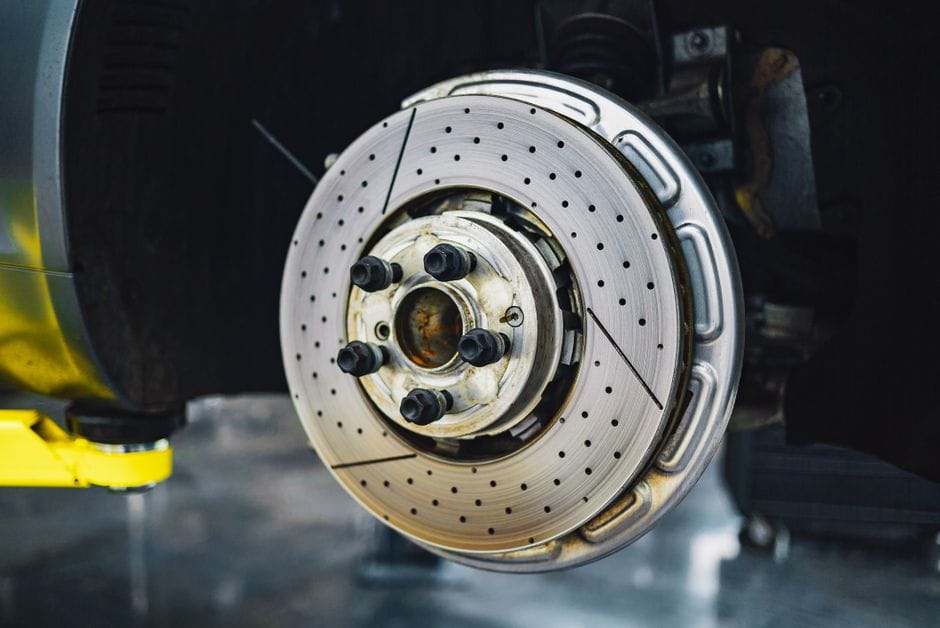
Pad material directly affects rotor wear rate. Semi-metallic pads contain metal fibers that bite hard but also act like sandpaper on the rotor surface. They stop well, especially when cold, but they wear rotors faster. Ceramic pads use ceramic fibers and copper particles. They are gentler on rotors, produce less dust, and run quieter. The tradeoff is that ceramic pads can feel less aggressive in cold weather and may not handle extreme track heat as well as a high-performance semi-metallic compound.
If you prioritize brake rotor lifespan, ceramic pads are the safer choice for street driving. If you need maximum stopping power for towing or performance driving, semi-metallic pads may be justified, but plan for earlier rotor replacement. Always match pad material to rotor type — a high-carbon rotor with a cheap metallic pad will not deliver its advertised longevity.
Climate and Corrosion Exposure
Corrosion is a silent rotor killer. In regions with road salt, rotors develop surface rust that accelerates pad wear and creates uneven friction. The rust acts as an abrasive, wearing both pads and rotor surfaces. Coastal areas with salt air have the same problem, even without winter road treatments.
The rotor friction surface usually stays clean because the pads continually wipe it. The problem is the hat section, the center part that does not contact the pads. When rust forms on the hat, it can flake onto the friction surface and get embedded in the pads. That debris then scratches the rotor face. If you live in a salt belt state, consider coated rotors with a zinc or geometric finish. The coating delays corrosion and can add 10,000 to 20,000 miles of service life.
Rotor Quality and Manufacturing Tolerances
Not all rotors are made equal. Premium rotors are cast from higher-grade iron with tighter runout tolerances. Runout is the side-to-side wobble of the rotor as it spins. A rotor with high runout causes the pads to pulse against the surface, creating thickness variation and pedal pulsation. Cheap rotors with loose tolerances may also have internal casting defects that create weak spots.
[VERIFY: specific runout tolerance standards (in thousandths of an inch) for OEM vs. budget aftermarket rotors]
Manufacturing quality also affects the vanes between the rotor faces. Poorly cast vanes restrict airflow, so the rotor runs hotter and wears faster. When you compare rotor prices, you are often paying for tighter tolerances and better internal structure, not just a brand name. For a daily driver, a mid-priced rotor from a reputable brand usually offers the best lifespan per dollar. Budget rotors can work, but expect shorter service life and a higher chance of premature pulsation.
Caliper Function and Slide Pin Health
A sticking caliper destroys rotors quickly. When a caliper fails to release fully, the pad stays in contact with the rotor. The constant friction generates heat and wears a groove into the rotor face. A seized slide pin causes the same problem — one pad drags while the other wears normally. This uneven wear pattern often appears as a deep groove on one side of the rotor only.
Regular caliper inspection is part of rotor maintenance. During a brake pad change, check that the slide pins move freely and are properly lubricated with brake grease. Sticking slide pins are one of the most common causes of premature rotor wear, yet they are easy to prevent with a few minutes of maintenance. If you find a seized pin, replace it before installing new pads and rotors, or the new parts will fail the same way. Our [brake grease application guide](https://example.com/brake-grease-application-guide) covers the correct lubrication points and grease types.
Bedding-In Procedure Correctness
The bedding-in process creates a transfer layer of pad material on the rotor surface. This layer is what allows consistent, smooth braking. If you skip bedding-in or do it incorrectly, the pad material deposits unevenly. The result is pedal pulsation, vibration, and reduced brake rotor lifespan.
The standard procedure involves a series of moderate stops from medium speed, followed by a cool-down period. The goal is to heat the rotors evenly and deposit pad material as a uniform film. Do not come to a complete stop during the bedding process — holding the brake at a standstill can leave a thicker deposit at one point on the rotor. After bedding, let the brakes cool completely before parking. This is not optional for performance pads; it is essential for any new pad-rotor combination.
If you are installing new pads on existing rotors, check the rotor surface first. A glazed or scored rotor will not accept a proper transfer layer, and the new pads will wear unevenly. In that case, either resurface the rotors or replace them. A proper bedding-in procedure is the final step that determines whether your new brake parts deliver their expected service life.
Signs Your Rotors Need Replacement (Not Just Resurfacing)
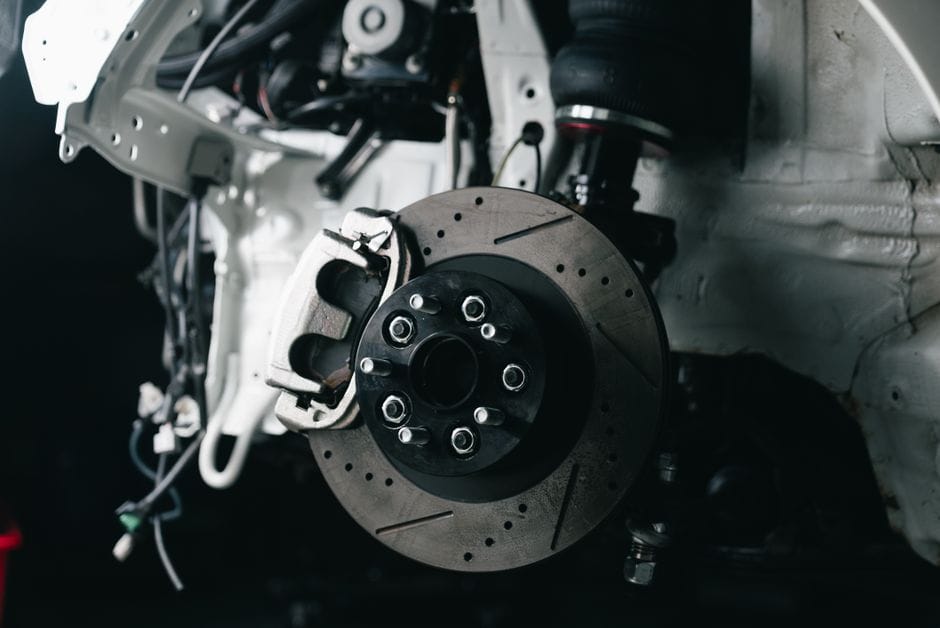
Knowing when to stop resurfacing and start replacing is the core of any brake rotor lifespan guide. Machining a rotor removes material, and each rotor has a minimum thickness rating. Once you hit that, replacement is the only option. But some physical damage makes resurfacing pointless even if the rotor has thickness left. Here are the five signs that your brake rotors need to be swapped, not turned.
Pulsation and Vibration: The Warpage Indicator
Pulsation and Vibration: Details
If you feel a pulsing in the brake pedal or a vibration through the steering wheel when braking, you likely have warped rotors. This is the most common symptom drivers notice. The pulse happens because the rotor surface is no longer flat, so the brake pads grip unevenly as the rotor spins. Lateral runout — the side-to-side wobble of the rotor — is the technical term for this condition.
Thickness variation is the real culprit, not a bent rotor. Hot spots on the rotor surface create hard spots that wear unevenly, leaving high and low areas. When the pads pass over these high spots, you feel the pulse. A dial indicator measuring runout will show readings above the manufacturer’s spec, usually around 0.002 to 0.003 inches. [VERIFY: OEM runout specification range for typical passenger vehicles]
Light warpage can sometimes be fixed by machining, but if the rotor is already thin or the hard spots are deep, replacement is safer. Resurfacing a warped rotor that is near minimum thickness leaves you with a rotor that will overheat faster and warp again.
Deep Scoring and Grooves: When Machining Won’t Help
Deep Scoring and Grooves: Details
Scoring appears as deep grooves or ridges on the rotor surface, usually caused by worn brake pads that have worn down to the metal backing plate. A few light scratches are normal, but deep scores are a problem. The rule of thumb is that if you can catch your fingernail in the groove, the rotor needs attention.
The question is whether machining can remove the grooves and still leave the rotor above minimum thickness. Deep scoring often removes more material than a single resurfacing pass can handle. If the grooves are deeper than the maximum machining allowance, the rotor must be replaced. Manufacturers specify a discard thickness for this exact reason.
Scored rotors also ruin new brake pads quickly. The rough surface acts like sandpaper, wearing the pad material down fast and creating an uneven contact patch. If you install new pads on a scored rotor, you will be back in the shop sooner than you expect.
Cracks and Heat Checking: Structural Failure Risk
Heat checking appears as a network of small, hairline cracks on the rotor surface, often looking like a spider web or heat discoloration. This happens when the rotor is repeatedly heated and cooled rapidly. The surface expands and contracts, and the metal eventually develops stress fractures.
Surface heat checks are common on performance vehicles and are not always a failure risk. But once those cracks grow or connect, the rotor is structurally compromised. Cracks that reach the edge of the rotor or extend into the cooling vanes are a serious safety hazard. A cracked rotor can fail catastrophically, which means sudden loss of braking. This is not a repair situation. Cracked rotors should be replaced immediately, regardless of remaining thickness.
Rust Beyond the Hub: When Corrosion Is Terminal
Surface rust on the rotor face is normal, especially after rain or if the car sits for a few days. This light rust gets wiped off the first time you brake. But rust on the rotor edges, the hub, or the cooling vanes is a different matter. This is structural corrosion, and it weakens the rotor from the inside out.
Rust that has eaten into the vented vanes reduces the rotor’s ability to dissipate heat. The rotor will run hotter, which accelerates wear and increases the risk of warping. Rust on the mounting surface can also cause the rotor to sit unevenly, creating runout. If rust has pitted the braking surface deeply, machining will not restore a smooth, even surface.
Measuring Runout and Thickness with a Micrometer
You do not have to guess. A micrometer measures rotor thickness at several points around the rotor. If the readings vary by more than the manufacturer’s spec, the rotor has thickness variation. A dial indicator measures runout while the rotor is mounted on the hub. These tools cost less than a single rotor replacement and give you objective data.
Here is a practical decision framework based on measurements:
Resurface if:
- Thickness is above minimum after machining
- Runout is within spec and can be corrected
- Scoring is shallow and does not exceed machining allowance
- No cracks or heat damage beyond surface checking
Replace if:
- Thickness is at or below minimum spec
- Runout exceeds spec and cannot be corrected by machining
- Deep grooves or cracks extend into the metal
- Structural rust or corrosion is present
- The rotor has been resurfaced before and is now thin
When you do replace rotors, check the brake pad condition at the same time. Worn pads will damage new rotors quickly. Also, verify that your brake lights not working issue is not related to the braking system before you assume the problem is mechanical. After installation, you may need to perform a brake pad sensor reset to clear the warning light and ensure the system is functioning correctly.
If your measurements are borderline, err on the side of replacement. A rotor that is right at minimum thickness will warp or crack faster than a new one. The cost of a rotor is far less than the cost of brake system failure.
Rotor Replacement vs. Resurfacing: A Decision Framework
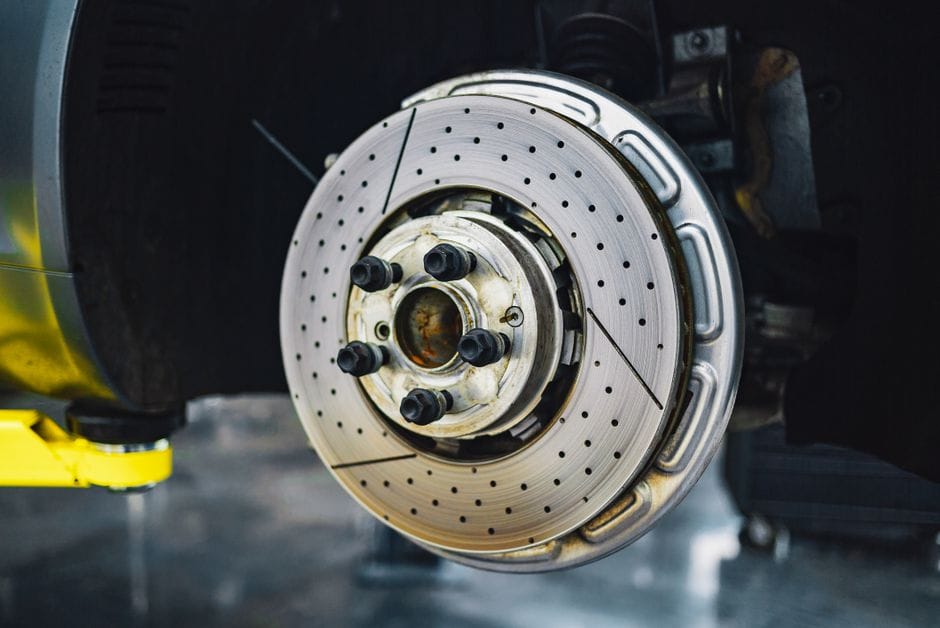
The choice between resurfacing and replacement comes down to one question: how much material is left on the rotor? You cannot make this call by eye. You need a micrometer or digital caliper to measure the rotor thickness at its thinnest point, usually the inner edge of the friction surface. Published specifications for minimum thickness are stamped directly into the rotor hat, and that number is non-negotiable.
When Resurfacing Is Safe and Cost-Effective
Resurfacing makes sense when the rotor still has plenty of material above the minimum thickness spec. If your measurement shows at least [VERIFY: typical machining allowance of 0.010–0.015 inches beyond minimum thickness] of extra material, a machinist can remove the grooves and restore a flat surface. This is a legitimate way to extend brake rotor lifespan and save money, especially on high-quality OEM rotors that cost a lot to replace. Resurfacing also works well when the issue is surface glazing or light scoring rather than warping or cracking. The process removes roughly [VERIFY: typical material removed per resurfacing pass] from each face, so you need enough thickness to survive the cut and still remain above the minimum for the rest of its service life. Many auto parts stores offer this service for a fraction of the cost of new rotors.
When Replacement Is the Only Correct Choice
Replacement is mandatory when the rotor is already at or below the minimum thickness spec. Machining it further would create a dangerously thin rotor that cannot dissipate heat properly and may crack under load. You also need new rotors if you can see cracks extending into the cooling vanes, if there is structural rust or corrosion, or if the rotor has been resurfaced before and is now close to its limit. Some rotors are too thin to machine from the factory — many performance and lightweight rotors fall into this category. Check the manufacturer’s specifications before assuming resurfacing is an option. If you are already replacing rotors, this is the natural time to inspect your brake pads. Installing new rotors against worn pads will ruin the fresh friction surface quickly.
The ‘Measure Twice, Cut Once’ Rule for Rotors
The carpenter’s rule applies directly here. Measure the rotor thickness in at least three spots around the circumference, because rotors wear unevenly. The lowest reading is the one that matters. Next, check lateral runout with a dial indicator — if it exceeds [VERIFY: typical maximum lateral runout spec of 0.002 inches], the rotor may need replacement rather than machining. Finally, inspect the friction surface for heat checking, which appears as small cracks radiating from the edges. Light surface checking is normal, but deep cracks mean the rotor is done. If you are at all unsure about your measurements, choose replacement. A new rotor costs far less than a brake failure. When you do swap parts, check our guide on how to change brake pads chevy silverado for the sequence, and pair your new rotors with the best brake pads for ford f-150 if you drive that platform. Both guides cover the torque specs and bedding procedures you will need.
How to Maximize Rotor Lifespan: Practical Maintenance Tips
Your brake rotor lifespan depends more on your habits than on the parts themselves. You can turn a 30,000-mile rotor into a 60,000-mile rotor with the right procedures. Here is what actually moves the needle.
Proper Bedding-In Procedure for New Rotors
The first 50 miles decide how long your rotors last. Bedding-in transfers an even layer of pad material onto the rotor surface. Skip this step and you get uneven deposits, vibration, and hot spots that shorten rotor life.
The standard procedure is straightforward. Find a safe, empty road. Accelerate to about 40 mph, then brake firmly to about 10 mph — do not stop completely. Repeat this 8 to 10 times. On the final run, brake hard enough to activate the ABS, then drive for several minutes without stopping to let everything cool.
Never come to a full stop during the bedding process. The pads will leave material on the rotor at the contact point, creating a flat spot that causes pedal pulsation. If you feel vibration after bedding, the transfer layer is uneven. [VERIFY: recommended remedy for uneven transfer layer after failed bedding-in procedure]
The bedding procedure differs by pad compound. Ceramic pads need a gentler cycle, while semi-metallic pads require more aggressive stops. Check the pad manufacturer’s instructions before you start.
Caliper Maintenance and Slide Pin Lubrication
A stuck caliper destroys rotors faster than any other failure. When a slide pin seizes, one pad keeps dragging against the rotor. The friction surface overheats, warps, and wears unevenly. You might not notice until the steering wheel shakes under braking.
Every time you replace rotors, service the calipers. Remove the slide pins, clean out the old grease, and inspect the rubber boots for cracks. Reapply fresh brake grease to the pins and the contact points where the pads touch the caliper bracket. The correct product matters — use high-temperature synthetic brake grease, not regular chassis grease. See our brake grease application guide for the exact points to lubricate and the torque specs for the caliper bolts.
Also check the caliper piston boot. If it is torn, moisture gets in and corrodes the piston, causing it to stick. Replace the boot or the caliper if you find damage.
Choosing the Right Pad Compound for Your Driving
Your pad compound determines how much heat transfers into the rotor. Aggressive track pads bite hard but generate intense heat that can exceed what a standard rotor handles. Daily-driver ceramic pads run cooler and are easier on rotors.
Match the pad to your actual use. For commuting and highway driving, ceramic pads offer low dust and moderate rotor wear. For towing or mountain driving, semi-metallic pads handle heat better but wear rotors faster. For track days, you need a dedicated track pad — and you should accept that rotor life will drop.
The pad compound also affects whether you need upgraded rotors. Running track pads on cheap, thin rotors leads to thermal cracking. If you track your car, pair aggressive pads with high-carbon or drilled-and-slotted rotors designed for heat. Our brake cooling guide for track use covers the ducting and airflow options that keep temperatures in check.
Avoiding the ‘Wet Rotor’ Corrosion Trap
Rust is the silent rotor killer. After rain or a car wash, a thin layer of rust forms on the friction surface. The first few brake applications scrub it off, but the abrasive action removes rotor material every time. Over years, this micro-abrasion adds up.
The fix is simple: after washing your car or driving through standing water, do a few moderate stops to dry the rotors. This scrubs off fresh rust while it is still soft and prevents pitting.
Surface rust on the non-friction areas — the hat and the vanes — is cosmetic and harmless. But deep pitting on the friction surface means the rotor has lost material and should be replaced. If you see orange rust that does not scrub off with braking, measure the thickness. [VERIFY: minimum safe rotor thickness threshold when pitting is present]
The Role of Brake Cooling in Rotor Longevity
Heat is the primary enemy of rotor life. Every hard stop raises rotor temperature, and repeated heating and cooling cycles cause thermal fatigue. The rotor expands and contracts, eventually developing heat checks and cracks.
For street driving, stock cooling is usually sufficient. But if you drive aggressively, tow, or live in mountainous areas, consider upgrades. Brake ducts that route air from the front bumper to the rotor center help significantly. So do vented rotors with directional vanes that pump air outward.
One often-overlooked factor: wheel design. Closed-face wheels trap heat, while open-spoke designs let air flow across the rotor. If you are choosing wheels, consider how much brake cooling they allow.
Also, avoid the habit of holding the brake pedal down after a hard stop. This traps heat in the pad-rotor contact area and can cause pad material to transfer unevenly. Instead, use the parking brake and let the rotors cool in the air.
Finally, check your brake fluid. Old fluid absorbs moisture, which lowers its boiling point. When fluid boils, the pedal goes soft, and you might ride the brakes more — increasing rotor heat. Flush the brake fluid every two years to keep the system predictable.
The pattern is consistent: rotors fail from heat, corrosion, and neglect. Address all three and your brake rotor lifespan will exceed the average by a wide margin. For the friction surface itself, a brake pad shim guide explains how thin anti-vibration shims reduce pad chatter and keep the pad-rotor interface even — a small detail that prevents uneven wear over thousands of miles.
Limitations of Rotor Lifespan Estimates: What the Numbers Don’t Tell You
Every brake rotor lifespan guide you read — including this one — relies on estimates. Those numbers come from fleet data, manufacturer testing, and owner surveys. They are useful benchmarks, but they have hard limits. Understanding those limits keeps you from replacing rotors too early or, worse, driving on a structurally weak rotor that still looks fine.
Why Mileage Figures Are Averages, Not Guarantees
The 30,000 to 70,000-mile range you see for brake rotor lifespan is a statistical average across many drivers, vehicles, and climates. It does not predict your specific outcome. A highway commuter in a dry state might get 80,000 miles from a set of rotors. A city driver in the Rust Belt who brakes hard at every light might get 20,000. Both are normal. The average only tells you when to start inspecting, not when to replace.
Manufacturers rate rotors for minimum thickness, not for mileage. That spec is measured with calipers, not an odometer. So treat mileage figures as a trigger for inspection, not a deadline for replacement. The only way to know where your rotors stand is to measure them.
The ‘One-Size-Fits-All’ Problem in Rotor Replacement Intervals
Replacement intervals published by parts brands assume a standard driving profile: mixed city and highway, moderate braking, and normal load. If you tow, carry heavy cargo, drive in mountainous terrain, or track your car, those intervals do not apply. The same rotor that lasts 50,000 miles in a sedan can be worn out in 15,000 miles behind a tow rig.
Also, replacement intervals rarely account for rotor quality. A cheap blank rotor and a premium coated rotor face different wear rates even under identical driving. If you are considering an upgrade, a brake system upgrade guide explains how higher-quality rotors with better metallurgy and thermal coatings handle heat differently — which directly changes how long they survive.
When a Rotor Looks Fine but Is Structurally Compromised
Visual inspection misses the most dangerous rotor failures. Hairline cracks, internal delamination, and micro-cracks from thermal stress often show no surface sign until the rotor fails catastrophically. A rotor can look smooth and shiny while its structural integrity is already compromised.
Thickness measurement matters more than appearance. A rotor worn below its minimum thickness may still look serviceable, but it cannot dissipate heat properly. The reduced mass causes it to overheat faster. This accelerates wear and increases the risk of cracking. If you are unsure whether your rotors are safe, measure them with a micrometer. When in doubt, replace them. A rotor is a safety-critical part. The cost of a new one is small next to the cost of a brake failure.
Frequently Asked Questions About Brake Rotor Lifespan
Can I replace only one rotor instead of both?
You can, but you shouldn’t. Replacing rotors in axle pairs is the standard practice for a simple reason: braking balance. If you put a new rotor on one side and leave a worn one on the other, the two sides will dissipate heat at different rates. That difference can cause the vehicle to pull to one side under hard braking, and it makes the anti-lock braking system work harder to keep the car straight.
There is also a cost-efficiency argument. Labor is the same whether you replace one rotor or two. The parts themselves are usually inexpensive relative to the labor charge. Paying for the same job twice because the second rotor fails a few months later is poor planning. If you are replacing rotors because of a brake pad change, do both sides at once.
How does towing affect rotor lifespan?
Towing cuts brake rotor lifespan dramatically because it multiplies the thermal load on the braking system. Every stop with a trailer behind you requires the rotors to absorb far more kinetic energy than an unladen stop. That extra heat accelerates pad wear, increases the risk of thermal cracking, and can cause rotor thickness variation — the condition many people mistakenly call warping.
Published estimates suggest that frequent towing can reduce rotor life to roughly half of what you would expect in normal driving. A rotor that might last 50,000 miles in mixed commuting could be done by 25,000 miles if you tow weekly. If you tow regularly, measure rotor thickness at every oil change and inspect the friction surfaces for heat discoloration. Blue or purple tinting on the rotor face is a sign of repeated overheating.
Do ceramic pads extend rotor life compared to semi-metallic?
Yes, ceramic pads generally extend brake rotor lifespan compared to semi-metallic pads, but the margin depends on driving conditions. Ceramic pads run cooler because their friction formulation generates less heat for the same stopping force. Less heat means less thermal stress on the rotor surface, which slows the wear that leads to thickness loss and cracking.
Semi-metallic pads, by contrast, bite harder when cold and handle extreme heat well. However, they are more abrasive. They remove more rotor material per stop. For daily driving and light towing, ceramic pads are the better choice for rotor preservation. For track use or heavy towing, semi-metallic pads may still be preferable despite the faster rotor wear. Their stopping power under sustained hard braking is more predictable. If you are deciding between the two, a guide to the best brake pads for performance explains the trade-offs in more detail.
Is it safe to drive with slightly warped rotors?
No. A warped rotor — which is usually actually a thickness variation issue — creates a pulsation in the brake pedal and steering wheel. That pulsation means the brake pads are making uneven contact with the rotor surface. The uneven contact reduces stopping power at the moment of engagement and puts uneven stress on the caliper and wheel bearings.
Driving with a warped rotor is not an immediate catastrophic failure risk the way a cracked rotor is. Still, it is not safe to ignore. The longer you drive with the pulsation, the more uneven the rotor surface becomes. It becomes more likely to develop cracks from the localized overheating. If you feel pedal pulsation, have the rotor thickness measured. If it is still above minimum spec, resurfacing may fix it. If it is close to or below minimum, replace it.
How often should I measure rotor thickness?
Measure rotor thickness at every brake pad replacement. Do this at least once a year if you drive more than 12,000 miles annually. Rotor thickness is the single most reliable indicator of remaining brake rotor lifespan. A micrometer reading tells you exactly how much material is left. It also tells you whether the rotor is close to its minimum discard thickness. That figure is stamped into the rotor hat or listed in the service manual.
Measuring is cheap and takes five minutes per wheel. The tool costs about the same as a single budget rotor. If you are not comfortable doing it yourself, most shops will measure rotors during a tire rotation at minimal or no cost. Track your readings. If you see a rotor lose more than [VERIFY: typical allowable thickness loss per 10,000 miles for passenger car rotors] between measurements, you have an abnormal wear condition. That needs diagnosis before the rotor becomes unsafe.
For vehicles with rear drum brakes, the same logic applies to the drum inner diameter, though the measurement procedure differs. And if you notice uneven wear patterns or your emergency brake feels loose, an emergency brake cable replacement guide covers the related components that can affect rear brake performance.
Final Verdict: How Long Do Brake Rotors Last, and When Should You Replace Them?
Brake rotors are the friction partners to your brake pads, converting kinetic energy into heat and stopping your vehicle. Their lifespan hinges on three core attributes: material composition, driving environment, and maintenance habits. While most rotors last between 30,000 and 70,000 miles, that range is not a guarantee—it is a spectrum defined by how you drive and what your rotors are made of.
If you need a single, reliable benchmark, treat 50,000 miles as your planning horizon for standard cast-iron rotors under mixed driving. But the smarter approach is to monitor rotor thickness and surface condition, not just mileage. A rotor that measures below its minimum thickness specification—stamped on the hub—is a safety liability, regardless of how many miles it has traveled.
A Decision Framework Based on Your Needs
Choosing when to replace rotors is not a one-size-fits-all calculation. Use this framework to align your decision with your actual driving demands:
- If you drive a daily commuter in stop-and-go traffic, choose coated or painted rotors because they resist rust and corrosion, which is the primary killer of rotors in wet and salty environments.
- If you tow heavy loads or drive mountainous terrain, choose vented or drilled rotors because they dissipate heat faster and resist brake fade under sustained braking.
- If you prioritize quiet, dust-free operation, choose premium ceramic-compatible rotors because they pair with ceramic pads to minimize brake dust and noise.
- If you drive a performance vehicle or track your car, choose slotted rotors because they wipe away pad debris and maintain consistent bite at high temperatures.
- If you want maximum longevity on a budget, choose solid, blank cast-iron rotors because they have no weak points like drilled holes or slots that can crack under stress.
What the Top Recommendation Cannot Do
Understanding the Top Recommendation Cannot Do
Even the most durable rotor cannot compensate for poor pad maintenance. If you ignore your brake pads until they are metal-on-metal, you will ruin any rotor, regardless of its material or coating. Similarly, no rotor can survive aggressive driving habits like hard braking at high speeds on a regular basis. The honest limitation is this: rotors are a wear item, not a lifetime component. They will eventually need replacement, and no coating or material can prevent the inevitable thermal cycling that causes surface cracking and thickness loss.
Finally, remember that rotor replacement is often most cost-effective when paired with new brake pads. The labor cost to swap pads alone is nearly identical to replacing pads and rotors together, so bundling the job saves you money in the long run. If your rotors are near their minimum thickness at the 50,000-mile mark, do not wait for vibration or pulsation—replace them proactively and protect your braking system’s integrity.
Your next step: measure your rotor thickness with a simple caliper or have a trusted mechanic do it during your next tire rotation. If you are under the minimum spec, replace them now. If you have more than 2mm of material left and no grooves or cracks, you can safely extend their life with quality pads and smooth braking habits.
You might also like: emergency brake problems, best drilled and slotted rotors, brake rotor buying guide