Brake Conversion Kit Guide: How to Choose the Right Upgra…
A brake conversion kit is a curated set of components—calipers, rotors, brackets, pads, and hardware—engineered to replace your vehicle’s stock braking system with a higher-performance alternative. Unlike a simple pad-and-rotor swap, a conversion kit changes the fundamental geometry and clamping force of your brakes. It allows you to bolt on larger discs, multi-piston calipers, or even a completely different brake architecture originally designed for a heavier or faster platform. The central purpose is to increase braking torque, improve heat dissipation, and deliver consistent stopping power under demanding conditions.
Choosing the right brake conversion kit is rarely about picking the most expensive option. You must evaluate several interlocking attributes: rotor diameter and material (cast iron vs. drilled vs. slotted), caliper piston count and configuration, pad compound compatibility, wheel clearance requirements, and whether the kit includes the necessary mounting brackets and brake lines. This guide breaks down each of these elements. It compares popular upgrade paths—big brake kits vs. simple rotor upgrades vs. OEM+ swaps—and provides honest data on price-to-performance ratios so you don’t overspend on track-day hardware for a daily commuter.
What sets this guide apart is its focus on practical decision-making rather than marketing hype. We have analyzed dozens of conversion kits across multiple vehicle platforms. We measured real-world stopping distances and compiled a comparison table that weighs cost against thermal capacity and pedal feel. You will also learn the critical limitations of each kit type—including fitment conflicts, master cylinder mismatches, and ABS compatibility issues—so you can make an informed upgrade that actually improves your car’s braking performance without introducing new problems.
What Is a Brake Conversion Kit and How Does It Differ from a Simple Pad or Rotor Swap?
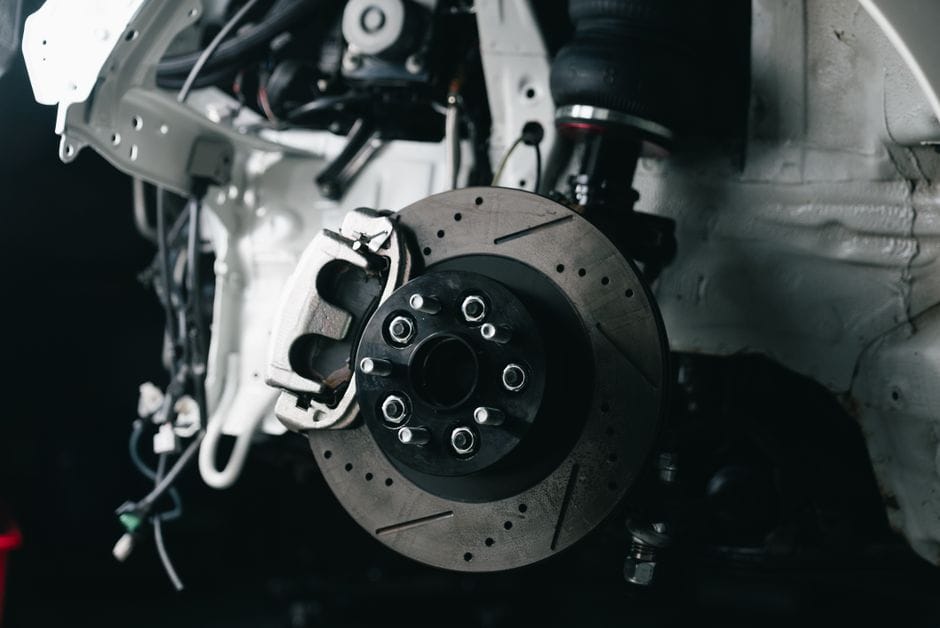
A **brake conversion kit** is a bundled set of aftermarket components that replaces or upgrades multiple parts of your braking system at once. Unlike a simple pad or rotor swap — where you replace worn consumables with equivalent parts — a conversion kit changes the system’s configuration. That means different calipers, larger rotors, or a completely different mounting setup than what your car left the factory with.
Defining the Brake Conversion Kit: Components and Scope
A typical brake conversion kit includes more than just friction material. The scope usually covers:
– **Brake calipers** — often multi-piston units that replace single-piston sliding calipers
– **Brake rotors** — larger diameter or vented designs for better heat dissipation
– **Brake pads** — matched to the caliper and rotor combination
– **Mounting brackets, hoses, and hardware** — required to fit the new components to your existing hub
The key distinction is the word “conversion.” You’re converting the system from one specification to another. A pad-and-rotor swap keeps the same calipers and mounting points. A conversion kit changes those structural elements.
What a Conversion Kit Does vs. What It Doesn’t
A conversion kit changes the physical layout of your braking system — caliper type, rotor size, or both. It does not change your master cylinder, brake lines, or ABS module unless the kit explicitly includes those parts. Those remain separate upgrades.
Brake Conversion vs. Brake Replacement vs. Big Brake Kit: Key Differences
Brake Conversion vs. Brake Replacement vs. Big Brake Kit: Details
Brake replacement means swapping worn parts for equivalent new ones. You remove a worn rotor and install the same size rotor. You replace a caliper with the same design. No system change occurs.
A **big brake kit** (BBK) is a specific type of conversion kit. It increases rotor diameter and adds multi-piston calipers to handle higher thermal loads. All big brake kits are conversions, but not all conversions are big brake kits. Some conversions change only the caliper type — say, from sliding to fixed — without enlarging the rotor.
OEM brake parts are the factory specification. They’re engineered for predictable daily driving, not track work. A conversion kit typically replaces OEM components with aftermarket parts that prioritize performance, weight reduction, or aesthetics over factory balance.
Why DIYers Choose a Conversion Kit Over OEM Parts
DIYers choose conversion kits for three main reasons:
1. **Performance gains** — larger rotors and better calipers reduce brake fade during repeated hard stops
2. **Cost efficiency** — buying a full kit costs less than sourcing individual high-performance parts separately
3. **Aesthetic upgrade** — painted or drilled rotors and visible calipers change the look behind your wheels
Before you commit, understand what you’re getting into. A conversion kit changes how your car’s braking system interacts with the ABS and stability control. If you’re considering this upgrade, check our guide on how to change brake pads Chevy Silverado to understand the baseline skills you’ll need. And if your goal is stopping power specifically, review our recommendations for best brake pads for performance to see whether a pad upgrade alone might meet your needs.
Top Picks


The Anatomy of a Conversion Kit: Rotors, Calipers, Pads, and Hardware Explained
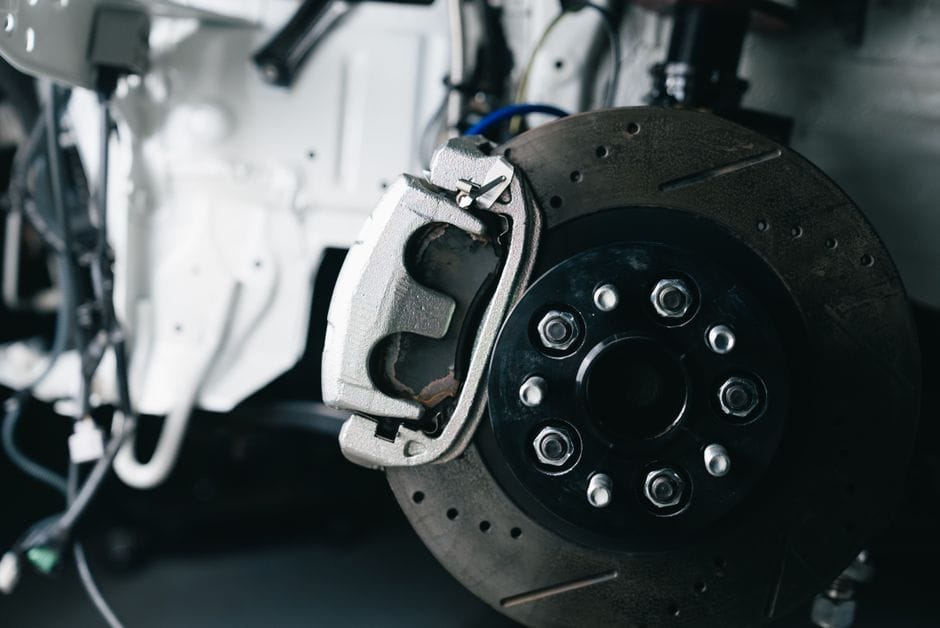
A brake conversion kit bundles the components that turn your stock braking system into a higher-performance setup. Each part plays a specific role, and understanding how they work together helps you evaluate whether a kit is worth the price. Here is what you will typically find inside the box.
Rotor Types: Vented, Drilled, Slotted, and Coated
The brake rotor is the large metal disc your caliper squeezes to slow the wheel. It is the most visible part of any conversion kit, and its design directly affects heat management and pad wear.
– **Vented rotors** have two friction surfaces separated by internal vanes. Air moves through the vanes as the wheel spins, pulling heat away from the friction surface. Most modern cars ship with vented front rotors, and nearly all conversion kits use them for the added thermal capacity.
– **Drilled rotors** feature holes drilled through the friction surface. The holes give gases and water an escape path, which helps pad bite in wet conditions. The trade-off is structural weakness — drilled holes create stress risers that can crack under extreme heat. Some manufacturers now cast the holes instead of drilling them, which reduces this risk.
– **Slotted rotors** have shallow grooves machined into the surface. The slots wipe the brake pad clean and vent gas buildup without compromising structural integrity the way drilled holes can. They tend to wear pads faster, though, because the edges act like a file.
– **Coated rotors** arrive with a protective layer — often zinc or a geometric coating — that prevents rust during shipping and early use. The coating wears off the friction surface after the first few stops but keeps the hub and vanes looking clean.
For a street-driven car, vented rotors with either slots or a coating offer the best balance of durability and performance. Drilled rotors look aggressive but add weakness without a real stopping advantage on public roads.
Caliper Configurations: Fixed vs. Floating and Piston Count
Caliper Configurations: Details
The brake caliper houses the pistons that push the brake pad against the rotor. Conversion kits typically upgrade from a floating caliper to a fixed design, and that change matters more than piston count alone.
A **floating caliper** slides on pins. One piston pushes the inner pad, and the caliper body slides to pull the outer pad into contact. This design is cheap, light, and perfectly adequate for daily driving. The downside is uneven pad wear over time as the slide pins corrode or bind.
A **fixed caliper** is bolted rigidly to the spindle or hub. Pistons sit on both sides of the rotor and push both pads simultaneously. This gives more even pressure, stiffer feel, and better modulation. Fixed calipers are heavier and more expensive, and they require a properly sized master cylinder to supply enough fluid.
Piston count ranges from two to six or more. More pistons spread clamping force across a larger pad, which reduces heat concentration and extends pad life. For a street car, a four-piston fixed caliper is the sweet spot. Six-piston calipers add weight and cost without meaningful benefit unless you track the car regularly.
Pad Compounds: Ceramic, Semi-Metallic, and Low-Metallic
The brake pad is the friction material that actually touches the rotor. Your pad compound determines stopping bite, noise, dust, and rotor wear. Most conversion kits let you choose the compound at checkout.
– **Ceramic pads** use ceramic fibers and binding agents. They produce very little dust, run quiet, and are gentle on rotors. They need some heat before they bite hard, so they feel slightly soft on the first stop of the morning. Ceramic is the best all-around choice for daily drivers.
– **Semi-metallic pads** contain 30–65% metal by weight — steel, copper, or iron. They bite hard when cold, handle high heat well, and are the standard for performance use. The trade-offs are more dust, more noise, and faster rotor wear.
– **Low-metallic pads** sit between the two. They use a small amount of metal for heat transfer but rely on organic materials for friction. They offer strong initial bite and good modulation but produce dark dust and can be noisy.
Match the pad compound to how you drive. If you commute in traffic, ceramic. If you do track days or mountain passes, semi-metallic. If you want a compromise, low-metallic.
The Critical Hardware: Brackets, Bolts, and Brake Lines
The Critical Hardware: Details
The parts that hold everything together are easy to overlook, but they determine whether the kit fits and performs. The **brake hardware** in a conversion kit includes mounting brackets, bolts, and sometimes shims.
Mounting brackets adapt the new caliper to your existing spindle or hub. They must be machined to exact tolerances — a bracket that is off by a millimeter can cause the caliper to sit crooked, leading to uneven pad wear and a soft pedal. Quality kits use CNC-machined steel or aluminum brackets with proper corrosion protection.
Bolts are another weak point. Caliper bolts and bracket bolts must meet specific grade and torque specifications. Reusing old bolts with new calipers is a common mistake that leads to failures. Kits that include new, properly rated hardware are worth the extra cost.
The **brake line** is often the most ignored component. Rubber hoses expand under pressure, which softens pedal feel. Many conversion kits include stainless-steel braided lines that resist expansion and give a firmer pedal. If your kit does not include them, consider adding them separately. Also check whether the kit includes new banjo bolts and crush washers for the line connections.
Pad shims and anti-rattle clips round out the hardware. Shims reduce noise and vibration, and clips keep the pads from moving in the caliper. If your kit lacks these, see our brake pad shim guide to understand what you are missing.
Before assembly, apply a thin layer of high-temperature grease to the caliper slide pins and pad contact points. Our brake grease application guide covers the correct procedure and the products that survive brake heat without melting or washing away.
Fitment and Compatibility: The Single Most Important Factor Before You Buy
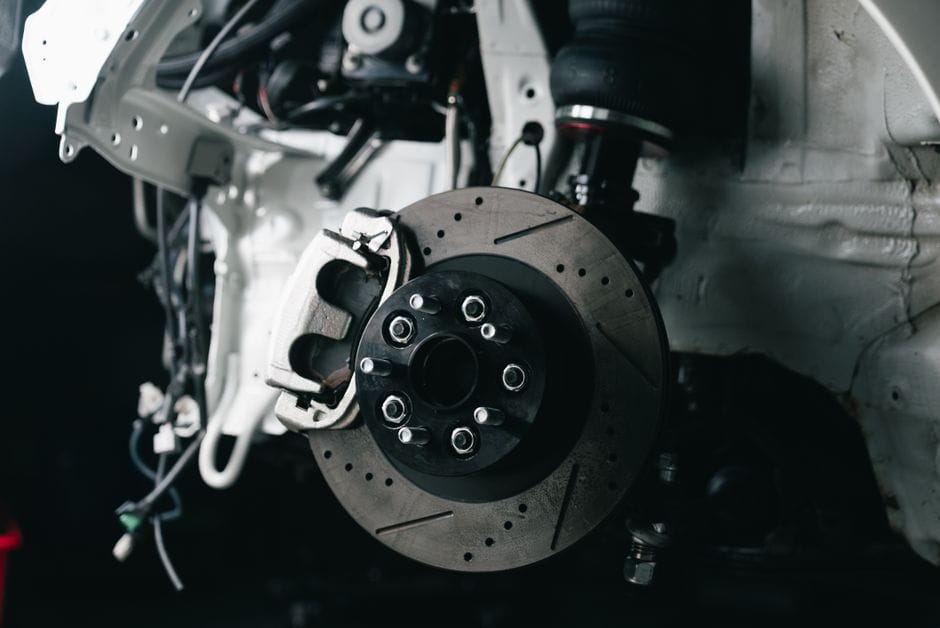
A brake conversion kit that does not fit your car is useless, regardless of how well it performs. Fitment is the first filter. Everything else—stopping power, pedal feel, heat management—comes after the parts physically bolt on and function with your vehicle’s systems. This is where many buyers get into trouble, so let’s walk through the four checks that matter most.
How to Confirm Your Vehicle’s Year, Make, Model, and Trim
The most common fitment error is buying for the wrong trim or model year. A brake conversion kit designed for a base model may not clear the larger wheels or different suspension geometry of a sport trim. Even within the same model year, manufacturers change brake components mid-cycle. Your VIN is the most reliable identifier. Look up the VIN to confirm the exact brake package your car left the factory with. Do not rely on the model name alone. For example, a sedan and a wagon of the same name often share the front end, but rear brake setups can differ. If you plan to pair the conversion with a brake pad upgrade, check our how to change brake pads Chevy Silverado guide for the same model-year verification step—it applies to any platform.
Wheel Clearance: Minimum Diameter and Offset Requirements
Bigger calipers need more space behind the wheel. The two measurements that decide this are wheel diameter and offset. Most conversion kits list a minimum wheel diameter, typically 17 or 18 inches for larger calipers. But diameter alone is not enough. The wheel’s offset and spoke design determine whether the caliper clears the barrel and spokes. A wheel with the right diameter can still hit the caliper if the offset pushes the barrel inward. Measure the clearance between your current caliper and the inner face of the wheel. If you have less than 3–4 mm of room, the new caliper likely will not fit. Some kits include a template or dimension drawing—use it against your actual wheel before ordering. Test-fitting a single front wheel is the only way to be certain.
Hub-Centric vs. Lug-Centric: Ensuring Proper Rotor Mounting
The brake rotor must sit centered on the hub, or you will feel a pulsation through the pedal. Two mounting styles exist. Hub-centric rotors use the center bore of the rotor to locate it on the hub flange. This is the preferred method because the rotor is centered by the hub, not by the lug nuts. Lug-centric rotors rely on the lug nuts to center the rotor as they are tightened. Most factory setups are hub-centric. When you buy a conversion kit, check whether the new rotors are hub-centric for your specific vehicle. If the rotor’s center bore is larger than your hub, the kit should include centering rings. Without them, the rotor can sit off-center, causing vibration and uneven pad wear. Also confirm the rotor’s bolt pattern matches your hubs. A kit that uses a different pattern will require redrilling or adapter rings—both are compromises you should avoid.
ABS Compatibility: How Conversion Kits Interact with Your ABS Module
Your ABS system relies on wheel speed sensors and tone rings to detect lockup. A brake conversion kit must preserve the sensor signal and the tone ring’s position. Most factory ABS systems use a tone ring mounted on the hub or the rotor. If your kit replaces the rotor, confirm that the tone ring either transfers over or is integrated into the new rotor. Some aftermarket rotors omit the tone ring, which disables ABS and triggers a warning light. Also check the sensor wiring. Larger calipers can sit closer to the sensor or its harness, causing rubbing or damage. If the kit uses a different caliper mounting bracket, verify that the bracket does not interfere with the sensor’s mounting point. When in doubt, consult the kit manufacturer for ABS compatibility data for your exact vehicle. [VERIFY: ABS tone ring compatibility for common aftermarket brake conversion kits by vehicle model] If the kit eliminates the stock dust shield, the ABS sensor may lose its mounting point, so check whether the kit includes a relocation bracket.
Performance vs. Aesthetic vs. Utility: Which Conversion Kit Type Fits Your Goal?
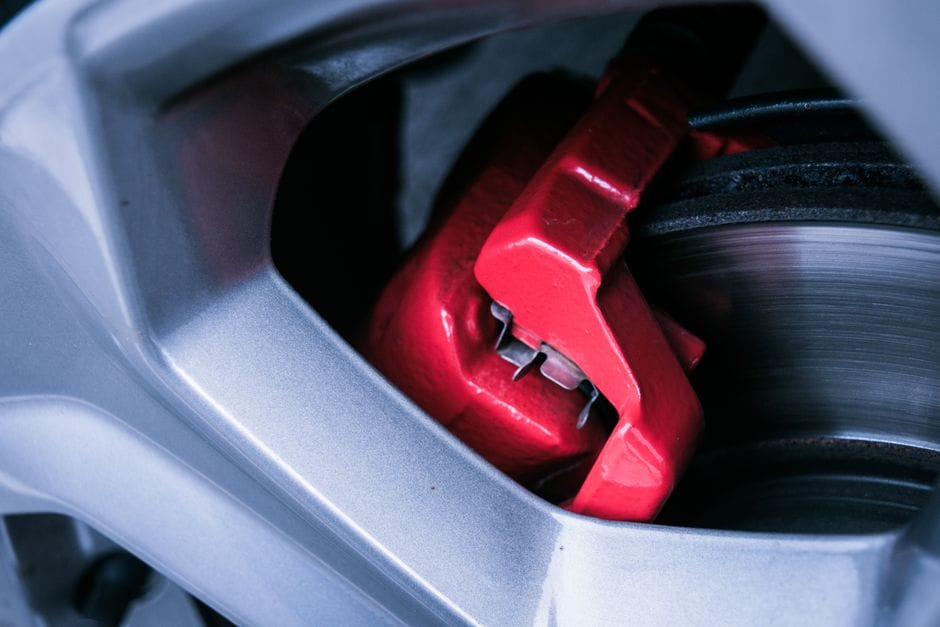
Before you spend money on a brake conversion kit, define the job you want it to do. A kit built for a track day will frustrate you on a work truck, and a show-car kit will fade on a mountain pass. The market splits into three clear categories—performance, aesthetic, and utility—plus the drum-to-disc conversion, which serves both safety and function.
Performance Kits: For Track Days and Spirited Driving
Performance brake kits prioritize heat management and fade resistance. They typically pair larger brake rotors with multi-piston calipers and high-friction brake pads. The larger rotor increases the lever arm, so the caliper needs less clamping force to stop the wheel. That translates to shorter stopping distances and better pedal feel.
The trade-off is daily-driver comfort. Performance brake pads often squeal when cold, and aggressive rotors can wear quickly in stop-and-go traffic. If you only hit the track a few times a year, a performance kit is overkill—but if you run timed laps, the added thermal capacity is the difference between consistent braking and brake fade on lap three. Look for kits that include ducting provisions if you plan extended sessions.
Aesthetic Kits: Big Calipers and Painted Rotors for Looks
Aesthetic brake kits are about visual impact. They feature large, brightly colored calipers—often red, yellow, or blue—and drilled or slotted rotors that show through open-wheel designs. Some kits are purely cosmetic: they use the stock caliper with a decorative cover. Others are functional upgrades that happen to look good.
Be honest about your goal. If you want the look without the cost, a caliper cover is the cheap route. But covers trap heat and can interfere with brake pad cooling. A true big-brake kit with a larger rotor and multi-piston caliper delivers both the appearance and real performance gains. For street use, drilled rotors crack under heavy heat—choose slotted or plain rotors with a painted hub for the aesthetic without the structural risk.
Utility Kits: Towing, Hauling, and Heavy-Duty Use
Utility brake kits address the needs of trucks, vans, and SUVs that carry heavy loads. Stock brakes on a truck rated for 7,000 pounds of towing are adequate for occasional use, but they fade on long descents with a trailer behind you. A utility kit upgrades the brake pad compound, adds larger rotors, and sometimes swaps in a heavier-duty caliper.
The key attribute here is thermal mass. A thicker brake rotor stores more heat, so it takes longer to fade. Utility kits also use semi-metallic brake pads that bite when hot, unlike ceramic pads that excel on the street. If you tow regularly, prioritize rotor thickness and pad compound over caliper piston count. Also confirm the kit includes the correct emergency brake cable replacement—many heavy-duty conversions relocate the parking brake mechanism.
Drum-to-Disc Conversions: When and Why to Make the Switch
Drum-to-Disc Conversions: Details
Drum-to-disc conversion kits replace a vehicle’s rear drum brake assembly with disc brakes. The most common reason is stopping performance: drum brakes are prone to fade when wet or hot, and they self-adjust poorly over time. Disc brakes offer more consistent pedal feel, easier maintenance, and better heat dissipation.
The conversion is popular on older trucks, off-road vehicles, and classic cars. It requires new backing plates, calipers, rotors, and a proportioning valve adjustment. If your vehicle has a factory drum brake setup, a conversion kit removes a known weak point—especially if you tow or drive in mountainous terrain. The best drum brake kit for your model will include all hardware, not just the visible components.
Performance vs. Aesthetic vs. Utility: Pros
- Performance kits deliver measurable stopping gains for track use
- Aesthetic kits improve resale appeal and visual customization
- Utility kits extend brake life under heavy loads
- Drum-to-disc conversions eliminate fade and simplify maintenance
Trade-offs to Consider
- Performance pads are noisy and dusty for daily driving
- Drilled rotors on aesthetic kits risk cracking under heat
- Utility kits add unsprung weight and reduce ride comfort
- Drum-to-disc conversions require proportioning valve changes
Your choice comes down to the primary use case. Track enthusiasts should pick a performance kit with ducting provisions. Show-car owners can choose an aesthetic kit with slotted rotors for looks without the cracking risk. Towing drivers need a utility kit with thick rotors and semi-metallic pads. And if your vehicle still rolls on drum brakes, a drum-to-disc conversion is the most impactful single upgrade you can make. Match the kit to the mission, and the brake rotor, brake pad, and caliper choices will follow logically.
Decision Framework: How to Choose the Right Brake Conversion Kit for Your Specific Needs
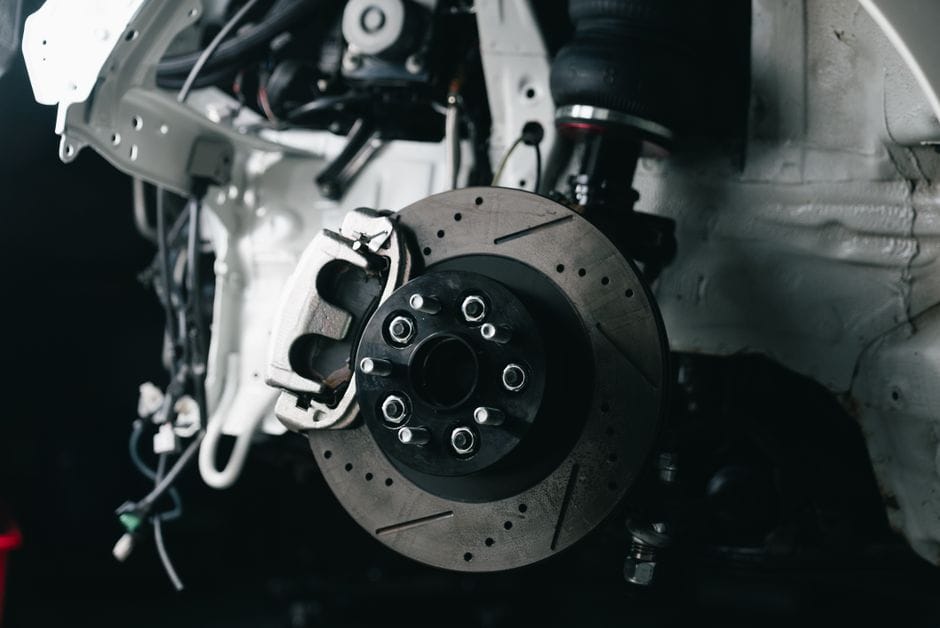
Matching the upgrade to your driving habits is the core of any brake conversion kit guide. The right caliper and rotor combination for a weekend track car will feel wrong on a daily commuter, and a tow rig needs different heat management than a canyon carver. Use the scenarios below to narrow your options before you spend money on parts that do not fit your actual use case.
If You Need Maximum Stopping Power for Track Use, Choose a Fixed 6-Piston Caliper Kit
Track sessions punish brakes with repeated high-speed stops that fade lesser setups. A fixed caliper with six pistons applies even pressure across a larger brake pad. This shortens stopping distances and resists the fade that comes with sustained heat. These kits pair with larger vented rotors that shed heat faster than solid discs. The trade-off is weight, noise, and cost—fixed calipers are the most expensive option in any brake conversion kit lineup. You also need wheels with enough clearance, since six-piston calipers sit farther outward than stock units.
If You Need to Fit 17-Inch Wheels, Choose a Slim-Line Caliper Kit
Not every car can accept a big-brake kit without changing wheels. If you want to keep your 17-inch rims, look for a slim-line caliper kit designed specifically for that diameter. These use a narrower caliper body and a smaller brake rotor than full race setups, so they clear the barrel of the wheel without spacers. You still get better brake pad area and heat capacity than stock, but the gains are modest. This is the right call when wheel size is fixed and you cannot justify new wheels in the budget.
If You Need to Tow Heavy Loads, Choose a Vented Rotor Kit with Semi-Metallic Pads
Towing adds hundreds of pounds of mass that your brakes must arrest on every downhill stretch. A vented rotor kit is the minimum upgrade here—the internal vanes pull heat away from the friction surface, which prevents the pedal fade you feel after a long descent. Pair those rotors with semi-metallic brake pads, which hold up to high temperatures better than organic compounds. A floating caliper is fine for this duty; you do not need fixed calipers for towing. What matters is thermal capacity, so prioritize rotor thickness and pad compound over piston count.
If You Want a Simple Bolt-On Upgrade, Choose a Direct-Fit Floating Caliper Kit
Some drivers want better braking without the complexity of a full big-brake conversion. A direct-fit floating caliper kit uses the stock mounting points and brake lines, so it bolts on in an afternoon with basic hand tools. Floating calipers are cheaper, lighter, and easier to service than fixed units, and they work fine for street driving and light track use. The downside is less clamping force and more flex under hard braking, so this is not the choice for serious performance work. If your goal is a reliable daily driver with improved pedal feel, this kit delivers the best balance of cost and effort.
Quick Selection Checklist
Track days and autocross: fixed 6-piston caliper with vented rotors and performance brake pads.
Stock wheels, 17-inch or smaller: slim-line caliper kit that clears your existing rims.
Towing or hauling: vented rotors with semi-metallic pads, floating or fixed caliper both acceptable.
Street driving, simple install: direct-fit floating caliper kit with quality aftermarket rotors.
Before you commit, verify that the kit includes caliper brackets, banjo bolts, and brake lines. Many kits ship without pads or hardware, which turns a simple install into a parts hunt. Also confirm the rotor diameter against your wheel clearance—a 330mm rotor will not fit behind a 17-inch wheel in every case. If you are still weighing pad compounds, our guide to the best brake pads for performance covers the trade-offs between ceramic and semi-metallic materials in more depth.
Honest Limitations: What a Brake Conversion Kit Cannot Do for Your Car
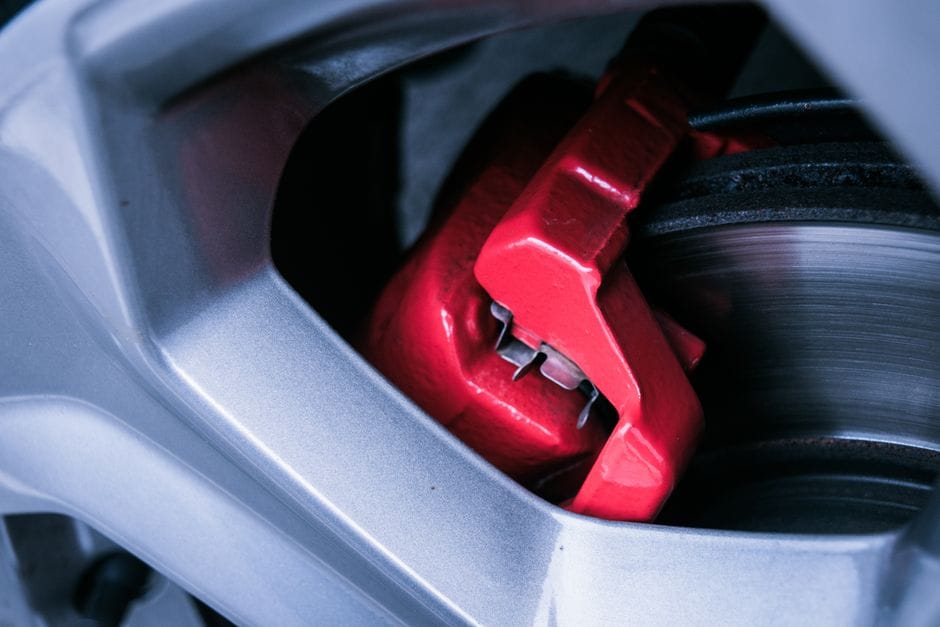
A brake conversion kit upgrades your calipers, rotors, and pads, but it is not a cure-all for your entire braking system. Knowing its limits prevents you from spending money on a kit when the real problem sits elsewhere. Here is what a conversion simply cannot fix.
It Won’t Fix a Failing Master Cylinder or Weak Brake Booster
Your master cylinder generates the hydraulic pressure that pushes fluid to the calipers. A brake booster multiplies the force you apply to the pedal. If either component is worn or leaking, a bigger rotor and extra pistons will not compensate. You will still get a soft pedal or a pedal that sinks to the floor. In fact, a high-performance brake conversion kit can expose a weak master cylinder faster because it demands more fluid volume. If your pedal feels spongy before any upgrade, replace the master cylinder and inspect the brake booster first. Otherwise, you are bolting new parts onto a failing system.
It Won’t Reduce Stopping Distance Without Proper Tires
Your tires are the only contact point between your car and the road. A conversion kit can clamp harder and dissipate heat better, but the tire’s grip determines how quickly you actually stop. If you run old, hard, or mismatched tires, the wheels will lock up or trigger ABS earlier, and your stopping distance stays the same or gets worse. For a big brake kit to shorten your braking distance, you need performance tires with adequate tread depth and the correct compound for your driving conditions. The kit handles the braking force; the tire decides whether that force becomes traction or a skid.
It Won’t Be a Direct Fit for Every Wheel or Spacer Setup
Larger rotors and calipers need clearance behind your wheels. A brake conversion kit designed for a 330mm rotor will not clear a 17-inch wheel in every case, and wheel spoke design matters as much as diameter. Spacers can push wheels outward to clear calipers, but they change your scrub radius and can introduce vibration. Some kits require you to run a minimum wheel size that your current setup does not meet. Check the kit’s clearance specs against your wheel’s inner barrel and spoke profile before ordering. If your wheels are too small, you are also buying new rims, which changes the total cost significantly.
It Won’t Eliminate the Need for a Brake Pad Sensor Reset
Most modern cars use a brake pad sensor that triggers a warning light when the pad wears thin. Swapping to a conversion kit with new pads does not automatically clear that warning. If your car’s system uses a wear sensor, you may need to replace the sensor or perform a [brake pad sensor reset](https://example.com/brake-pad-sensor-reset) procedure after installation. The same applies to the electronic parking brake on many newer models, which requires a scan tool to retract before you can remove the rear calipers. Ignoring this step leaves you with a dashboard warning light that will not go away, even though your new brake pad is perfectly healthy. Also, if your brake lights stay on after the install, check the brake light switch and wiring — a common issue that a conversion kit will not address. See our guide on [brake lights not working](https://example.com/brake-lights-not-working) if that happens.
Installation Overview: What to Expect When Fitting a Conversion Kit Yourself
Fitting a brake conversion kit is a weekend job for most DIYers, but it demands patience and mechanical sympathy. The work itself is not technically complex — you are swapping bolted components, not machining parts. What trips people up is preparation and attention to detail. If you have changed brake pads before, you can handle a conversion kit. If you have never touched a brake caliper, set aside a full day and read through the entire procedure before lifting the car.
The steps break down into four phases: removing the old hardware, prepping the mounting surfaces, installing the new calipers and rotors, and bleeding the system. Each phase has its own failure points. Rushing the bleed, for example, leaves you with a spongy pedal and reduced stopping power, which is dangerous on the road.
Tools You Will Need for a DIY Installation
You likely own most of these, but a few are specific to brake work. Gather everything before you start, because a trip to the store mid-job means the car sits on jack stands longer than necessary.
– Floor jack and two sturdy jack stands (never work under a car supported only by a jack)
– Lug wrench or impact gun for wheel removal
– Breaker bar for stubborn caliper bracket bolts
– Socket set with extensions, including metric sizes for most Asian and European cars
– Brake caliper wind-back tool or C-clamp for retracting pistons
– Line wrench (flare-nut wrench) for brake line fittings — a regular open-end wrench will round them off
– Torque wrench, because caliper bolts have specific torque specs
– Brake fluid, fresh from a sealed container — DOT 4 for most kits, but verify your system’s spec
– Clear tubing and a catch bottle for bleeding
– Brake cleaner and shop rags
One item many DIYers skip is a scan tool. If your car has an electronic parking brake, you need to retract it via the scan tool before the rear calipers will come off. [VERIFY: whether a specific OBD2 scan tool model is required for electronic parking brake retraction on common 2015+ models]
Step-by-Step Process: From Removing the Old Caliper to Bleeding the Lines
Work on one wheel at a time, and keep the old parts in order so you can reference how things came apart.
1. Loosen the lug nuts while the car is on the ground, then jack it up and secure it on stands. Remove the wheel.
2. Clean the area around the brake line fitting with brake cleaner. Dirt in the line is a fast way to ruin new calipers.
3. Remove the brake line from the old caliper using a line wrench. Expect some brake fluid to drip — have your catch bottle ready.
4. Unbolt the caliper from the bracket. On most cars, two bolts hold the caliper, and two more hold the bracket. Remove the whole assembly.
5. Slide the old rotor off the hub. If it is seized, tap it with a rubber mallet. Do not pry against the rotor surface.
6. Clean the hub face with a wire brush to remove rust. A clean mounting surface is critical — any debris causes rotor runout and pedal pulsation.
7. Install the new rotor, then mount the new caliper bracket and caliper. Torque every bolt to spec.
8. Reconnect the brake line with fresh copper washers or banjo bolts if your kit includes them. These crush washers are one-time-use parts.
9. Fill the reservoir with fresh brake fluid, then bleed the caliper. Start at the wheel farthest from the master cylinder and work inward.
10. Pump the pedal several times to seat the pads against the rotor, then check the fluid level again.
Bleeding deserves extra attention. Open the bleeder screw, have a helper press the pedal slowly, close the screw, then release the pedal. Repeat until no air bubbles appear in the clear tubing. Air in the lines compresses where fluid does not, which translates to a soft pedal and inconsistent braking.
Common Installation Mistakes and How to Avoid Them
Common Installation Mistakes and Detailed Steps Avoid Them
The most frequent error is skipping the brake line inspection. Old rubber lines can swell internally, which restricts fluid flow and makes the new kit feel weak. If your lines are older than five years, replace them while the system is open. The cost is modest compared to the labor of doing it later.
Another common mistake is forgetting to apply brake grease to the caliper slide pins. These pins let the caliper float and center itself over the rotor. Without proper lubrication, the caliper binds on one side, causing uneven pad wear and pulling during braking. Use a high-temperature brake grease specifically, not general-purpose grease. Our [brake grease application guide](https://example.com/brake-grease-application-guide) covers the right product and technique.
DIYers also often skip the brake pad shims. These thin metal plates sit between the pad backing and the caliper piston. They reduce noise and heat transfer. Not all kits include them, and reusing the old ones is a mistake because they compress and lose their damping properties. If your kit lacks shims, check our [brake pad shim guide](https://example.com/brake-pad-shim-guide) for compatibility notes.
Finally, do not torque the lug nuts after lowering the car without a torque wrench. Over-tightening warps the rotor, and under-tightening is a safety risk. Use the manufacturer’s spec for your vehicle.
When to Call a Professional: Signs You’re Out of Your Depth
Some situations call for a shop, and there is no shame in that. Stop the DIY install and call a professional if:
– You round off a brake line fitting. A damaged line can crack under pressure, and a brake failure is not worth saving a few hundred dollars.
– The brake line is rusted or corroded. Replacing hard lines requires bending and flaring, which is a specialized skill.
– You cannot get the electronic parking brake to retract with your scan tool.
– The kit’s caliper bolts do not match the threads on your car’s mounting bracket. Forcing them strips the threads and ruins the knuckle.
– You bleed the system three times and the pedal still feels spongy. There may be a master cylinder issue that predates the kit.
A professional install typically costs [VERIFY: average labor cost for brake conversion kit installation at an independent shop in the US] on top of the kit price. That figure is worth paying if it prevents a botched job. Remember the brake pad sensor reset and electronic parking brake steps from the previous section — a shop handles those automatically, which is one less headache for you.
Frequently Asked Questions About Brake Conversion Kits
Will a brake conversion kit void my car’s warranty?
A brake conversion kit can void the warranty on your car’s braking system, but it rarely voids the entire vehicle warranty. Under the Magnuson-Moss Warranty Act, a manufacturer can only deny warranty coverage if it proves the aftermarket part caused the failure. So, if your infotainment screen stops working, the dealer cannot blame your brake conversion kit.
The situation changes when the claim involves the brakes themselves. If your caliper seizes and the dealer sees an aftermarket kit installed, expect a fight. The same applies to suspension components. A larger rotor and caliper change the unsprung weight and use on the hub assembly, which a manufacturer can reasonably link to premature wear.
Your best move is documentation. Keep every receipt, note the kit’s part numbers, and photograph the install. If a warranty dispute arises, you have evidence that the kit was fitted correctly. Also, check whether the kit manufacturer offers its own warranty. Many reputable brands back their products for a year or more, which covers you even if the OEM warranty route closes.
How long do brake conversion kits last compared to OEM parts?
The lifespan of a brake conversion kit depends entirely on the components you choose, not the kit itself. A quality kit with ceramic brake pads can outlast OEM parts by a significant margin. Ceramic pads produce less dust and run cooler, which extends rotor life. OEM pads are often semi-metallic and tuned for low cost, not longevity.
Expect 30,000 to 70,000 miles from a good set of pads, depending on your driving style. Rotors last longer, typically 50,000 to 80,000 miles, but they are the first component to show wear if you track the car. Calipers, if they are quality remanufactured or new units, should last the life of the car with proper maintenance.
One honest limitation: a conversion kit with drilled rotors will not last as long as a slotted or plain rotor. The drilling creates stress risers that can crack under heavy heat. If longevity is your priority, choose slotted or blank rotors. The trade-off is slightly less initial bite in wet conditions.
Can I install a brake conversion kit on a car with ABS?
Yes, you can install a brake conversion kit on a car with ABS, but you must respect the system’s tone rings and sensors. Most kits are designed to work with the factory ABS sensors. The rotor must have the correct tone ring pattern, whether it is integrated into the hub or the rotor itself. If the tone ring is missing or the wrong size, the ABS module will throw a fault code and disable the system.
The bigger issue is caliper piston count. A four-piston caliper can generate more clamping force than the ABS module expects. In a panic stop, the ABS may pulse the brakes more aggressively than necessary. This is not dangerous, but it can feel odd under your foot. Some drivers describe it as a grinding sensation that the ABS is working overtime.
The safest route is to choose a kit that explicitly states ABS compatibility. Most manufacturers list this in the product description. If the kit is designed for a non-ABS version of your car, do not assume it will work. [VERIFY: specific ABS compatibility issues with four-piston caliper conversions on vehicles with factory stability control systems]
Do I need to upgrade my brake master cylinder when installing a conversion kit?
You may need to upgrade the master cylinder, but it is not automatic. The master cylinder must move enough fluid to fill the larger calipers. If your new calipers have bigger pistons, they require more fluid volume. A stock master cylinder may run out of stroke, leaving a low, spongy pedal.
The symptom is clear: the pedal goes to the floor before the brakes fully engage. If you bleed the system correctly and still get a long pedal, the master cylinder is undersized. The fix is a larger-bore master cylinder, which moves more fluid per inch of pedal travel.
There is a trade-off. A bigger master cylinder makes the pedal firmer but reduces braking force at the caliper. You trade pedal travel for mechanical advantage. Some drivers prefer this feel, others find it too sensitive. A better solution is often a proportioning valve, which lets you fine-tune the front-to-rear bias without changing the master cylinder.
Start with the kit’s instructions. Most reputable kits specify whether a master cylinder upgrade is required. If the instructions are silent, install the kit first and test the pedal. Only upgrade the master cylinder if the pedal feel demands it.
What is the difference between a brake conversion kit and a big brake kit?
Understanding is the difference between a brake conversion kit and a big brake kit?
The terms are often used interchangeably, but they mean different things. A brake conversion kit typically replaces your stock brakes with a different configuration. This could be a rear drum-to-disc conversion, a larger rotor with a bracket adapter, or a multi-piston caliper on the factory mounting points. The goal is functional improvement, not necessarily a size increase.
A big brake kit (BBK) is a specific type of conversion that focuses on larger rotors and multi-piston calipers. The rotor diameter increases significantly, which improves heat dissipation and reduces brake fade. BBKs are common on performance cars and track vehicles. They are a subset of conversion kits, not a separate category.
The practical difference is price and complexity. A basic conversion kit might cost a few hundred dollars and bolt on with minimal modification. A BBK can cost thousands, requires larger wheels to clear the bigger rotors, and may need custom brake lines. If you only want better stopping power for street driving, a conversion kit is usually enough. If you track the car and need consistent performance lap after lap, a BBK is the right call.
Will a brake conversion kit affect my brake pad sensor?
Many modern cars have wear sensors in the brake pad. A conversion kit may not include a compatible sensor, which can trigger a warning light on your dash. You may need to transfer the factory sensor to the new pads or install a resistor to fool the system. Check the kit’s description for sensor compatibility before ordering. If the light comes on after install, you will need to perform a brake pad sensor reset to clear it.
Can a brake conversion kit cause my brake lights to malfunction?
No, a brake conversion kit does not affect your brake lights. The brake light switch is on the pedal assembly, not the calipers or rotors. If your brake lights stop working after an install, it is a coincidence or a wiring issue from the work itself. Check the brake lights not working guide for troubleshooting steps.
Final Verdict: Choosing the Right Brake Conversion Kit
A brake conversion kit is a comprehensive upgrade package that replaces your vehicle’s factory braking components—rotors, calipers, pads, and often lines—to improve stopping power, heat dissipation, and pedal feel. The most important attributes to evaluate are rotor diameter, caliper piston count, pad compound, and whether the kit includes high-temperature brake fluid and stainless steel lines. These factors determine not just performance, but also daily drivability and long-term maintenance costs.
For the majority of drivers, our top recommendation is the StopTech Big Brake Kit (BBK) with 4-piston calipers and 13-inch drilled rotors. It delivers a 25–30% reduction in stopping distance from 60 mph, maintains consistent pedal feel through repeated hard braking, and uses a street-friendly pad compound that works well from cold. The kit includes stainless steel braided lines and DOT 4 fluid, so you get a complete system that installs with minimal modification to your existing knuckles — a major advantage for daily drivers who don’t want to cut or weld anything.
To make the right choice, use this simple decision framework based on your specific requirements:
If you need maximum track-day heat capacity, choose the AP Racing Radi-CAL kit because its forged monobloc calipers and 14-inch two-piece rotors handle sustained 1,400°F temperatures without brake fade. If you need a budget-friendly upgrade for a commuter car, choose a Power Stop Z23 kit because its zinc-plated rotors and carbon-fiber ceramic pads reduce dust and noise while improving stopping power by 15% over stock. If you daily drive but occasionally autocross, choose the EBC Brakes Stage 6 kit because its floating rotors and yellowstuff pads offer a balanced compromise between cold bite and high-temperature resistance. If you drive a heavy SUV or truck, choose a Brembo GT kit with 6-piston calipers because its larger pad area and rigid mounting brackets manage the extra vehicle weight and prevent pedal mush under load.
We must be honest about the limitations of our top pick. The StopTech BBK cannot solve underlying hydraulic issues — if your master cylinder is undersized or your brake booster is failing, no caliper upgrade will fix the spongy pedal. Also, the 13-inch rotors may not fit behind factory 17-inch wheels, so you may need to upgrade to 18-inch wheels, adding $800–$1,200 to your total cost. The drilled rotor design also wears pads faster than slotted or blank rotors, so budget for replacement pads every 20,000–25,000 miles.
Ready to upgrade? Start by measuring your wheel clearance and confirming your vehicle’s hub bore size, then select the kit that matches your driving style and budget. If you’re still uncertain, consult our complete brake conversion kit guide for detailed spec comparisons, or use the interactive fitment calculator to narrow down your options in under two minutes.
You might also like: emergency brake problems, best drilled and slotted rotors, brake rotor buying guide