You pressed the brake pedal. The car pulled hard to the left. Smoke poured from the right front wheel.
That smell means your caliper piston is stuck. You need a brake caliper replacement before you ruin the rotor and warp the hub. I have done hundreds of these jobs in 15 years. This guide gives you every tool, torque spec, and safety step to do it right the first time.
How Do You Know If a Brake Caliper Is Bad?
A stuck caliper piston causes uneven braking, pulling, and rapid pad wear. The brake pedal may feel soft or the vehicle may drag after you release the pedal.
Heat builds fast inside a seized caliper. The pad stays clamped against the rotor. You will smell burning friction material. Fuel economy drops because the engine fights constant drag.
Common Mistake:Many DIYers blame warped rotors for steering shake. A dragging caliper overheats the rotor and creates the exact same symptom. Always check caliper slide action before you order new rotors.
Key Signs of Caliper Failure:
-
Vehicle pulls left or right during braking
-
One wheel gets hotter than the others after a short drive
-
Brake pad wears out twice as fast on one side
-
Brake fluid leaks near the inner pad or bleeder screw
-
Squealing or grinding that only happens on one corner
Insider Tip: After any 10-minute drive, touch each wheel center with the back of your hand. A stuck caliper makes its wheel hub scalding hot. Do this check before you lift the car. It tells you exactly which corner failed.
Rebuild vs Replace: Which Saves More Money?
Rebuilding a caliper costs $20 to $40 in seals and boots. Replacing it costs $60 to $300 per caliper depending on the vehicle.
A rebuild only works if the piston bore is flawless. Rust pits, corrosion rings, or scoring mean the seal will never seat. You will leak fluid within a week. Most modern single-piston floating calipers are cheaper to replace than to rebuild properly.
Insider Tip: Remanufactured calipers from major brands are bench-tested and painted. They often include new guide pins and boots. That saves you $15 in extra parts. I use reman units on 90 percent of customer cars.
What Tools Do You Need for Brake Caliper Replacement?
You need standard hand tools plus a few brake-specific items. Missing one tool turns a one-hour job into a three-hour frustration.
Required Tools:
-
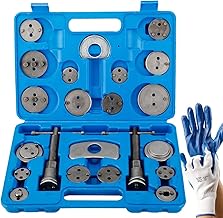
3/8-inch drive ratchet with metric socket set (10 mm, 12 mm, 14 mm, 17 mm, 19 mm)
-
Torque wrench (1/4-inch or 3/8-inch drive, 20–100 ft-lb range)
-
C-clamp or disc brake piston compressor tool
-
Brake bleeder wrench (8 mm or 10 mm hex)
-
Bungee cords or mechanic’s wire
-
Brake clean and shop rags
-
Drain pan for brake fluid
-
DOT 3 or DOT 4 brake fluid (check cap label)
Optional but Smart:
-
Impact driver for rusted bracket bolts
-
Brake pad spreader for dual-piston calipers
-
Vacuum brake bleeder or one-person bleeder bottle
Insider Tip: Buy a caliper bracket bolt kit if your car is over 10 years old. Those bolts seize into the steering knuckle. The original threads often strip during removal. New bolts with fresh threadlocker prevent comebacks.
What Torque Specs Matter for Caliper Installation?
Every bolt on a brake system carries a specific torque. Guessing causes noise, leaks, or catastrophic failure.
Critical Torque Specifications:
-
Caliper slide pin bolts: 25–35 ft-lb (check service manual)
-
Caliper bracket bolts: 65–85 ft-lb (front), 45–65 ft-lb (rear)
-
Banjo bolt (fluid line): 18–25 ft-lb with new copper washers
-
Bleeder screw: 8–12 ft-lb (snug, then quarter turn)
Insider Tip: Write torque specs on masking tape. Stick the tape to the inner fender before you remove anything. You will not hunt for a phone in greasy gloves later.
How Do You Safely Remove a Stuck Brake Caliper?
Rust and road grime lock caliper bracket bolts to the steering knuckle. Brute force snaps bolts or strips threads.
Step-by-Step Removal:
Step 1 — Secure and Access Chock the wheels. Loosen lug nuts two turns while the tire is on the ground. Raise the vehicle with a jack. Support it on a jack stand rated for your vehicle weight. Remove the wheel.
Step 2 — Inspect the Damage Check the rotor surface. Look at pad thickness on both inner and outer pads. Note which side wore faster. Spray everything with brake clean before you touch a bolt.
Step 3 — Compress the Piston Place the old inner pad against the piston. Use a C-clamp or piston compressor to push the piston back into the bore. This releases pressure on the caliper so it slides off the rotor. Open the bleeder screw slightly while compressing. Old fluid squirts out instead of pushing back to the master cylinder.
Step 4 — Disconnect the Line Remove the banjo bolt from the brake hose. Use new copper crush washers on reassembly. Cap the hose immediately with a rubber plug or your finger over the end. Brake fluid destroys paint in seconds.
Step 5 — Remove the Caliper Unbolt the caliper slide pins or the caliper mounting bolts (12 mm to 14 mm typical). Lift the caliper body off the bracket. Hang it with a bungee cord from the spring or control arm. Never let a caliper dangle by the brake hose. The hose inner liner tears and causes a delayed failure.
Step 6 — Remove the Bracket Unbolt the caliper bracket bolts (17 mm to 19 mm typical). These require the most torque. Use a breaker bar if needed. Remove the bracket and old pads.
Insider Tip: If a bracket bolt will not budge, soak it in penetrating oil for 20 minutes. Then hit the bolt head sharply with a hammer once. The impact shock breaks the rust bond. I have freed bolts this way that would not move with a 3-foot breaker bar.
How Do You Install a New Brake Caliper Correctly?
Installation is the reverse of removal. But small details separate a safe brake job from a dangerous one.
Step-by-Step Installation:
Step 1 — Prep the Bracket Clean the bracket pad slides with a wire brush. Apply a thin coat of synthetic brake lubricant to the slide surfaces. Do not get grease on the friction material. Grease-soaked pads glaze and lose stopping power.
Step 2 — Mount the Bracket Install the bracket with new bolts if required. Torque to 65–85 ft-lb for front brackets, 45–65 ft-lb for rear. Use a torque wrench. Do not guess.
Step 3 — Install the Pads Place the new pads in the bracket. The inner pad usually has a wear sensor clip. Make sure the clip faces the correct direction.
Step 4 — Mount the New Caliper Remove the shipping plugs from the new caliper. Install the new slide pins with fresh rubber boots if included. Slide the caliper over the pads and rotor. Torque the slide pin bolts to 25–35 ft-lb.
Step 5 — Connect the Brake Line Install the brake hose with new copper crush washers on both sides of the banjo fitting. Torque the banjo bolt to 18–25 ft-lb. Do not overtighten. The banjo bolt is hollow and strips easily.
Step 6 — Bleed the Brake System Fill the reservoir with fresh DOT 3 or DOT 4 fluid. Have a helper pump the pedal three times and hold it down. Open the bleeder screw (8 mm or 10 mm). Fluid and air escape. Close the screw before the helper releases the pedal. Repeat until the fluid runs clear with no bubbles.
Step 7 — Bed the Pads Drive the vehicle to 35 mph. Brake firmly to 10 mph. Do not come to a complete stop. Repeat five times. This transfers an even layer of pad material onto the rotor surface. Skipping this step causes vibration and poor initial performance.
Insider Tip: After the first test drive, recheck every bolt torque. Heat cycles loosen fasteners. I have seen caliper bracket bolts back out 50 miles after installation because the tech skipped the recheck.
How Long Does Brake Caliper Replacement Take?
A single front caliper takes 1 to 1.5 hours for a trained technician. A rear caliper with an integrated parking brake adds 30 to 45 minutes.
Rear calipers with electronic parking brakes require a scan tool to retract the motor. You cannot compress these pistons with a C-clamp. The motor gearbox strips if you force it. Budget extra time for tool rental or dealer software access.
Time Estimates by Configuration:
-
Front floating caliper: 1.0–1.5 hours
-
Rear floating caliper (cable parking brake): 1.5–2.0 hours
-
Rear caliper (electronic parking brake): 2.0–3.0 hours
-
Both sides front or rear: Add 30 minutes for the second side after the first
Insider Tip: Do both calipers on the same axle even if only one failed. Brake balance matters. A new caliper clamps harder than a 100,000-mile unit on the opposite side. You will pull slightly under hard braking. The extra $60 in parts saves you from chasing a pull symptom later.
What Are the Signs of a Sticky Caliper You Should Not Ignore?
A sticky caliper does not fail all at once. It gives you warning signs for weeks. Ignoring them costs you rotors, pads, and sometimes wheel bearings.
Progressive Failure Timeline:
-
Week 1: Slight pull under braking. Pad wear begins to favor one side.
-
Week 2–3: Steering wheel vibration after highway driving. One wheel smells hot.
-
Week 4+: Visible smoke at stops. Rotor turns blue from overheating. Brake fluid may boil and cause pedal fade.
Insider Tip: Pull the rubber boots off the slide pins. If the grease inside looks like black mud, clean the pins with a wire wheel. Pack them with high-temp synthetic brake grease. New boots cost $4. This $4 repair fixes 40 percent of “bad calipers” I diagnose.
FAQ
Can I replace just one brake caliper?
You can, but you should not. Brake systems need balanced clamping force. A new caliper moves freely. An old caliper has worn seals and slight bore corrosion. The new side clamps harder. The car pulls under hard braking. Always replace calipers in axle pairs. The cost difference is small. The safety gain is large.
Do I need to replace brake pads when I replace the caliper?
Yes. Old pads have wear patterns matched to the old caliper bracket and rotor. New pads seat flat against a new or resurfaced rotor. Mixing old pads with a new caliper causes noise and uneven wear. Pads are $20 to $50 per axle set. Skipping them to save money creates a comeback job.
Why is my brake pedal soft after caliper replacement?
Air entered the system during the hose disconnect. You did not bleed the caliper thoroughly. A soft pedal means air compresses instead of fluid transferring force. Re-bleed the system starting with the caliper farthest from the master cylinder. Use a vacuum bleeder if you cannot get a helper. The pedal should feel firm with 1 inch of travel or less.
Can I drive with a stuck caliper?
No. A stuck caliper creates constant drag. The pad and rotor overheat. In extreme cases, the rotor glows red and cracks. Brake fluid boils. You lose braking entirely. A dragging caliper also overheats wheel bearings and axle seals. Fix it immediately. Do not drive to work and hope it gets better.
Conclusion
A brake caliper replacement is not a mystery. It is a methodical process with clear torque specs and safety steps. You need the right tools, fresh fluid, and patience during the bleed process. Skip any step and you risk noise, pull, or complete brake failure.
Start with the basics. Check slide pins before you buy a caliper. Compress the piston with the bleeder open. Torque every bolt to spec. Bed the pads before you hit the highway. Do both sides on the same axle. These habits separate a safe repair from a roadside breakdown.
Your brakes are the only thing between you and the car ahead. Do this job once. Do it right. Then enjoy the confidence of a firm pedal and straight stops every time you press it.
You might also like: Sticky Brake Caliper Symptoms: Diagnosis Guide, Electronic Brake Force Distribution (EBD): Explained, ABS Sensor Cleaning: Remove Metal Shavings
Related: ABS Module Repair vs Replacement: Which to Choose
Related: Traction Control vs Stability Control: Differences
Related: Brake Caliper Rebuild vs Replace: Which Is Better?
Related: Brake Line Replacement Guide: Steel & Rubber Lines
Related: Brake Squeal When Stopping: Causes & Solutions
Related: ABS vs Non-ABS Braking: Safety Comparison
Related: Wheel Bearing vs Brake Rotor Noise: How to Tell the Difference
Related: Brake Booster Replacement: Power Brake Service Guide
Related: Brake Proportioning Valve
Related: Brake Line Flaring Tool: How to Make Brake Lines
Related: Brake Caliper Piston Seal Kit: Rebuild Procedure
Related: Best Brake Caliper Grease: High-Temp Lubricant Guide
Related: Brake Bleeding Methods: Gravity, Pressure, Vacuum — Which One Actually Works?
Related: How to Check Brake Fluid Level: Quick Guide
Related: Low Brake Fluid Symptoms: Warning Signs
Related: Brake Fluid Moisture Contamination: Problems & Fix
Related: Gravity Brake Bleeding: Easiest DIY Method
Related: Pressure Bleeder for Brake Flush: How to Use
Related: Vacuum Brake Bleeding Tool: Worth Buying?
Related: Brake Bleeding Sequence: Correct Order by Vehicle (RR LR RF LF Explained)
Related: Brake Master Cylinder Replacement: DIY Guide
Related: Brake Master Cylinder Failure Symptoms: Warning Signs
Related: Brake Master Cylinder Leak: Internal vs External
Related: How to Compress a Brake Caliper: The Ultimate Piston Tool Guide
Related: Brake Caliper Slide Pin Maintenance: Lubrication Guide
Related: Rear Brake Caliper Piston Tool: Which Type Do You Actually Need?
Related: Brake Line Fitting Types: Metric vs SAE Flares
Related: Squeaking Brakes: Causes and How to Fix
Related: Grinding Brakes: Is It Safe to Drive?
Related: Brake Grinding Noise: Metal-on-Metal Sound Fix
Related: New Brake Pads Squeaking: Break-In or Problem?
Related: Soft Brake Pedal After Bleeding: Common Mistakes
Related: Air in Brake Lines: Symptoms and Removal
Related: Brake Pedal Goes to Floor: Emergency Diagnosis
Related: Pulsating Brake Pedal: Vibration When Braking
Related: Brake Pedal Vibration at High Speed: Is It a Warped Rotor or Something Worse?
Related: Brake Light On But Brakes Work Fine: Why?
Related: Rear Brakes Locking Up: Common Causes
Related: Brakes Grinding When Not Applied: Is It the Backing Plate or Something Worse?
Related: Brake Backing Plate Bent: Scraping Noise Fix
Related: Brake Smell After Driving: Burning Odor Causes
Related: Overheating Brakes: Causes and Prevention
Related: Brake Fade: Loss of Braking Power Explained
Related: Brake Rotor Damage from Grinding: Can It Be Fixed?
Related: Brake Caliper Won’t Compress: Stuck Piston Fix
Related: One Brake Pad Wearing Faster: Uneven Wear Causes
Related: Brake Noise After Tire Rotation: Why It Happens
Related: Loose Brake Caliper Bolts: Dangerous Rattle
Related: Brake Pad Anti-Rattle Clips: Installation & Purpose
Related: Brake Booster Failure Symptoms: Hard Pedal & More
Related: ABS System Problems: Common Issues & Diagnosis
Related: Brake Booster Vacuum Leak: Hissing Sound Diagnosis
Related: ABS Wheel Speed Sensor Replacement: DIY Guide
Related: ABS Pump Motor Failure: 5 Warning Signs Your Brakes Are Screaming for Help
Related: ABS on Ice and Snow: Does It Help or Hurt?
Related: Brake Assist System: Emergency Braking Technology
Related: ABS Sensor Reluctor Ring Damage: Tooth Missing — Complete Repair Guide
Related: Brake Dust Shield Rubbing on Rotor: Quick Fix
Related: Brake Noise Over Bumps: Clunking & Rattling
Related: Brakes Locking Up: Causes and Solutions
Related: ABS module problems
Related: oil change Acura MDX
Related: oil change Honda Accord
Related: Brake Fluid Level Sensor Faulty: False Warning
Related: Brake Fade on Mountain Roads: Prevention Tips
Related: Brakes Smoking After Driving: Overheating Issue
Related: oil change Subaru Outback
Related: Traction Control System: How It Works (And Why Your Car Feels Like It’s Fighting You)
Related: Can You Disable ABS for Off-Road? Safety, Risks, and How
Related: How ABS Works: Anti-Lock Braking Explained
Related: transmission pan gasket replacement
Related: ABS Light On: Causes and Reset Procedure
Related: Brake Fluid Color Chart: What Each Color Means
Related: Brake Fluid Leak Diagnosis: How to Find the Source Like a Pro
Related: ABS Brake Brake Bleeding Procedure: Special Steps Needed
Related: Stainless Steel Brake Lines: Worth the Upgrade?
Related: Anti-Squeal Brake Shims: Do They Really Stop Brake Noise?
Related: Brake Warning Light On Dashboard: What It Means
Related: Front Brakes Locking Up — Here’s What’s Really Going On
Related: Should You Disable Traction Control When Stuck?
Related: Traction Control Light On: Causes & Diagnosis