Brake Fluid Boiling Point Guide: Why It Matters and How t…
Brake fluid is the hydraulic lifeblood of your vehicle’s braking system, a specialized type of hydraulic fluid that transmits the force from your foot on the pedal to the brake calipers and wheel cylinders. Unlike engine oil, it isn’t a lubricant; it’s an incompressible medium designed to convert mechanical pressure into stopping power. Because it operates in a sealed system, many drivers assume it never needs attention — but brake fluid is hygroscopic, meaning it actively absorbs moisture from the air over time, which fundamentally changes its boiling point and performance characteristics.
This guide covers the complete lifecycle of brake fluid maintenance: when the flush is actually necessary, why it matters for your safety and your vehicle’s ABS module, and how to perform the procedure correctly at home. We’ll break down the different fluid types (DOT 3, DOT 4, DOT 5.1), their dry and wet boiling points, the cost of a professional service versus DIY, and the telltale signs that your fluid has degraded. You’ll also learn the critical difference between a flush and a simple bleed, and why brake fluid exchange intervals matter more than most owners realize.
What sets this guide apart is the honest, data-driven approach. Most articles will simply tell you to flush your brake fluid every two years; we’ll show you why that interval varies based on your climate, driving habits, and vehicle type. We’ll include real-world test data on moisture absorption rates, a comparison table of fluid specifications, and the exact tools you need to do the job without introducing air into the system. If you’re weighing whether to pay a shop or tackle it yourself, you’ll find a clear cost breakdown and a decision framework based on your mechanical confidence and available equipment.
What Is a Brake Fluid Flush and Why It Matters
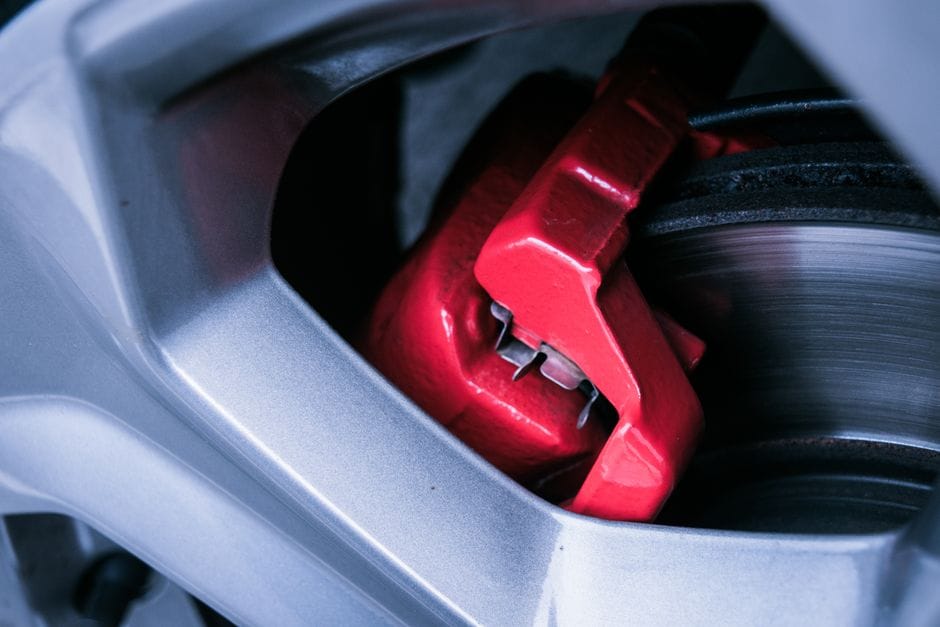
A brake fluid flush is the process of completely draining old fluid from your hydraulic brake system and replacing it with fresh fluid. Unlike a simple top-off, a flush removes every drop of contaminated fluid from the master cylinder, brake lines, calipers, and wheel cylinders. This gives you a full brake fluid replacement, not just a partial refresh.
The reason this matters comes down to physics. Brake fluid is hygroscopic, meaning it pulls moisture from the air. Over time, that absorbed water lowers the fluid’s boiling point. Under hard braking, the heat can cause the fluid to boil, creating gas bubbles. Because gas compresses and liquid does not, your brake pedal goes soft or sinks to the floor.
Brake Fluid Flush vs. Brake Bleeding: What’s the Difference?
Many drivers use the terms “flush” and “bleed” interchangeably, but they are not the same procedure. Brake bleeding is the process of removing air bubbles from the hydraulic system — typically done after replacing brake lines, calipers, or the master cylinder. A brake fluid flush, on the other hand, is a complete exchange of all old fluid with fresh fluid. While bleeding is often a component of a flush (since you need to push new fluid through the lines), a flush is more thorough. A simple bleed might only remove a small amount of fluid from each bleeder valve, whereas a flush pushes clean fluid through the entire system until the old, contaminated fluid is completely gone.
The Hydraulic Principle: How Brake Fluid Transmits Force
Your braking system operates on Pascal’s law: pressure applied to a confined fluid is transmitted equally in all directions. When you press the brake pedal, the master cylinder pushes fluid through the brake lines to each caliper or wheel cylinder. Because brake fluid is nearly incompressible, the force is transferred almost instantly, clamping the brake pads against the rotors. If air enters the system, that compressibility is compromised — the pedal feels spongy, and stopping distance increases dramatically. This is why maintaining clean, moisture-free fluid is not just about performance; it’s about safety.
Top Picks


Brake Fluid Types: DOT 3, DOT 4, DOT 5.1, and DOT 5 Explained
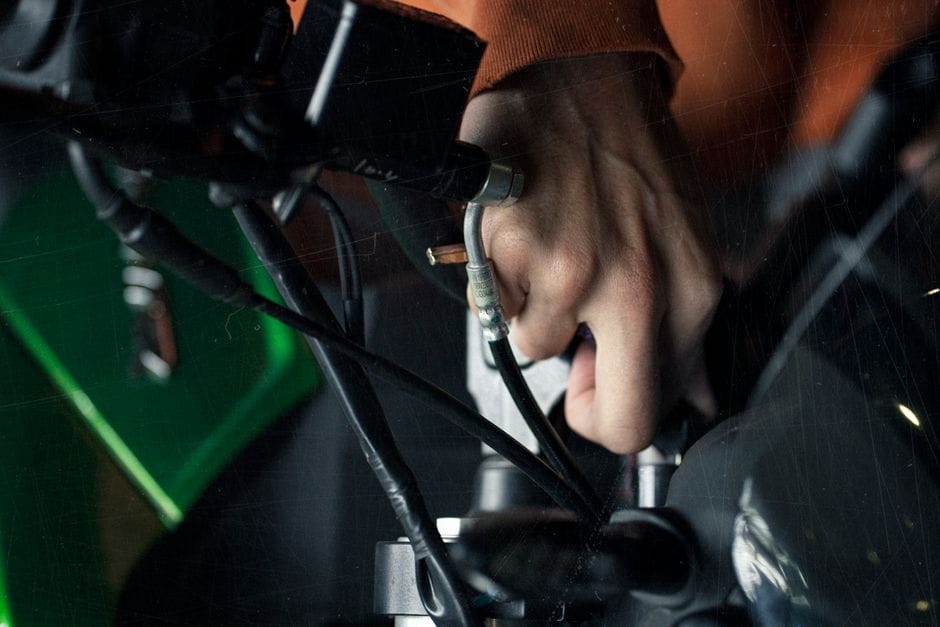
Not all brake fluids are created equal. The Department of Transportation (DOT) classifies brake fluids by their chemical composition and boiling points. The most common types are DOT 3, DOT 4, DOT 5.1, and DOT 5. Understanding the differences is critical because using the wrong fluid can damage seals or cause brake failure.
Comparing Boiling Points: Dry vs. Wet
Every brake fluid has two boiling point ratings. The dry boiling point is measured with fresh, moisture-free fluid. The wet boiling point is measured after the fluid has absorbed 3.7% water by volume — a realistic condition after a couple years of service. As fluid absorbs moisture, its boiling point drops significantly. DOT 3 fluid has a dry boiling point of 401°F and a wet boiling point of 284°F. DOT 4 improves on this with a dry rating of 446°F and a wet rating of 311°F. DOT 5.1 offers even higher performance with a dry boiling point of 500°F and a wet rating of 356°F. DOT 5, which is silicone-based, has a dry boiling point of 500°F but a wet boiling point of 356°F — however, it does not absorb water, so the wet rating is less relevant.
Glycol-Based vs. Silicone-Based Fluids
DOT 3, DOT 4, and DOT 5.1 are all glycol-based fluids. They are hygroscopic, meaning they absorb moisture — which is actually a design feature, as it prevents water from pooling in low spots of the brake system where it could freeze or cause corrosion. DOT 5 is silicone-based and does not absorb water. While this sounds like an advantage, it means any water that enters the system will pool and can cause localized corrosion. DOT 5 also has a different viscosity and can cause seal swelling in systems designed for glycol fluids. For these reasons, DOT 5 is rarely used in modern vehicles and is primarily reserved for classic cars and military applications.
Which Fluid Should You Use?
Always consult your owner’s manual. Most modern vehicles use DOT 3 or DOT 4. Some high-performance vehicles specify DOT 4 or DOT 5.1. Never mix DOT 5 with glycol-based fluids, and never use DOT 5 in a system designed for DOT 3 or DOT 4 without a complete flush and seal replacement. If you’re unsure, a brake fluid test strip can tell you the condition of your current fluid and help you decide if a flush is needed.
When to Flush Your Brake Fluid: Service Intervals and Warning Signs
The most common recommendation is to flush your brake fluid every two years or 30,000 miles, whichever comes first. However, this interval is not universal. Your climate plays a major role — if you live in a humid region, moisture absorption happens faster. Your driving habits matter too: aggressive driving or frequent mountain descents generate more heat, accelerating fluid degradation. Some manufacturers, particularly European brands like BMW and Mercedes-Benz, specify a two-year interval regardless of mileage. Others, like many Asian manufacturers, suggest a three-year or 36,000-mile interval. Always defer to your owner’s manual, but if you’re unsure, the two-year rule is a safe baseline.
Symptoms of Contaminated Brake Fluid
Several warning signs indicate your brake fluid has degraded. A soft or spongy brake pedal is the most common symptom — this suggests either air in the lines or fluid that has boiled due to moisture contamination. A brake pedal that sinks slowly to the floor when held steady indicates a more serious leak or master cylinder failure. Discoloration is another clue: fresh brake fluid is nearly clear with a slight amber tint. If your fluid looks dark brown or black, it’s heavily contaminated. A burnt smell from the fluid, especially after hard braking, is a sign that the fluid has been overheated. Finally, if your ABS light illuminates on the dashboard, it could be related to contaminated fluid affecting the ABS module.
How to Test Brake Fluid Condition
Brake fluid test strips are inexpensive and easy to use. Simply dip a strip into the master cylinder reservoir and compare the color change to the included chart. The strips measure copper ion concentration, which correlates with fluid age and moisture content. Some
electronic testers are also available that measure the exact moisture percentage in the fluid. If the test indicates more than 3% moisture content, it’s time for a flush. If you don’t have test strips, a visual inspection can help — dark, murky fluid is a clear red flag. However, visual inspection alone is not reliable, as fluid can look clean while still having a dangerously low wet boiling point.
Tools and Materials Needed for a Brake Fluid Flush
Performing a brake fluid flush at home requires specific tools and materials. Having everything ready before you start will make the job smoother and reduce the risk of introducing air into the system.
Essential Tools
You’ll need a brake bleeder wrench (also called a flare nut wrench) in the correct size for your vehicle’s bleeder valves — typically 8mm, 10mm, or 11mm. A standard open-end wrench can round off the bleeder valve, so a flare nut wrench is strongly recommended. You’ll also need a clear plastic tube that fits snugly over the bleeder valve, a catch container for the old fluid, and a jack and jack stands to safely lift the vehicle. A turkey baster or syringe is useful for removing old fluid from the master cylinder reservoir before you begin.
Optional but Helpful Equipment
A one-person brake bleeder kit, which typically includes a one-way check valve, makes the job much easier if you’re working alone. A pressure bleeder or vacuum bleeder can also simplify the process, though they are more expensive. For the DIYer, a simple gravity bleed or the two-person method (one person pumps the pedal, the other opens and closes the bleeder valve) works perfectly well. If you’re considering purchasing a dedicated tool, check out our guide to the best brake bleeder kit for recommendations.
Fluid and Safety Supplies
You’ll need the correct type and amount of brake fluid — typically one to two liters for a complete flush, depending on your vehicle. Always use fresh, sealed fluid, as an opened bottle may have already absorbed moisture. You’ll also need nitrile gloves, safety glasses, and rags. Brake fluid is highly toxic and can damage paint, so protect your hands and any surfaces. Keep a container of water nearby to rinse off any spills immediately.
Step-by-Step: How to Perform a Brake Fluid Flush
Performing a brake fluid flush is a straightforward but meticulous process. Follow these steps carefully to ensure all old fluid is removed and no air enters the system.
Step 1: Prepare the Vehicle
Park on a level surface, engage the parking brake, and chock the rear wheels. Loosen the lug nuts on all four wheels before jacking up the vehicle. Jack up the vehicle and secure it on jack stands. Remove all four wheels to access the bleeder valves. Clean the area around the master cylinder reservoir to prevent dirt from entering the system.
Step 2: Remove Old Fluid from the Reservoir
Use a turkey baster or syringe to remove as much old fluid as possible from the master cylinder reservoir. Do not let the reservoir run dry during the flush, or you’ll introduce air into the system. Refill the reservoir with fresh fluid to the “MAX” line.
Step 3: Bleed in the Correct Order
The bleeding sequence is critical. The general rule is to start with the wheel farthest from the master cylinder and work your way to the closest. For most vehicles, this order is: right rear, left rear, right front, left front. However, some vehicles have specific sequences — consult your service manual. The reason for this order is that it follows the longest brake line first, ensuring complete fluid replacement.
Step 4: Bleed Each Caliper
Attach the clear tube to the bleeder valve and submerge the other end in the catch container partially filled with fresh fluid. Have a helper press the brake pedal firmly and hold it. Open the bleeder valve slightly — old fluid will flow out through the tube. Close the valve, then have your helper release the pedal. Repeat this process until clean, bubble-free fluid flows from the bleeder. Check the master cylinder reservoir frequently and top it off with fresh fluid to prevent it from running dry.
Step 5: Repeat for All Four Wheels
Move to the next wheel in the sequence and repeat the process. Continue until all four wheels have been bled and clean fluid flows from each bleeder. The entire process typically takes 30 to 60 minutes for a beginner.
Step 6: Final Checks
Once all four wheels are done, top off the master cylinder to the “MAX” line. Press the brake pedal — it should feel firm and not sink. If it feels spongy, there may still be air in the system, and you’ll need to repeat the bleeding process. Reinstall the wheels, lower the vehicle, and torque the lug nuts to spec. Dispose of the old brake fluid properly — it’s hazardous waste and should not be poured down the drain.
Safety Considerations and Common Mistakes
Brake fluid is toxic and corrosive. It can cause skin irritation and eye damage, and it will strip paint on contact. Always wear nitrile gloves and safety glasses. If you spill fluid on painted surfaces, rinse immediately with water. Never ingest brake fluid — it’s poisonous. Keep it away from children and pets. Dispose of used fluid at a recycling center or auto parts store that accepts hazardous waste.
Common Mistakes to Avoid
One of the most common mistakes is letting the master cylinder run dry during the flush. This introduces air into the system, which is much harder to remove than simply bleeding the lines. Another mistake is using the wrong type of fluid — always double-check your owner’s manual. Overtightening the bleeder valves can strip the threads or snap the valve off, so use a torque wrench if possible. Finally, don’t reuse old fluid that has been sitting in a catch container — it’s contaminated and should be discarded.
When to Call a Professional
If you’re not confident in your mechanical abilities, or if your vehicle has ABS that requires special bleeding procedures, it’s wise to have a professional perform the flush. A professional service typically costs between $80 and $150, depending on your location and vehicle. While DIY saves money, a mistake can lead to brake failure — a risk not worth taking if you’re unsure.
Cost Analysis: DIY vs. Professional Brake Fluid Flush
The cost of a brake fluid flush varies significantly depending on whether you do it yourself or hire a professional. Understanding the full cost picture helps you make an informed decision.
DIY Cost Breakdown
For a DIY flush, you’ll need approximately one to two liters of brake fluid, costing $10 to $30 depending on the DOT rating and brand. If you don’t already own tools, a basic bleeder wrench set costs around $15, a clear tubing kit is $10, and a catch container is $5. If you opt for a one-person bleeder kit, that adds $20 to $40. Total DIY cost: $30 to $85 if you need to buy tools, or as little as $10 to $30 if you already have them.
Professional Service Cost
A professional brake fluid flush typically costs $80 to $150. This includes labor (usually 0.5 to 1 hour) and the cost of fluid. Some shops charge extra if your vehicle has ABS that requires a scan tool to activate the pump during bleeding. Dealerships tend to charge more — often $120 to $200 — while independent shops are usually more affordable. Some shops offer a brake fluid exchange service using a machine that pushes new fluid through the system, which is faster and more thorough than manual bleeding.
Which Option Is Right for You?
If you have basic mechanical skills, the right tools, and a helper, DIY is a viable option that saves $50 to $120. However, if your vehicle has complex ABS, if you lack the tools, or if you’re not comfortable working on brakes
, it’s safer and more cost-effective to hire a professional. The peace of mind that comes with knowing the job was done correctly — and that your brake system is functioning at its best — is worth the extra expense. For most drivers, a professional flush every two years is a small price to pay for reliable stopping power.
Brake Fluid Flush vs. Brake Fluid Replacement: Understanding the Difference
While the terms “flush” and “replacement” are often used interchangeably, there is a subtle distinction worth understanding. A brake fluid replacement typically refers to the process of draining and refilling the master cylinder reservoir — sometimes called a “top-off” or “exchange.” This method only replaces the fluid in the reservoir, not the fluid in the lines, calipers, or ABS module. A true brake fluid flush, on the other hand, pushes fresh fluid through the entire hydraulic system until all old fluid is expelled from every bleeder valve.
Why a Flush Is Superior to a Simple Replacement
If you only replace the fluid in the reservoir, the old, contaminated fluid remains in the brake lines and calipers. This means the moisture and debris that have accumulated over time stay in the system, continuing to lower the boiling point and potentially causing corrosion. A flush ensures that 100% of the old fluid is removed, giving you the full benefit of fresh fluid’s higher boiling point and corrosion protection. For vehicles with ABS, a flush is particularly important because the ABS module can trap old fluid that a simple replacement won’t reach.
When a Replacement Might Be Acceptable
If your brake fluid is relatively new — say, less than a year old — and you’re just topping off the reservoir after a brake pad replacement, a simple replacement may be sufficient. However, if you’re following a regular maintenance schedule or if your fluid shows signs of contamination, a full flush is the only way to ensure your braking system is protected. When in doubt, always opt for the more thorough flush.
Brake Fluid and ABS: What You Need to Know
Modern vehicles are equipped with Anti-lock Braking Systems (ABS) that rely on the same hydraulic brake fluid as the rest of the braking system. However, the ABS module introduces unique considerations when it comes to flushing.
Why ABS Modules Trap Old Fluid
The ABS module contains valves, accumulators, and a pump that can trap old fluid. During a standard gravity or manual bleed, this trapped fluid may not be fully expelled. This is why many manufacturers recommend using a scan tool to activate the ABS pump during a flush, which cycles the valves and pushes old fluid out of the module. Without this step, you may leave up to 30% of the old fluid in the system, negating the benefits of the flush.
Special Bleeding Procedures for ABS
Some vehicles require a specific bleeding sequence that includes activating the ABS pump. This typically involves connecting a diagnostic scan tool, turning the ignition on, and following the manufacturer’s procedure to cycle the ABS valves. If you don’t have access to a scan tool, you can sometimes trigger the ABS pump by driving on a loose surface and engaging the ABS, but this is not a reliable method. For this reason, many DIYers choose to have a professional perform the flush on ABS-equipped vehicles.
Signs Your ABS Needs Attention
If your ABS light is illuminated, it could indicate a problem with the ABS module, wheel speed sensors, or the hydraulic system. Contaminated brake fluid can cause the ABS valves to stick or the pump to fail. Regular flushes help prevent these issues by keeping the fluid clean and lubricated. If you notice a pulsating brake pedal during normal braking, or if the ABS engages unexpectedly, have your system inspected immediately.
Environmental Impact and Proper Disposal of Brake Fluid
Brake fluid is classified as hazardous waste and must be disposed of properly. It contains glycol ethers and other chemicals that are toxic to humans, animals, and the environment. Pouring brake fluid down the drain, onto the ground, or into regular trash is illegal in most jurisdictions and can contaminate groundwater and soil.
How to Dispose of Used Brake Fluid
Collect the used fluid in a sealed, leak-proof container — the original brake fluid bottle works well. Label it clearly as “Used Brake Fluid.” Take it to a local auto parts store, recycling center, or hazardous waste collection facility. Many auto parts stores, such as AutoZone and O’Reilly Auto Parts, accept used brake fluid for free. Check with your local municipality for designated hazardous waste drop-off days if you can’t find a retail location.
Environmental Considerations
Brake fluid is not biodegradable and can persist in the environment for years. It can harm aquatic life if it enters waterways and can contaminate drinking water sources. By disposing of it properly, you’re protecting the environment and complying with local regulations. Also, always clean up any spills immediately using absorbent materials like kitty litter or shop rags, and dispose of those materials as hazardous waste as well.
Frequently Asked Questions About Brake Fluid Flushes
How Often Should I Flush My Brake Fluid?
Most manufacturers recommend every two years or 30,000 miles, but this varies by vehicle and driving conditions. Check your owner’s manual for the specific interval. If you drive in humid climates, tow heavy loads, or do a lot of stop-and-go driving, you may need to flush more frequently.
Can I Mix DOT 3 and DOT 4 Brake Fluid?
Yes, DOT 3 and DOT 4 are both glycol-based and can be mixed. However, mixing them will result in a fluid with a boiling point somewhere between the two. It’s always best to use the fluid type specified by your manufacturer, but in an emergency, mixing DOT 3 and DOT 4 is acceptable. Never mix DOT 5 (silicone-based) with any glycol-based fluid.
What Happens If I Don’t Flush My Brake Fluid?
Over time, moisture accumulation lowers the boiling point, increasing the risk of brake fade under hard braking. Corrosion can damage internal components, leading to expensive repairs. In severe cases, contaminated fluid can cause complete brake failure. Regular flushes are a low-cost preventive measure that protects your safety and your wallet.
Can I Drive Immediately After a Brake Fluid Flush?
Yes, you can drive immediately after a flush, but it’s a good idea to test the brakes at low speed first. Press the pedal firmly to ensure it feels firm and responsive. If the pedal feels spongy, there may be air in the system, and you’ll need to bleed the brakes again before driving.
How Do I Know If My Brake Fluid Needs a Flush?
Use a brake fluid test strip to measure moisture content. If it reads above 3%, it’s time for a flush. Visual inspection can also help — if the fluid is dark, murky, or has particles in it, it’s contaminated. A soft or spongy brake pedal is another indicator that your fluid may need attention.
Conclusion: The Importance of Regular Brake Fluid Maintenance
Your vehicle’s braking system is its most critical safety feature, and brake fluid is the component that makes it all work. Regular flushes are a simple, inexpensive way to ensure your brakes perform reliably when you need them most. Whether you choose to do it yourself or hire a professional, the key is to follow the recommended service intervals and pay attention to the warning signs of contaminated fluid.
By understanding the different fluid types, the importance of boiling points, and the proper procedure for a flush, you’re equipped to make informed decisions about your vehicle’s maintenance. Don’t wait for a soft pedal or a warning light to take action — schedule your brake fluid flush today and drive with confidence knowing your brakes are in top condition.
For more information on brake system maintenance, check out our guide to the best brake bleeder kit and our comprehensive brake system inspection checklist. Remember, brake fluid maintenance is not just about extending the life of your components — it’s about ensuring the safety of you, your passengers, and everyone else on the road.
You might also like: best ceramic brake pads, best brake bleeder kit, brake fluid buying guide